
Many retouchers always use the same value for frequency separation and then wonder why the result sometimes looks clean and sometimes artificial. The solution is not a magic number, but adjusting the value to the area you are currently working on. That is exactly what this tutorial is about.
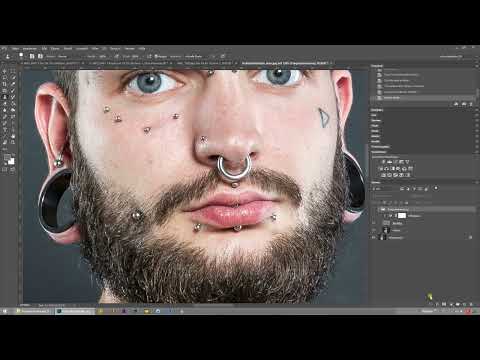
The video is only loaded from YouTube when you play it – data (including your IP address) is then transmitted to YouTube/Google. More in the privacy policy
You will learn why there is no fixed default value, how to treat fine skin pores with a small value, and how to tackle larger areas such as piercings with a second frequency separation. By the end, you will know how to use the action multiple times and with different values without overworking your image.
Key Takeaways
Key Takeaways
- The right value depends on the image and the goal. There is no universally valid value.
- Small values (e.g. 7 pixels) are suitable for fine structures such as skin pores.
- Larger values (e.g. 10 to 12 pixels) capture larger blemishes and impurities.
- You can set up frequency separation multiple times on different layers, each with its own value.
- Start with fine values and add further targeted corrections at the end.
Step-by-Step Guide
Step 1: Adjust the value to your goal
Before you start the action, think about what you want to retouch. What matters is not which value you choose, but whether it fits the situation. Consciously decide on a value that suits your task.

Step 2: Zoom in on the details
Zoom in close to the face so that you can clearly see the skin texture. At high magnification, you will see that the fine skin pores can be captured well with a small value. A low value is particularly suitable here because it only affects the small structures.

Step 3: Run the action with a small value
Play the frequency separation action and choose a value of 7 pixels. This value processes the fine details, i.e. the pores and small irregularities. The result ends up on the frequency separation layer, where you can then correct the skin blemishes.

Step 4: Create a second frequency separation for larger areas
If you also want to remove larger areas such as the piercings, you need a different approach. Create a new layer and drag it above the frequency separation folder. Then run the action again, but this time with a higher value, for example 10 or 12 pixels.

When confirming, note that at first glance nothing noticeable seems to happen. The image looks unchanged because the values are on their own structure layer. The actual effect only unfolds once you work specifically with the correction tool.

Step 5: Compare the layers
Show the layer with the higher value to see what it does. With a value of 12 pixels, you can specifically retouch away larger areas. On the layer with 7 pixels, on the other hand, only the small pores remain. So if you want to remove the piercings, you work on the layer with the higher value, because considerably larger blemishes are still left there.

The comparison clearly shows you how differently the layers work. The value 7 captures fine details, while the value 12 makes larger areas visible.

Step 6: Proceed step by step
The order of your work is crucial. Start with the fine values and work on the small details first. If, after editing, you find that you want to correct more, simply create another frequency separation with different values. This way you can improve exactly the spots that you still notice, without affecting areas that are already finished.

Set up the frequency separation again with new values if you want to continue at a specific spot.

This way, you target the areas you still want to edit.
Summary – Frequency Separation in Photoshop: Using Values Specifically for Each Area
Frequency separation is not a method with fixed numbers. With small values you work on fine skin pores, with larger values you remove piercings and other larger blemishes. You can apply the action multiple times, each on its own layer and with a suitable value. Start with the fine details and add further targeted corrections at the end. This way you keep control over the result and avoid unnatural transitions.
FAQ
Which value should I choose for frequency separation?There is no fixed default value; the value depends on the image and on what you want to retouch.
What is a small value like 7 pixels suitable for?A small value is suitable for fine structures such as skin pores and small unevenness.
When do I use a larger value like 12 pixels?You use a larger value when you want to remove larger blemishes or objects such as piercings.
Can I apply frequency separation multiple times?Yes, you can set up the action again on new layers with different values, even later in the editing process.
Why does the image look unchanged after the second frequency separation?The values are on a separate texture layer; the effect only becomes visible when you make targeted corrections with the tool.
What should I start with?Start with the fine values, work on the small details first, and then add larger corrections.


