
If you have already set up frequency separation for 8-bit images, you know the basic principle. For 16-bit files, however, the old action is not sufficient, because the calculation values change. In this tutorial, you will create your own action for 16-bit images step by step, which automatically builds the structure and color layers and saves you work.
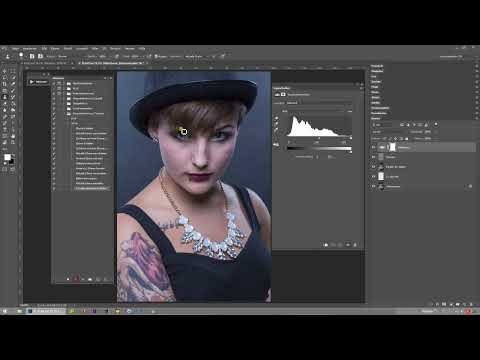
The video is only loaded from YouTube when you play it – data (including your IP address) is then transmitted to YouTube/Google. More in the privacy policy
Key Takeaways
- For 16-bit images you need a separate action, because the values for the image calculation and the levels adjustment differ from the 8-bit version.
- The action builds the layers in a fixed order: color layer, structure layer, image calculation with the Linear Light blend mode, helper layer with clipping mask, and then the grouping.
- With the Clone Stamp and the "Interpolate Brightness" filter, you achieve the actual separation of color and structure.
- Before each test, you delete the layers and then restart the action so that you can reliably check its function.
Step-by-Step Guide
Step 1: Preparation and Starting the Action
Open your image in 16-bit mode. Before you record the action, create a new layer and rename it. Then remove any layers you don't need and select the background layer so that the recording starts from a clean starting point. After that, create a new action in the Actions panel and name it "16 Bit". Clicking "Record" starts the recording, and all of the following steps are recorded.

Step 2: Creating the Color Layer
First, create a new layer with Shift+Ctrl+N and name it "Colors for Action". Move this layer all the way to the top with Shift+Ctrl+]. Then merge all visible layers into a new layer. To do this, press Shift+Ctrl+Alt+E. The result is a layer with all the image information, on which the later separation is built.

Step 3: Creating the Structure Layer
Now create another new layer and name it "Structures". On it, merge all layers again with Shift+Ctrl+Alt+E. Then move this layer down one level with Ctrl+[. This places the structure layer below the color layer, and you can address the two layers cleanly in the next steps.
Step 4: Blurring the Structure
Select the layer "Colors for Action" with Alt+Period. In the menu, under Filter, you will find the Noise filter section. There, choose the command "Interpolate Brightness" and set the desired value. Confirm with OK. This step is also saved in the action, so you don't have to repeat it for later images.

Step 5: Image Calculation with the 16-Bit Values
Select the structure layer with Alt+Comma and move it up one level again with Ctrl+]. Then open the Image Calculation via Image. For 16-bit images you have to set different values than for 8-bit. As the source, choose the currently open image, and as the layer, the color layer "Colors for Action". Set the blend mode to Add, the scale to 2, and the offset to 0. Also check the Invert box and confirm.

Step 6: Setting the Blend Mode to Linear Light
Do not change the blend mode in the Image Calculation window, but in the Layers panel. To do this, right-click the layer and open the Blending Options. There, set the blend mode to Linear Light. Confirm the setting with OK. This makes the calculation act as the separation layer between color and structure.

Step 7: The Helper Layer with Levels Adjustment
Create a Levels adjustment via Layer, New Adjustment Layer. Rename it "Helper Layer" and set it as a clipping mask on the structure layer. This way, the adjustment only affects that layer. Set the values to 110 for black, 1.00 for the midtones, and 150 for white. Then close the Properties window and temporarily hide the helper layer.

Step 8: Group the Layers
Select the top three layers. With Shift+Alt+Comma you extend the selection until all three are highlighted. Hold down the Alt key and click the folder icon at the bottom of the Layers panel. This creates a group right away. Name it "Frequenztrennung" and choose a different color for the group. This color will make it easier for you to find your way around the layer structure later.

Step 9: Add the Clone Stamp
Open the group and double-click the name of the layer "Farben für Aktion" to adjust it. Then select the texture layer, that is, the layer above it, with Alt+Period. Next, pick the Clone Stamp with the S key. If that doesn't work, for example because the Clone Stamp is already active, first press the B key and then switch to the Clone Stamp with S. The brush step that is created in the process is not needed for the action. You can therefore simply drag it to the trash in the Actions panel.

Step 10: Test the Action
To test it, delete all layers except the original image. In the Actions panel, select the action "16 Bit" and click Play. In the "Helligkeit interpolieren" dialog window, choose a suitable value and confirm with OK. At the end, the Clone Stamp should be active, the folder structure should be marked in orange, and the correct layer should be selected. If that is the case, your action works correctly.

Summary – Frequency Separation in Photoshop: Creating an Action for 16-Bit Images
With the action for 16-bit images, you set up frequency separation in just a few clicks. First you create the layers, set up the image calculation with adjusted values, and add an auxiliary layer with a clipping mask. Then you group everything, check the action with a test run, and thus have a template that you can reuse with every 16-bit image.
FAQ
Why do you need a separate action for 16-bit images?The values for image calculation and levels adjustment differ at 16 bit from those at 8 bit. The 8-bit action therefore does not deliver correct results with 16-bit files.
Why doesn't the S key work for the Clone Stamp?The Clone Stamp tool is probably already active. First press the B key to select the normal brush tip, and then switch to the Clone Stamp with S.
Do I have to adopt the levels adjustment values exactly?The values 110, 1.00 and 150 serve as a starting point in the tutorial. You can adjust them to your image, but you should keep the structure of the action.
How do I check whether the action is running correctly?Delete all layers except the original image, play the action, and at the end check whether the folder structure is marked in orange and the correct layer is active.


