
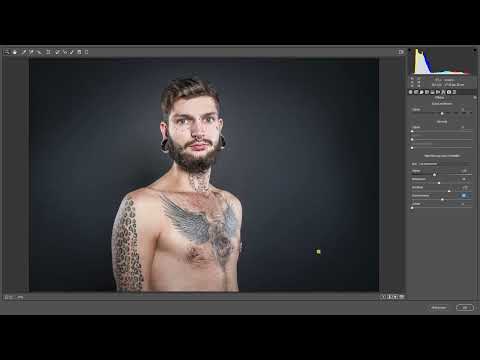
A good photo immediately shows the viewer where to look. Often, all it takes is a small nudge: a dark edge that pulls the eye toward the center, or a subtle brightening exactly where your subject is standing. This tutorial shows you exactly that final finishing touch. You will learn how to add a vignette in Photoshop's Camera Raw filter and use a radial filter to direct light onto your model. The result is a look that you can adjust again at any time, because everything is based on a Smart Object.
The video is only loaded from YouTube when you play it – data (including your IP address) is then transmitted to YouTube/Google. More in the privacy policy
Key Takeaways
- Merge all layers onto a new layer before using the Camera Raw filter.
- Convert this layer into a Smart Object so that you can readjust the settings at any time later.
- With the vignette, you guide the gaze from the edge toward the center. Strength, midpoint, roundness, and feather determine the effect.
- The radial filter selectively brightens the area where your subject is standing. With the clarity slider, you can add further emphasis.
- Double-clicking the mask of the radial filter applies it to the entire image. Then you adjust the edges so that only the desired area is affected.
Step-by-Step Guide
Step 1: Merge layers onto one layer
Before you even go into the Camera Raw filter, you need a single layer containing all the changes. To do this, press the key combination Ctrl + Alt + Shift + E (on a Mac, Cmd + Option + Shift + E). Photoshop creates a new, merged layer above your existing layers, and the original layers are preserved. This way you can go back at any time if something doesn't work out.

Step 2: Create a Smart Object
Right-click the newly created layer and select "Convert to Smart Object". This is worthwhile, because a Smart Object saves the Camera Raw filter as an adjustable setting. If you later notice that the vignette is too strong, simply open the filter again and change the values without having to re-edit the image.
Step 3: Open the Camera Raw filter
Now go to the "Filter" menu and select "Camera Raw Filter". The dialog window opens with all the sliders you need for your look. Make sure you are working with the Smart Object, because only then does the editing remain changeable afterward.

Step 4: Find the vignette in the Effects area
In the right-hand panel, switch to the Effects tab. There you will find the "Vignette" section, with which you can darken or lighten the edges of your image. It is the first building block for guiding the viewer's gaze from the outside toward the center of the image.

Step 5: Set the vignette strength
The "Amount" slider determines how strongly the edge is altered. If you drag it to the left, the corners become dark; to the right, they brighten. For a subtle look, a value of around minus 25 is usually enough. With this value, the edge is clearly noticeable without the image looking artificial.

Step 6: Set the midpoint
With the "Midpoint" slider, you decide how far the vignette extends toward the center of the image. If you drag it to the right, the darkening affects only the very edge. If you push it to the left, a tighter circle forms in the center, and your model is isolated more strongly. For portraits, a value in the middle range is usually ideal so that the transition stays smooth.
Step 7: Adjust roundness
The "Roundness" slider determines the shape of the vignette. With high values, a round gradient results; with lower values, the shape becomes more rectangular and thus follows the edges of the image. Reduce the value a little if your image can handle a clear, rectangular frame. If the image is more organic, you are better off sticking with a round shape.

Step 8: Set the feather
With the "Soft Edge" slider, you control how hard or smooth the transition is between the darkened and normal areas. If you drag the slider left to zero, a hard edge is created, which quickly looks unnatural. If you drag it all the way to the right, the transition is completely smooth. A medium value usually gives the most natural impression, and that is exactly what you should choose here.

Step 9: Hide Highlights at the Edge
The "Highlights" slider comes into play when bright specular highlights at the edge of the image are distracting. With it, you specifically reduce these areas so that they don't distract from the subject. If your image has no such highlights, as in the tutorial example, the slider has no visible effect, and you can leave it unchanged.
Step 10: Select the Radial Filter Tool
The vignette already guides the eye well, but you can direct it even more precisely to the model. To do this, you apply a radial filter. Select the icon for the Radial Filter tool at the top of the Camera Raw window. Then you can drag an ellipse over the area you want to highlight.

Step 11: Increase Exposure and Clarity in the Radial Filter
As soon as the radial filter is active, its sliders appear in the panel. Raise the exposure slightly so that the area around your model becomes brighter and attracts attention. In addition, increase the clarity slider slightly into the positive range. This makes contours and structure in the subject look sharper without the image appearing harsh. Stick to small steps, because too much clarity quickly looks grainy.

Step 12: Apply the Radial Filter to the Entire Image
Double-clicking the mask of the radial filter applies it to the entire image. At first glance this looks exaggerated, but it is a helpful intermediate step. The effect now covers all areas, and in the next step you adjust it to the desired section.

Step 13: Adjust the Filter Area and Confirm
Now you limit the radial filter to the area you want to emphasize. Drag the edges of the ellipse from right to left until the lateral area fits. Leave the vertical extent as it is, so that the model stays in the light vertically. When the look is right, confirm with "OK". You then see the finished result directly in the image, and your visual guidance is complete.

Summary – Visual Guidance in Photoshop: Vignette and Radial Filter in Camera Raw
With the combination of vignette and radial filter, you deliberately direct the viewer's eye to your subject. First you merge all layers and convert them into a Smart Object. Then, in the Camera Raw filter, you design the vignette using amount, midpoint, roundness, and soft edge. With the radial filter, you additionally highlight the most important area. Since everything runs via the Smart Object, you can readjust the look at any time.
FAQ
Why should I merge the layers before the Camera Raw filter?This way, all previous changes end up on one layer, and the filter affects the entire image.
What does the Smart Object do?It saves the Camera Raw filter as an editable setting, so that you can adjust it again at any time later.
How dark should the vignette be?For a subtle look, an amount of about minus 25 is suitable, but depending on the subject you may also work with a stronger or weaker value.
What does the midpoint of the vignette do?It determines how far the darkening reaches into the center of the image. Toward the left, a tighter circle is created; toward the right, the effect remains limited to the edge.
When should I change the roundness?Reduce the roundness if you want a more angular shape that follows the edges of the image.
Which soft edge is the right one?A medium value usually looks most natural, whereas a hard edge at zero quickly looks artificial.
Do I always need the Highlights slider?No, it is only useful if there are distracting highlights at the edge of the image.
Why do I double-click the mask of the radial filter?The double-click applies the mask to the entire image, so that you can then specifically crop the area to your subject.


