
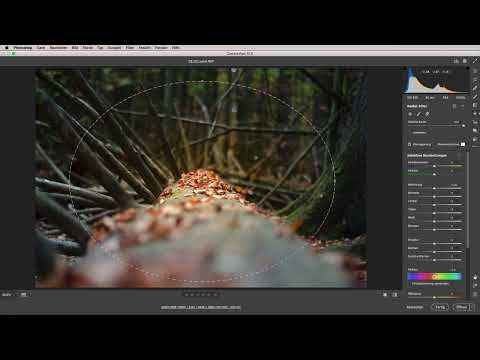
If you want to selectively brighten, darken, or add color emphasis to individual areas of an image in Camera Raw, the Radial Filter is exactly the right tool. While the linear gradient edits areas in stripes, the Radial Filter creates ring-shaped or circular gradients that spread outward from the center. This way, you can, for example, highlight a subject or add light to the image after the fact, as if the sun had been shining in the background. In this tutorial, I'll show you step by step how to use the Radial Filter, adjust it, and work with multiple gradients.
The video is only loaded from YouTube when you play it – data (including your IP address) is then transmitted to YouTube/Google. More in the privacy policy
Key Takeaways
The Radial Filter places an elliptical area over your image, the shape of which you can change at any time using the handles. A feather of 100 ensures flowing, soft transitions. With the invert option, you control whether the change takes effect inside or outside. Since all points and settings are preserved, you can move or correct each area later without destroying the image.
Step-by-Step Guide
Opening the Radial Filter and Setting the First Gradient
You'll find the Radial Filter in the tools above the image area in Camera Raw. Alternatively, simply press the M key, or Shift + M, depending on your interface settings. Then click directly in the center of the image, on the central subject you want to highlight. Drag the gradient outward until the ellipse encloses the subject well. Make sure your main subject is in sharp focus, because this is exactly the area that will benefit from the editing later.

Shaping the Ellipse and Setting the Feather
After dragging it out, small handles appear at the top and bottom of the ellipse. With them, you can change the shape as you like. So you can keep the ellipse round, but also stretch it out very narrow if, for example, an elongated streak of light is meant to appear. The area is always controlled by a feather, which you'll find in the Radial Filter settings. For the Radial Filter, I usually set this feather to 100. The reason is simple: at a value of 100, the transitions are flowing and soft, so no visible line appears.
Color Temperature and Exposure for a Natural Glow
Now it gets exciting. Change the color temperature to steer the mood. Drag the slider toward warmth, and the center of the image begins to glow. The change fades out very gently toward the edges, which gives the impression that sunlight had shone in from the background. If the effect still seems too flat to you, also increase the exposure slightly. The result then often looks even more realistic. During this phase, always compare with the original image so that you don't overdo it.

Positioning the Gradient and Letting It Spread
With the position, you determine where the glow is strongest. Drag the ellipse a bit further up or down so that the effect spreads evenly in both directions. This generally looks more harmonious than a gradient that lies on only one side of the subject. Make sure that the light area doesn't become too dominant and push the subject into the background.

Combining the Radial Filter with Linear Gradients
The Radial Filter can be combined excellently with linear gradients. So you can, for example, darken a sky with a linear gradient and then emphasize the subject with a Radial Filter. In the example, you first stay with the Radial Filter and set a second gradient with which you selectively adjust other areas.
Inverting the Selection and Darkening the Edge
The second gradient should not affect the inside, but only the outside. To do this, you activate the invert option. As a result, the adjustment no longer affects the center, but everything outside the ellipse. Now lower the exposure until the edge becomes darker. In this way, you automatically draw the viewer's gaze to the center. Such a vignette looks especially subtle if you keep the feather at a high value.

Place Additional Gradients Freely
You can set as many radial filters as you like. Simply drag them out one after another wherever you need them. In the example, you tackle a single branch whose bright spot you want to tint a little and bring out. Here too, the following applies: if a gradient is only meant to affect a single detail, activate the inversion so that the adjustment does not spill over into the surroundings. A narrow ellipse is particularly well suited for such details.
Edit the Entire Image Step by Step
With the radial gradient, you can now work your way through the whole image area by area. Set a separate gradient for each area, adjust color temperature, exposure, and other values, and check the result again and again in the overall image. In the example, you strengthen the green in the background to round off the color mood, and you move a gradient in the lower area so that a bit more color appears there without it looking too bright.
Adjust Afterwards and Work Non-Destructively
A major advantage of this tool is its flexibility. All handles and points are retained. If you want a gradient to be brighter or darker later, you simply click on it and change the values. You can move, rotate, or reshape an ellipse at any time. The editing is therefore set up non-destructively, and you can adjust all settings afterwards. Especially with more complex images, this makes your work much easier.
Summary – Radial Filter in Camera Raw: Round Gradients Step by Step
The radial filter in Camera Raw is a versatile tool for ring-shaped and circular adjustments. You place it in the center of your subject, shape the ellipse using the handles, and set the feather to 100 so that the transitions stay soft. With color temperature and exposure, you create light and mood, and with the invert function, you edit the outer area in a targeted way. Since all points are retained, you can readjust at any time. This way, you work flexibly, precisely, and without altering the original image.
FAQ
Can I also create narrow streaks of light with the radial filter?Yes, you simply pull the ellipse out very narrow and long using the top and bottom handles. This creates elongated, narrow gradient areas that are suitable for light reflections, for example.
Why should the feather be set to 100 for the radial filter?A feather of 100 ensures flowing and soft transitions. With lower values, visible edges can appear that look unnatural.
What does the invert option do?The inversion applies the adjustment to the area outside the ellipse. This way, you can, for example, darken the edge without changing the subject in the center.
Can I still change a radial filter after setting it?Yes, all handles and settings are retained. You can adjust position, shape, and values at any time.
How many radial filters can I set in an image?You can use as many radial filters as you like and apply them one after another to different areas of the image.
Can radial filters be combined with linear gradients?Yes, both tools can be combined excellently. For example, you can darken the sky with a linear gradient and emphasize the main subject with a radial filter.


