
Imagine you open the Creative Cloud desktop app and, instead of the small window you remember from before, you are greeted by a clear application with a menu bar, search field and categories. This guide is devoted to exactly this interface. You will get to know the most important areas, install programs, manage your cloud synchronization, adjust settings and find fonts, stock material, tutorials and the community. By the end, you will know where to find what and what it is meant for.
The video is only loaded from YouTube when you play it – data (including your IP address) is then transmitted to YouTube/Google. More in the privacy policy
Key Takeaways
- The Creative Cloud desktop app 2020 is built in a new design that follows the conventions of familiar programs: you can maximize, minimize and close the window.
- Using the search bar and the platform filters (desktop, mobile, web), you can find apps quickly.
- Cloud synchronization backs up your work and makes it accessible from other devices. Your storage space can be expanded if needed.
- Under "Settings" you define, among other things, language, installation path, update behavior and synchronization.
- Adobe Fonts, Adobe Stock, Behance, tutorials and the community are built directly into the app and can be reached via the header.
- In the "Files" section you manage libraries and your work, which you can also share on the web.
- In the "Beta Apps" section you get access to new features that are still in development and should therefore be treated with caution.
Step-by-Step Guide
Step 1: Understanding the new interface and the main menu
At first glance, you notice that the app is no longer a small little window but a menu with several areas. Window management works the way you are used to from other programs. In the top right you will find the buttons for maximizing, minimizing and closing. Your workspace thus adapts to your screen size.

Step 2: Finding apps via search and the platform filters
Directly below the header is the search bar. Enter the name of a program here, such as Photoshop or Premiere Pro, and the app immediately shows you matching results. Below that, you can filter by platform: desktop applications, mobile apps or web services. This way you can quickly tell from the icons whether an app runs on your computer, on your smartphone or in the browser. With a click on an app, you open the installation.
Step 3: Using the header with help, fonts and notifications
At the top edge you will find several buttons that save you a lot of time in everyday use. Via Help you reach guides and support information. The Fonts section takes you to your Adobe Fonts. Via the notifications you are informed as soon as an update or other news is available. Cloud synchronization shows you the status of your backed-up work, and via your account you can see which Adobe profile you are signed in with.
Step 4: Getting to know team projects, cloud storage and purchase options
Creative Cloud now also connects team projects with your account. You can access your files from anywhere in the world and download programs independently of the platform. This also includes plugins. You decide for yourself which folders and files are stored in the cloud. Your storage space is limited but can be expanded for a fee. Via the tiles you can purchase programs directly, download them and link them to your plan.
Keep one point in mind: if you buy After Effects or Premiere Pro, Media Encoder is installed automatically. However, if you want to render videos with third-party software, for example, you can also purchase Media Encoder separately.
Step 5: Installing programs and understanding Media Encoder
Once you have selected a program, you click the install button. The app downloads the program and links it to your plan. You only need Media Encoder separately if you want to use it without the main program. In all other cases it is already included in the package.

Step 6: Browsing apps by category
In addition to sorting by system, you can also navigate by category. If you are looking for design and layout, for example, you click on this item and the app shows you only programs for this area. There you can also see which applications are available as a desktop app, web service or mobile app. The icons provide orientation.

Step 7: Adjust Settings for Updates, Installation Path, and Language
Via the Options menu, you get to the preferences. There you determine whether the cloud applications are updated automatically and whether the app is launched when the computer starts. In my example, I disabled automatic launching because I use some plugins that I wouldn't be sure still work after an update. So you can make this decision consciously.
You also set the installation path here and select the language of the programs. In the past, you often had to laboriously obtain programs in other languages via third-party providers. Today, you set the language directly in the app.

Step 8: Control Synchronization and Bandwidth
In the synchronization section, you can start the transfer and limit the transfer speed. You set a minimum and a maximum so that synchronization doesn't slow down your internet connection. In addition, you can share certain folders with other people, such as family members or employees, without them having access to everything.
Step 9: Use and Manage Adobe Fonts
You will find the fonts in the Settings and Services section. If you activate a font, it becomes available in your programs. Clicking the link opens Adobe's font collection in the browser, where you are logged in with your account. There you can add fonts to your favorites, bookmark them for a web project, or include them in your own font family. You can also deactivate a font family again if needed. When you start a program, the app briefly synchronizes and adds or removes the fonts. The cloud serves as the interface between the programs.

Step 10: Find Images, Videos, and Templates on Adobe Stock
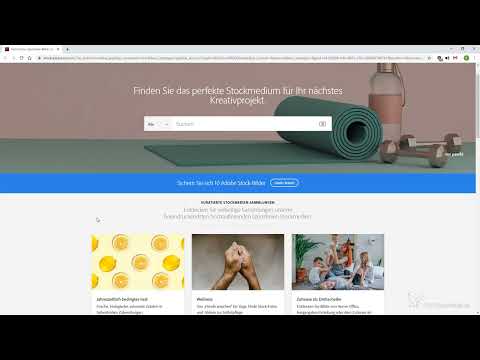
Via the Stock link, you get to Adobe Stock. There you choose images, videos, templates, 3D material, premium content, or editorial content. Templates can be incorporated into your own video with just a few clicks. Here too, you can purchase a plan with which you secure images and obtain the corresponding usage rights.

Step 11: Connect with Behance and Present Your Own Work
The Behance section connects you with other creative people. You can view others' work, exchange ideas, and get inspiration. You also create your own folder or page on which you showcase yourself and your projects. Through hashtags and locations, you make your works discoverable and make them available to the community. This is also helpful if you are looking for a project partner.

Step 12: Download Tutorials and Learn
In the Tutorials section, you will find learning material from Creative Cloud and Adobe. You can search for specific projects or techniques and download the guides. This way you improve your skills and learn how individual programs work. This is especially helpful when you try out a new tool.

Step 13: Use Support and the Community When You Have Problems
Every system is configured differently, which is why problems occasionally occur. Via the Support button, you get to the community, where you can ask your questions. Whether a program runs too slowly or a process doesn't work: other users share their solutions, and you will often find the answer you need there. Make this help resource your regular point of contact.

Step 14: Manage Works, Files, and Libraries
Via the Files item, you see how you work. You can collect, manage, and share content and synchronize it with the libraries. This way you can also access your files on other computers. You create new libraries directly, you can follow public libraries, and with a button you share a library on the web. This is handy if you want to bundle resources on a particular topic, such as special music techniques or motion design. In addition, you will find links here to Creative Cloud on the web, to your publications, and to deleted items.

Step 15: Try Out Beta Apps for New Features
The Beta Apps section offers you programs that are available in new versions or with experimental builds. There you will find, for example, Premiere Pro, After Effects, Character Animator, Media Encoder, or Audition. With beta versions, you can test features that are not yet available to the general public. Since they are not yet fully stable, you should not use them in important productions.

Summary ??? Mastering the Creative Cloud Desktop App 2020: Interface, Apps, and Services at a Glance
The Creative Cloud Desktop App 2020 is far more than an installer. You can find apps via search or categories, manage cloud storage and synchronization, adjust language and update behavior, and access Adobe Fonts, Adobe Stock, Behance, and tutorials. You organize your work via Files and Libraries, and the community helps you with problems. Once you have gone through the sections, you will navigate the app much more confidently and quickly.
FAQ
How do I quickly find a specific app again?Use the search bar at the top of the app and enter the name of the program, or filter by desktop, mobile, or web.
How do I increase my cloud storage?You can expand your storage for an additional fee by selecting the appropriate storage plan in the app.
Do I have to buy Media Encoder separately?No, when you purchase After Effects or Premiere Pro, it is installed automatically. Only if you want to use it separately, for example for renderings with third-party software, do you have to purchase it separately.
Can I prevent the app from opening at system startup?Yes, you can disable this in the preferences. This makes sense if you use plugins whose compatibility after an update is uncertain.
Where do I change the language of the programs?You set the language in the settings of the Creative Cloud Desktop App.
What happens with Adobe Fonts when I start a program?The app briefly synchronizes with your activated fonts and adds or removes them again, depending on the setting.
What do I use the Support and Community section for?If you encounter technical problems, such as slow program performance or malfunctions, you will find solutions from other users in the community.

