
Maybe you have already put together graphics, gradients, or other elements that you would like to share with others. At the same time, you surely come across the work of other creatives again and again that you would like to use for your own projects. The Creative Cloud Desktop app connects both through libraries. You manage your own content, share it on the web, and follow public libraries from other users. In this tutorial, you will learn all the important steps, from creating a library to using other people's gradients in your programs.
The video is only loaded from YouTube when you play it – data (including your IP address) is then transmitted to YouTube/Google. More in the privacy policy
Key Takeaways
- Libraries bundle your elements and can be renamed, shared, or deleted at any time.
- You add graphics via drag and drop, and the app recognizes them automatically.
- Via the web, you can find shared content, deleted elements, published links, and your cloud documents.
- You follow public libraries via the plus icon before you review and adopt their content.
- Using the features is free, and synchronized content is available to you in your programs.
Step-by-Step Guide
Step 1: Create a New Library
Open the Creative Cloud Desktop app and switch to the libraries section. Create a new library and give it a unique name, for example "ba1". As soon as you confirm, the library appears immediately in your overview. You can then edit it right away and fill it with content.

Step 2: Manage the Library and Share It on the Web
In your library's overview, you will find options that let you adjust it at any time. You can rename it, and you can share it online so that others can access it. If you no longer need a library, it can also be deleted via these options. Sharing determines whether your work becomes visible to others.

Step 3: Add Graphics via Drag and Drop
Drag the desired image file directly from your file folder into the open library. The Creative Cloud Desktop app automatically recognizes the file as a graphic and categorizes it accordingly. This way, you can quickly build your collection without having to import each element individually.
Step 4: Display Group Types and Create Your Own Groups
The group types display shows you which kinds of elements are contained in your library. You can also create your own groups to organize your content. To do so, select the option for a new group, activate it, and then add the appropriate elements. If you don't want to create a group, simply go back and display the types again.

Step 5: Bring Content from the Web into Your Library
In addition to your own files, you can also incorporate elements directly from the web. To do this, you open the Creative Cloud website, which offers you several categories. These include content shared with you, deleted elements, published links, and cloud documents that you have already added once. Select the appropriate category and adopt the desired content into your library.
Step 6: Follow Public Libraries
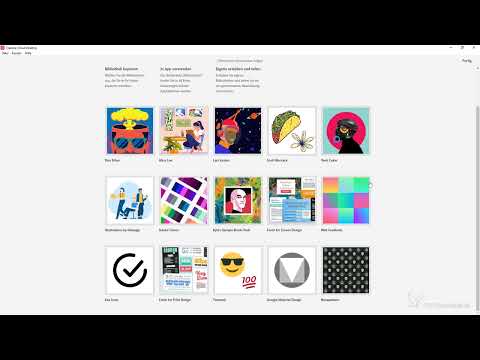
To subscribe to other users' libraries, click the plus icon in the library overview. There, you select the option to follow public libraries. You will find a few examples that you can click on. For instance, choose a library with gradients. A window then opens through which you can access and view the content.
Step 7: Review and Adopt Other People's Libraries
Before you adopt someone else's library, it is worth taking a closer look. The view shows you who created the library, when it was created, and what content it contains. This way, you can tell whether the gradients or graphics match your ideas and presets. If you like the library, you copy the work and follow the creator at the same time. Then complete the process with the "Done" button.

Step 8: Use Followed Content in Your Programs
After completion, the imported content appears in your library. Since your libraries are synchronized with the cloud, they are also available in your programs, such as Photoshop. So you no longer have to create your own gradients from scratch, but can use the shared templates directly.

Step 9: Organize your own projects and continue working
With this function, you share your work, use the works of others, and organize your own projects at the same time. You can use all the functions in this guide for free, with no additional costs. Maintain your libraries regularly so that you can access your collection at any time and keep your workflows efficient.

Summary – Creative Cloud Desktop App: Creating, sharing, and using libraries
With the Creative Cloud Desktop App, you manage libraries with your own graphics and gradients, share them on the web, and follow public libraries from other users. You create a library, fill it via drag and drop, organize content into groups, and review others' work before you adopt it. The synchronized content is then available to you in your programs, and use is free.
FAQ
How do I create a new library in the Creative Cloud Desktop App?You switch to the libraries section, create a new library, assign a name, and confirm. It then appears immediately in your overview.
Can I rename or delete a library later?Yes, via the options in the library overview, you can rename a library, share it online, or delete it at any time.
How do I add graphics to a library?Drag the image file directly from your file folder into the open library using drag and drop. The app recognizes the graphic automatically.
How do I find public libraries from other users?Click the plus icon in the library overview and select the option to follow public libraries. There you will find examples that you can click on.
How can I review someone else's library before I adopt it?The view shows you the creator, the creation date, and the content included. This way you can check whether the work fits your preferences.
Does it cost anything to share libraries or follow public libraries?No, the functions are free. You can use the content fully in your work.


