
The menu bar on the left side of Miro contains far more than drawing tools. In this tutorial, you will learn about the functions you need for feedback, teamwork, file imports, and extensions. I will show you step by step how to write and resolve comments, how to work with frames, upload files, and integrate apps.
The video is only loaded from YouTube when you play it – data (including your IP address) is then transmitted to YouTube/Google. More in the privacy policy
Key Takeaways
Comments can be created directly on the board, supplemented with emojis, replied to, and addressed to team members. With "Resolve" you close a discussion.
Frames structure your board, serve as templates for devices and paper formats, and determine what you export later.
Uploads work via your device, a URL, or cloud services such as Google Drive and Dropbox.
Apps extend Miro with features such as Kanban, mind maps, or Excel tables. In the Marketplace you will find more extensions, some of which are locked in the free version.
Introduction
Before you get started, you should have Miro open and a board in front of you. The following steps refer to the toolbar on the left. The functions can be used right away, so you don't need any prior knowledge of the other tools.

Step-by-Step Guide
Creating Comments
You can find the comment function in the left toolbar. Alternatively, you can activate it with the C key. Click on the desired spot on the board to open a comment box. Write your text in it, such as brief feedback on a draft, and add an emoji if needed. Once you submit it, your comment appears with your name and the date. You can also write a reply below each comment.

Tagging Team Members and Replying
If you want to involve a specific person, type the @ sign followed by the name in your comment, for example @Tobias. The tagged person is then notified and sees your reply directly in context. This is especially useful when you expect a specific answer to a question.
Resolving or Reopening Discussions
At the top of the comment area you will find the options "Resolve" and "Solve", whereby you will recognize these terms in the interface according to your language settings. If you choose "Resolve", you mark the discussion as completed. The comment box then disappears from the board as soon as you leave the area. If you later want to continue the discussion after all, you reopen it. This way, your board stays organized.
Using Frames as Templates
Frames are the next important tool. You create them in the toolbar using the corresponding icon. There you can select templates for phone, tablet, or browser. An online shop or an app can thus be planned directly in the appropriate screen size.

After inserting a phone frame, you activate "Show device". Then you see the device with its casing and can work inside it. You can set the background to white, insert objects, and add text. You can also switch between the device view and a plain outline, depending on whether you only want to plan the space or show the look.

Inserting Objects into Frames
A frame is more than a template, because it holds all objects that are located within its area. If you drag a frame over existing sticky notes or shapes, they are automatically assigned to it. If you enlarge the frame later, the contained objects grow with it. This way you can group content without selecting it individually.

Setting Up Frames for Team Members
Frames are also suitable for giving each team member their own workspace. You create several frames and name them using the name field at the top, for example "Frame von Tobias". Afterwards, you can fill them with notes or content and edit them in a targeted way later.

Choosing Paper Formats and Orientation
In addition to devices, you have predefined formats available, such as 16:9, 4:3, or 1:1. There are also paper sizes such as Letter or A4. Orientation is important: every format can be created in portrait or landscape. You can also leave the background transparent. Then you only see the outlines and have to orient yourself by the lines.

Designing Your Own Frames
With the Custom Frame, you create a freely designable rectangular frame. You decide for yourself which objects should be inside it. This function is practical when you want to delimit a specific section of your board for a presentation or an export.

Using Frames for Export
Frames are also the basis for export. If you select a specific frame when exporting, exactly the content of that area is saved as a PDF or image. For example, if you only want to export frame number 5, the file will also contain only its content.

Understanding Saving
Manual saving is not necessary in Miro, because the board is backed up automatically. So you can close Miro and continue working on the same board later. Frames therefore do not serve for saving, but for organization and export.

Uploading Files
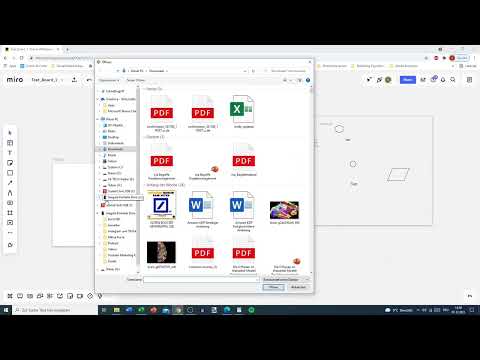
You upload files via the upload icon in the toolbar. You can select them from your device, embed them via URL, or fetch them from Google Drive, Dropbox, or Box via "More". For cloud services, you must connect the respective app beforehand. Uploaded images can be moved freely on the board. Depending on the file size, the upload may take a while.


Integrating Apps and Extensions
You access apps via the three dots in the toolbar. There you will find, among other things, Charts, Webpage Capture, Stickers and Emojis, as well as Diagrams. The Kanban function, for example, automatically creates a board, and mind maps and tables can be created just as quickly. You can also import an Excel spreadsheet and use it as a table on the board. Some apps even link Miro with Jira.


Using the Miro Marketplace
You open the Marketplace with the plus sign. There you can search specifically for applications such as Google Drive, Slack, Microsoft, Zoom, or Google Calendar. The extensions are sorted by areas of use such as Agile Workflows, Mapping, Research, or Design.

Note that some apps are locked in the free version. You can recognize them by an icon at the top right. These include, for example, the Timer or Planning Poker. Trello Power-Ups, on the other hand, can often be integrated, provided your plan allows it.

By the way, you can also open the Marketplace via the plug icon at the very bottom of the toolbar.

Outlook on the Other Areas
The menu bar has now been fully covered. The bars at the bottom left and top right remain. It is recommended that you first practice with the objects and basic functions. Afterwards, you can look into comments, chats, presentation mode, and the timer. Some of these functions are only available in paid plans.

Summary ??? Mastering Miro: Comments, Frames, Uploads, and Apps at a Glance
You have now learned about the most important tools in the Miro menu bar. Comments help you give feedback directly on the board and close discussions in a targeted way. Frames structure your board, make device and paper formats plannable, and determine the export. Uploads allow you to integrate files from various sources. Apps and the Marketplace extend Miro with features that support your team in everyday work. With this basic knowledge, you can now build your own boards and explore the other areas of Miro.
FAQ
Can I reopen comments later?Yes, a discussion marked as "Resolve" can be reopened and continued at any time.
Do I have to save my Miro board manually?No, Miro saves automatically. You can close the board at any time and continue working later from the same spot.
Why do I need frames if I can design the board freely anyway?Frames help you group content, simulate device formats, and export specific areas in a targeted way.
Can I export only part of my board?Yes, you select a specific frame for this. Only the content within that frame is then exported.
Are all apps in the Marketplace free to use?No, some apps are locked in the free version. You can recognize them by a corresponding icon.


