
Anyone building a diagram or a project overview in Miro can't avoid shapes and arrows. This guide walks you through the most important features: from inserting a shape, through colors and line styles, to connections that stay intact when you move objects. All you need is a Miro board and some time to experiment.
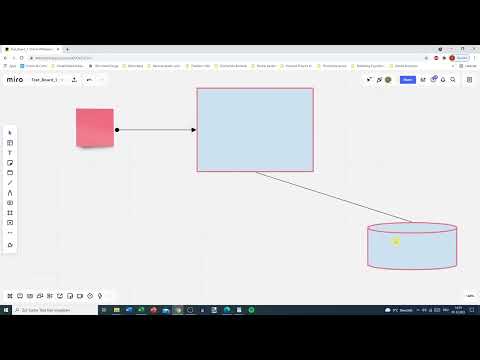
The video is only loaded from YouTube when you play it – data (including your IP address) is then transmitted to YouTube/Google. More in the privacy policy
Key Takeaways
You can find shapes with the tool marked with the letter S, and every tool can be accessed directly via its shortcut. You connect arrows via the small connection points on each object. Connected arrows stay in place when you move objects, while free lines do not. With the eyedropper you pick up colors from existing objects, and by holding down the Shift key you keep the aspect ratio.
Step-by-Step Guide
Finding and Inserting Shapes
Open the shapes tool via the toolbar or simply press the S key. The same logic applies to other tools: each has its own keyboard shortcut that takes you there immediately. For example, if you press T, you jump straight to the text tool, and with L you land on the line.
To start with, nine basic shapes are available to you, including rectangle, circle, and star. Clicking a shape and then dragging with the mouse button held down places it exactly where you need it.

Changing a Shape Afterwards
Once inserted, a shape is not fixed. You can convert it into a different shape at any time, such as a trapezoid, a cuboid, or a speech bubble. To do this, you select the object and choose the desired shape in the context menu. That way you don't have to start over if your idea changes while you work.

Setting Border, Line Style, and Transparency
In the formatting menu you determine how the border looks. Via the filled circle you choose whether the outline should be solid, dashed, or dotted. With the thickness slider you set the line weight, up to very bold borders.
The opacity, i.e. the transparency, can also be adjusted. Even a slight reduction ensures that a background element doesn't distract from the actual content. You can also change the color here.

Picking Up Custom Colors with the Eyedropper
Via the plus symbol in the color selection, you open the color palette and define your own shades. It's faster with the eyedropper: if you click it and then click any object on the board, such as a sticky note, its color is automatically picked up. This is especially helpful if you want to keep a consistent color scheme.
Setting the Background and Preserving Proportions
For shapes you can also set a background, for example a blue area on which you later place text. Here too, the transparency can be adjusted.
If you want to change the size of a shape, hold down the Shift key while dragging. The aspect ratio is then preserved, and width and height adjust proportionally. Without the Shift key, you can distort the shape freely. Text, bold, italic, or underlined, can also be added directly in the shape if needed.

More Shapes via "All Shapes" and Flowcharts
Besides the basic shapes, there is a more extensive library. Under "All Shapes" you'll find additional elements, including clouds. If you drag an element onto the board via drag and drop, it is immediately available.
Via "Manage Shapes" at the bottom left, you can show additional categories, for example flowchart shapes for flow diagrams. You'll also find connectors there. Some libraries, such as those from Cisco, Azure, or AWS, are paid, so they are often locked in the standard package.

Creating Connections with Connection Points
When you hover the mouse over an object, small light blue dots appear. These connection points are the key to clean arrows. If you click on one of these points, you get a connector arrow that you attach to the connection point of another object. The connection is created instantly.
Each object also has a connection point in the middle of its sides. You can use this one for a connection as well, which is often clearer when there are several objects next to each other.

Customizing arrow ends and line styles
If you select an arrow, you can define what should appear at both ends. At the start and the end, there are options such as a dot, an arrowhead, or nothing. Dots can be displayed filled or empty. For directions, it usually makes sense to place an arrow at the end so that it is immediately clear where the relationship points.

Fixing connections or designing them freely
The key difference from a normal line is that a connection stays bound to its start point and end point. If you move one of the connected objects, the arrow follows. However, you can edit the midpoint or the bend points to shape the path.
If you fix an endpoint, it stays at the chosen spot while the other endpoint remains movable. Without fixed points, the line stays free and unbound. You add bends by grabbing the arrow at a spot and dragging it. The connection remains intact in the process.

Normal lines and their variants
You can also find normal lines among the shapes. They differ in the type of path: straight, curved, stepped, or wavy. Here too, you can add arrows or dots to the start and end. The wavy and curved variants can be moved at their midpoints so that you can shape the path individually.
Placing text on lines
If you want to place a label directly on a line, you can use "Insert Shape" to insert an object in the middle of the arrow. Alternatively, you select the text tool and write directly on the line. The text then sits above the line.
In the text menu, you determine how the text is aligned: horizontally, so always easy to read, or tilted along the line. If you enlarge the text, the line may also be displayed larger. The color of the line can also be adjusted separately.

Using the big arrow for emphasis
The third arrow in the selection is an especially thick arrow. It is suitable when you want to emphasize something strongly in a presentation. Apart from the color, it can be changed only a little, but that is exactly its strength.

Drawing connections even without a target object
You don't have to place two objects first before you connect them. If you drag a line from an object into empty space, you can attach it to another object later. If you move the first object, the line follows. So connections can also be created afterward.

With practice to a clear board
The combination of shapes and connections takes some practice. Be careful not to include too many design gimmicks, because then you quickly end up with a cluttered board. Miro is primarily meant to structure projects easily, and for that, clear, uniform shapes are usually the better choice. So feel free to take your time and try out the tools at your leisure.

Summary ??? Using Miro shapes and arrows correctly
Shapes and arrows form the basic framework of many Miro boards. With the keyboard shortcuts, you quickly get to the tool you want, and the connection points create arrows that move along when you move objects. With the eyedropper, transparency, and line styles, you design your board clearly and consistently. It's best to try out the functions directly on your own board, and then using them will quickly become routine.
FAQ
How do I quickly get to the shapes in Miro?Press the S key on your keyboard, and the shapes tool will open right away.
What are the small dots on objects for?They are connection points. If you click on them, you can drag an arrow that attaches to another object.
Does a connection remain if I move objects?Yes, connected arrows follow the objects. Free lines without a connection, however, stay in their position.
How do I pick up a color from another object?In the color selection, choose the eyedropper and click on the object whose color you want to pick up.
How do I keep the aspect ratio when enlarging a shape?Hold down the Shift key while dragging, and the width and height will stay in the correct proportion.
Can I write text directly on a line?Yes, with the text tool or via an object inserted into the line, you can place text that you can align horizontally or along the line.
Are all shapes in Miro free to use?The basic shapes and the standard library are available. Some special libraries, such as those from Cisco, Azure, or AWS, are paid.


