
An empty whiteboard initially looks cluttered, but with text and sticky notes it quickly turns into a structured workspace. This is exactly where this tutorial comes in. It is part 3.2 of the Miro series and covers the first tools from Module 3: the text tool and sticky notes. Both are among the features you need in almost every Miro board, whether for brainstorming, project planning or workshops.
The video is only loaded from YouTube when you play it – data (including your IP address) is then transmitted to YouTube/Google. More in the privacy policy
You will learn how to place text, adjust font, size and formatting, insert links, and use colors and transparency. After that, we move on to sticky notes, which you can supplement with tags, smileys and links. The guide follows the video and its sequence so that you can follow the steps directly.
Key Takeaways
You can access the text tool with the T key. Then you can click anywhere on the board and write directly.
Font, size, text styles and alignment can be adjusted via the toolbar or via the corner points of the text box.
Links, text colors and highlighters help you label content and emphasize important passages.
With Copy Style and Paste Style, you transfer the design of one element to another without having to set everything up again.
You will find sticky notes under the text tool and can access them with the N key. With tags and smileys, you turn them into task or feedback cards.
Step-by-Step Guide
Step 1: Open the Text Tool and Place Text
The fastest way to the text tool is the T key. You don't have to click in the toolbar first. Then you click on the spot on the board where the text should appear and start typing right away. Zoom in closer if needed so that you can better see what you are doing while writing. You can still move the position at any time later.

Step 2: Adjust Font and Font Size
Once the text is selected, you can change the font via the toolbar. Miro offers a large selection of fonts that is sufficient for most purposes. The font size can be changed in two ways: either you use the up and down arrows in the toolbar, or you hold down one of the four corners of the text box and drag it to the desired size. When dragging, the font grows or shrinks accordingly.

Step 3: Bold, Italic, Underlined and Strikethrough
You can select either the entire text or individual letters and words and then format them. The styles bold, italic and underlined can be applied individually or in combination. The strikethrough function is particularly useful when you want to keep an entry but mark it as possibly no longer relevant. Especially in brainstorming sessions, this creates a clear separation between current and discarded ideas.

Step 4: Use Text Alignment and Lists
If your text consists of several lines, it is worth taking a look at the alignment. You can align it left, right or centered. With multi-line texts, the difference is immediately apparent, as the text block is shifted within the box accordingly.
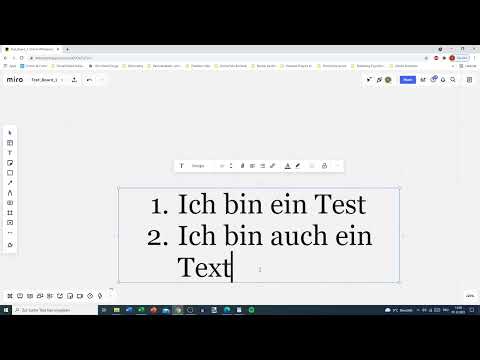
You can also create lists, for example with bullet points. Using the indentation functions, individual items can be moved inward or outward. When you change the alignment of an item, the entire text block often shifts, so you should check beforehand whether this is what you want.

Step 5: Add a Link to a Word
A single word can be linked to a link. Select the word, click the link icon in the toolbar, enter the address and confirm with "Apply". The word then appears blue and underlined. Clicking on it opens the link. In this way, you can embed videos, documents or external pages directly into your board without long addresses cluttering the overview.

Step 6: Using Text Color and Highlighter
With the text color, you can highlight individual lines or entire paragraphs in color, for example in green, turquoise, or blue. This makes hierarchies visible, for example for headings or responsibilities.
The highlighter works like a text marker. It places a colored background behind the selected text. You may know this from word processing programs. The same applies here: use the highlighter sparingly, otherwise it loses its effect.

Step 7: Background Color, Transparency, and Locking
With the highlighter, you will also find the settings for background color and opacity. The background color determines which color lies behind the text. The opacity controls the transparency. At 100 percent, the color is fully opaque. If you lower the value, the color becomes lighter, and at around 40 percent you can already see through to the background clearly. With this setting, you can make markings subtle without covering the content.
You can also lock an element so that it is not accidentally moved or changed. To do this, you long-click on the lock icon. To unlock, you repeat the process. Locked elements are particularly suitable for headings or finished areas that should remain stable in a team.

Step 8: Copying Style and Transferring Content
Via the menu with the three dots on the right edge, you will find further options. Particularly practical are Copy Style and Paste Style. If you have designed a text element with a specific highlighter style, you copy its style and then paste it onto another text element. The background color and the other settings are then adopted. This saves you a lot of time on larger boards.
Other options in the menu include, for example, Copy Link, which copies the link of an element, as well as export functions. The content can also be exported as a CSV file, for example for further processing in Excel. You can also place a frame around elements.


When copying and pasting text, you should note that the right-click context menu is not always available in the browser. In that case, use the keyboard shortcuts Ctrl+C to copy and Ctrl+V to paste instead. On a Mac, use Cmd+C and Cmd+V accordingly.

Step 9: Creating Sticky Notes
Sticky Notes, that is, adhesive notes, can be found below the text tool in the toolbar. Alternatively, you can open them with the N key. Choose a color, click on the desired spot on the board, and drag the note to the size you need while holding down the mouse button. Sticky Notes are suitable for ideas, tasks, or short comments and can be moved around freely later.

Step 10: Adjusting Type, Size, Font, and Link of Sticky Notes
You can subsequently convert a Sticky Note into other types, for example into a text field or into a shape such as a circle. The size of the note can also be adjusted using the handles on the edge. The font plays a rather minor role with Sticky Notes, since you can place text over them anyway, which then takes over the actual design. You can still adjust the text alignment.
You can also attach a link to a Sticky Note. When someone clicks on the note, the linked page then opens. In addition, the size (S, M, or L) and the color can be changed afterward. This way, you can visually highlight important notes without having to recreate them.


Step 11: Adding Tags and Smileys
With tags, you can additionally label Sticky Notes. To do this, click on the tag icon, enter a name, for example a person's name, and confirm. The note then displays a small label with the tag at the bottom, the color of which you can also adjust. You can assign multiple tags, for example to assign a task to several people.
Emojis are another way to enhance the note. They act like short reactions to the content and are well suited for feedback in teams.

Overall, these functions are not particularly complicated, but you should try them out once. Afterwards, it is best to take a look at the example projects in Miro. There you can see how the elements are combined in finished boards.
Summary ??? Miro Text Tool and Sticky Notes: Explained Step by Step
With the text tool (key T), you write directly on the board and style your content via font, size, formatting, alignment, lists, links, and colors. The highlighter emphasizes passages, and with Copy Style you apply styling to other elements. Sticky notes (key N) can be adjusted in size, type, and color, given links, and enhanced with tags and emojis. Together, these tools form the foundation of every well-structured Miro board.
FAQ
How do I quickly open the text tool in Miro?Press the T key, then you can click anywhere on the board and start writing.
How do I change the font size of a text?Use the arrows in the toolbar or drag one of the four corners of the selected text box.
Why doesn't the context menu always work in the browser?In the browser, the right-click menu is restricted when copying, so it is better to use Ctrl+C to copy and Ctrl+V to paste.
What is the difference between the highlighter and text color?The text color changes the color of the font, whereas the highlighter places a colored background behind the selected text.
What is the opacity for with the highlighter?With opacity, you control the transparency of the background color, so at low values you can still see the content underneath.
How do I apply styling to another element?In the menu with the three dots, use the Copy Style function and then Paste Style on the target element.
How do I create a sticky note?Press the N key or select the sticky note in the toolbar, click on the board, and drag the note to the desired size.
Can I add a link to a sticky note?Yes, you can link the note to a web address that opens when you click it.
What are tags used for on sticky notes?Tags label notes, for example with names, in order to assign tasks to people.
Can I export a text as a CSV file?Yes, via the menu with the three dots, content can be exported as a CSV file and opened in Excel, for example.


