
A Miro board grows quickly: sticky notes, diagrams and ideas pile up, and at some point colleagues are supposed to join in or you need a file for the presentation. That's exactly what this post is for. You'll learn how to share your board with others, which access rights you can assign, and how to save individual frames or the entire board locally, for example as a PDF, image or CSV. You'll also find out what to watch out for in the free version, because it has some limitations that help prevent data loss.
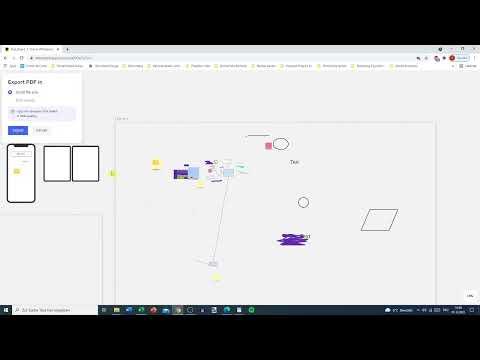
The video is only loaded from YouTube when you play it – data (including your IP address) is then transmitted to YouTube/Google. More in the privacy policy
Key Takeaways
Key Takeaways
- Using the "Share" button, you invite people by email and determine whether they may edit, comment or only view.
- Invited people need an existing Miro account.
- You can pass the board on via a link. The access rights for the link can be set separately.
- Miro saves automatically. You can find older versions via the History.
- The export includes CSV, template, PDF and image. For PDFs you need at least one frame.
- In the free version, exports are only possible in low quality, and the Miro logo appears on every page.
- In the free version, the fourth board is automatically set to view-only mode. That's why you should export regularly.
Step-by-Step Guide
Sharing a Board with Others
The starting point is always the same place: at the top right of the board you'll find the "Share" button. Clicking it opens the sharing window, where all options are bundled together.

To invite a person directly, enter their email address in the input field. Then you determine what they are allowed to do. The options are Edit, Comment or view only. You select the setting via the menu next to the address. If you like, you can add a short greeting, for example "Welcome!", and send the invitation.

A note that is often overlooked: the invited person already needs a Miro account. If the address is not registered, the invitation cannot be sent. So create the account beforehand or ask the person to log in first.
The permissions influence what the person can do in the board. They can be changed at any time, even afterwards. In the team access section you will also find the "Team access to board" setting. Here you determine which rights all members of your team have by default, such as view only or contribute. Via "Invite to team and board" you can additionally invite people directly into the team.
Besides the personal invitation, there is the link. It is well suited when you want to reach many people at the same time without entering each one individually. You create it in the sharing window via the option to copy the link. Then you determine what recipients may do with it. By default, "Can view" is usually set, meaning view only. If you want people to collaborate, switch the option to "Can edit".

The link looks long, but you don't need to understand it. Simply copy it and send it via email, chat or another platform. Make sure you copy the link again after changing the permission, because it can easily change in the process. An old link may then no longer work as expected.

The "Anyone with the link" option determines who may open the board via the link at all. If it is active, anyone who has the link can access the board, provided the selected permission allows it. If you only want to grant access to certain people, you deactivate this option or restrict access to people who have already been invited. Then even someone with the link cannot open the board, and you retain full control.
With that, sharing is complete. With the settings for people and links, you have controlled who can access your board, when and how.

Save and export a board
Unlike traditional programs, you don't have to save actively in Miro. Every change is applied automatically. If you ever want to undo a step or are looking for an earlier version, open the History at the bottom of the board. There you will find older versions and can restore them.
To have your result available outside of Miro as well, for example on your desktop, you use the export. You will find it at the top in the menu. Click on "Export" there to display the various formats.
Several formats are available. For spreadsheet fans, there is the option to download the board as a spreadsheet in CSV format. You open this file in Excel or a similar program. You can also save your board as a template so that you can use it later as a starting point for new boards. The best-known format, however, remains the PDF.
With the PDF export, one decision is important: the quality. In the free version, only the "Small file size" option is available to you. The file becomes smaller, but also blurrier. With a paid plan, you can choose "Best quality," and the result looks significantly better. Select the appropriate option and then click on "Export" so that the download starts.

Before you export, it is worth taking a look at the frames. Each frame is saved as its own page during the PDF export. If your board contains many empty frames, this results in an unnecessarily large number of empty pages. Look at the frames, remove the ones you no longer need, and keep only the important areas.

But what happens if there is no frame at all? Then there are only objects spread across the canvas, and the PDF export does not work, because Miro needs a frame as a basis. In this case, simply create a frame using the corresponding function. You can mark exactly the area you want to export. With multiple frames, you accordingly get multiple pages in the PDF.

Once you have set the frame, you start the PDF export again and save the file on your computer. You now get a useful PDF file that shows exactly the area you marked.

One point shouldn't surprise you: in the free version, the Miro logo appears at the bottom right of every page, whether in landscape or portrait format. Theoretically, you could cover it up, for example with an image editing program. Whether that is legally permissible cannot be said across the board. It is best to check the terms of use before you do something like that.

If you need an image instead of a PDF, for example for a presentation slide or a blog post, then you choose the "Save as image" option in the export menu. Here too you need a frame, because even if you already have a frame, you have to define a separate section for images. Mark the desired area and confirm it.

With the image export as well, a restriction applies in the free version: you can only choose the smallest size. Vector graphics or other special formats are not available. The result is an image file of the marked area. If you zoom in, however, it looks blurry. If you need a sharp result, use the PDF or the full version.

With that, you have completed the export. Always pay attention to which format you need for which purpose, and briefly check the file after downloading.

Handling the limitation of the free version correctly
Exporting is particularly important in the free version. There, the number of editable boards is limited. As soon as you create more than three boards, the oldest board is put into view-only mode. You can still open it, but you can no longer change anything on it.

This results in a simple strategy. Keep an eye on the number of your active boards and, if possible, work in one board until it is finished. Save interim versions as an image or PDF along the way. That way, you keep a version even if the board can no longer be edited later. When you store a file as a backup, you also create a snapshot that you can return to at any time.
This completes the cycle of sharing, saving, and exporting. Anyone who goes through these steps regularly won't lose any ideas and can pass on or document their work at any time.
Summary ??? Sharing and Exporting a Miro Board: Guide for PDF, Image, and Link
You can share your Miro board in several ways. Via "Share," you invite people by email and set their permissions. With a link, you can reach larger groups, and you decide whether the link is for viewing only or also for editing. Miro saves automatically, and you can find older versions via the History. For a local backup, you use the export. Depending on your needs, you can choose CSV, template, PDF, or image. For PDFs, you need at least one frame. In the free version, quality and formats are limited, so you should back up interim versions regularly before older boards switch to view mode.


