
An empty whiteboard can seem intimidating at first glance, especially if you have only worked with pen and paper so far. This guide walks you step by step through creating your first board in Miro. You will learn how to create a board, name it and give it an image, how to move around the canvas, and how to select, edit, group and lock objects. All you need is a Miro account and a few minutes of time.
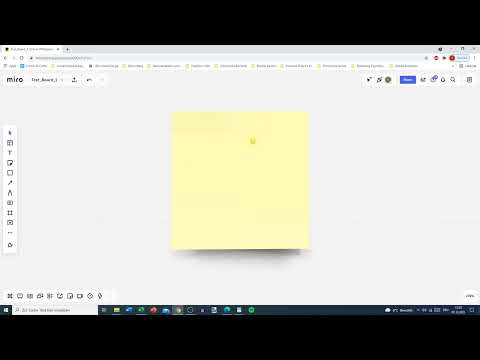
The video is only loaded from YouTube when you play it – data (including your IP address) is then transmitted to YouTube/Google. More in the privacy policy
Key Takeaways
- You start a new board using the blue "New board" button.
- In the free version, only three boards remain permanently editable. If you create another one, the oldest of these boards is automatically set to view-only mode.
- With the "Show when creating" setting, you can hide the template suggestions when creating a board.
- Title, description and cover image can be set directly in the board. Square images are displayed most cleanly.
- You can zoom with the mouse wheel, via the percentage display at the bottom right, or with the "Fit to screen" function.
- With selection by frame, the Shift key, or grouping, you can edit several objects at the same time.
- With "Ctrl + Z" (on Mac "Command + Z") you undo changes.
- With the hand tool, you move the visible screen area without accidentally changing objects.
1. Create a new board
You get started in the Miro overview. There you will find the blue "New board" button at the top. One click on it immediately opens an empty board. Alternatively, you could also select a template right away, which we will come back to later. To begin with, the empty board is completely sufficient.

2. Understand the limitation of the free version
If you have already created several boards, a notification may appear. In the free version of Miro, only three boards remain permanently editable. As soon as you create another one, the oldest of the editable boards is set to "View only" mode. It can then only be viewed, not modified. When using the free version, therefore, plan deliberately which boards you want to keep long term.

3. Manage boards in the overview
Before you dive deeper, it is worth taking a look at the overview. There you can rename an existing board, duplicate it, add details, open it in a new tab, or delete it. Sharing is also already possible in the overview. So you do not have to open the board first to do these tasks. For a joint project, you can additionally create a Shared Board.

4. Hide template suggestions
By default, Miro suggests various templates when you create a board. If this bothers you, open the settings in the dialog and uncheck the box at the top right next to "Show when creating". The next time you create a board, you will get an empty canvas right away. The templates are not lost as a result: you can find them again at any time in the toolbar on the left at the second item.

5. Set the title and description
Now it is time to design your first board. Click on the default title "Untitled" at the top left. Then you can overwrite it. In this tutorial, the board is called "Test Board 1". Afterwards, you can use the description field to add a short text explaining the purpose of the board. Especially with multiple boards, this helps you keep track.

6. Add a cover image
On the left side of the title area, there is an option to add an image. One click on it opens your file folder, for example the desktop. Select an image file there, and it will be inserted. Be sure to use a square format. Otherwise, the image will be cropped in an unattractive way, which is undesirable in most cases.

7. Zooming the Board and Adjusting the View
Once you leave edit mode by clicking with the mouse outside the area, you can work with the board. To zoom, scroll the mouse wheel forward to get closer and backward to zoom out. Alternatively, click the percentage display at the bottom right. With the plus or minus sign, you change the zoom level in steps of 25 or 50 percent. The "Fit to screen" option adjusts the view so that all objects fit on your screen. This is especially helpful if you have spread out many notes.
8. Selecting and Editing Objects
With a click on an object, you can edit it. In the toolbar on the left, you first choose what you want to do, such as inserting an arrow or writing a text. If you want to select several elements at once, click on an empty spot, hold down the left mouse button, and drag a frame around the objects. All elements contained within it will then be selected. With the Delete key on the keyboard, you delete them.

9. Undoing Changes
If you deleted something you wanted to keep, the key combination "Ctrl + Z" or, on a Mac, "Command + Z" helps. Each press undoes one step. Alternatively, you will find the arrow buttons for going back and forward in the menu bar at the top. This way, you can also undo a deletion by going one step forward and back.
10. Editing Multiple Objects Together
Hold down the Shift key while clicking and click on additional objects one after another. These will be linked together and can then be moved, deleted, or edited together. Grouping is particularly handy: Select the objects and group them using the corresponding icon. You then move grouped elements as a unit. If you want to undo the grouping, simply split the elements up again.
11. Locking and Unlocking Objects
If an object should not be changed by accident, you can lock it. After that, it can no longer be edited. To unlock it, press and hold on the locked object until the lock is released. Afterwards, you can group the individual elements again or edit them individually.
12. Navigating with the Selection Tool and the Hand
At the top of the menu bar, the selection tool, the cursor icon, is usually active. With it, you can click on and edit objects. If you switch to the hand, you can move the entire screen section by dragging with the left mouse button held down. You can still zoom with the mouse wheel. Once you have set the view the way you want, switch back to the cursor to edit objects again or add new ones.
Summary – Creating a Miro Board: Your First Whiteboard Project Step by Step
You have now learned the basics of Miro. You can create a new board, understand the limitations of the free version, set a title, description, and image, and zoom the view. You also know how to select, delete, group, and lock objects, as well as undo changes. With the hand tool, you navigate confidently across the entire canvas. In the next step, it is worth taking a closer look at the toolbar on the left side, which offers you many more possibilities for your content.
FAQ
How many boards can I edit in the free version of Miro?In the free version, three boards are permanently editable. If you create another one, the oldest of the editable boards is set to "View only" mode.
How can I prevent templates from being suggested every time I create a new board?When creating a board, uncheck the box next to "Show when creating" at the top right. You can still find the templates later in the toolbar on the left.
Which image format is suitable for the cover image?A square image is ideal, as otherwise it will be cropped unattractively.
How do I zoom in a Miro board?You can use the mouse wheel, click on the percentage display at the bottom right, or use the "Fit to screen" option.
How do I undo an action?Press Ctrl + Z, on a Mac Command + Z, or use the arrow buttons in the top menu bar.
How do I select multiple objects at the same time?Drag a frame around the objects with the left mouse button held down, or hold down the Shift key and click on the individual elements.
How do I move the screen section without changing objects?Switch to the hand tool and drag across the canvas with the left mouse button held down.


