Forms are a central element in Access, as they provide a user-friendly interface to interact with data. In this tutorial, I will show you how to create your first form using the form wizard in Access. You will learn how to enter data, edit data, and present it attractively. Let’s dive right in and explore the possibilities!
Main insights
- Accessing the form wizard
- Selecting data sources for your form
- Designing the layout of your form
- Customizing controls and data fields
Step-by-step guide
First, it’s important to open Access and load your database, here the "Limousine Database." You can now use the form wizard to create a simple form.

First, click on the forms section in the menu. Here you will find the form wizard, which will guide you through the process of creating a form.
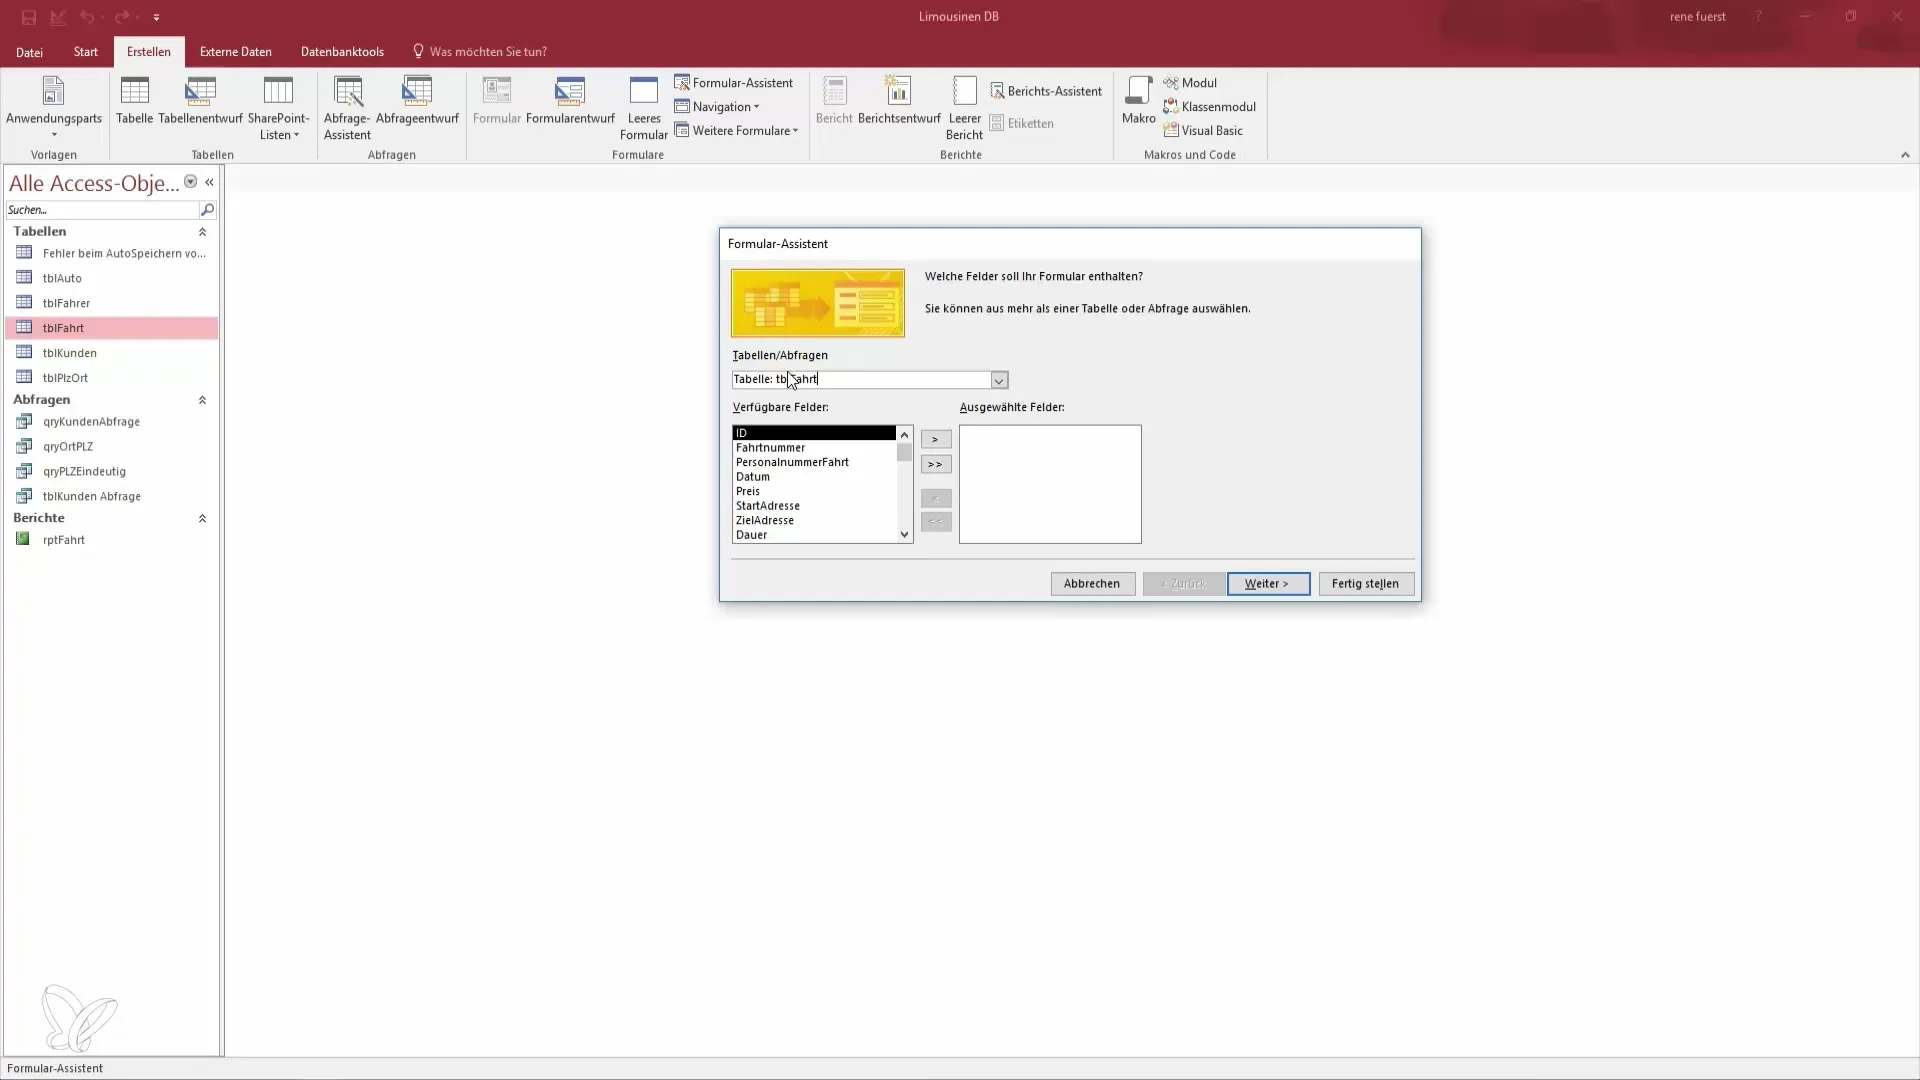
You will now be asked which table or query you want to use. Select the appropriate data source to work with the necessary information. You can choose not only tables but also queries that provide data-driven information.
Once you have selected your table or query, you can include all fields in the form by clicking on the double arrow. Consider whether you really need all fields or if you want to leave some out. However, it is helpful to use all fields to start with.

Now you have the opportunity to determine the layout of your form. Choose whether the form should be single-column or tabular. For most applications, the single-column layout is more advantageous as it enhances usability. This layout allows users to clearly recognize their entries.
After selecting the layout, you can give your form a title. You can use a simple notation or a full description. When you’re finished, click “Finish.”
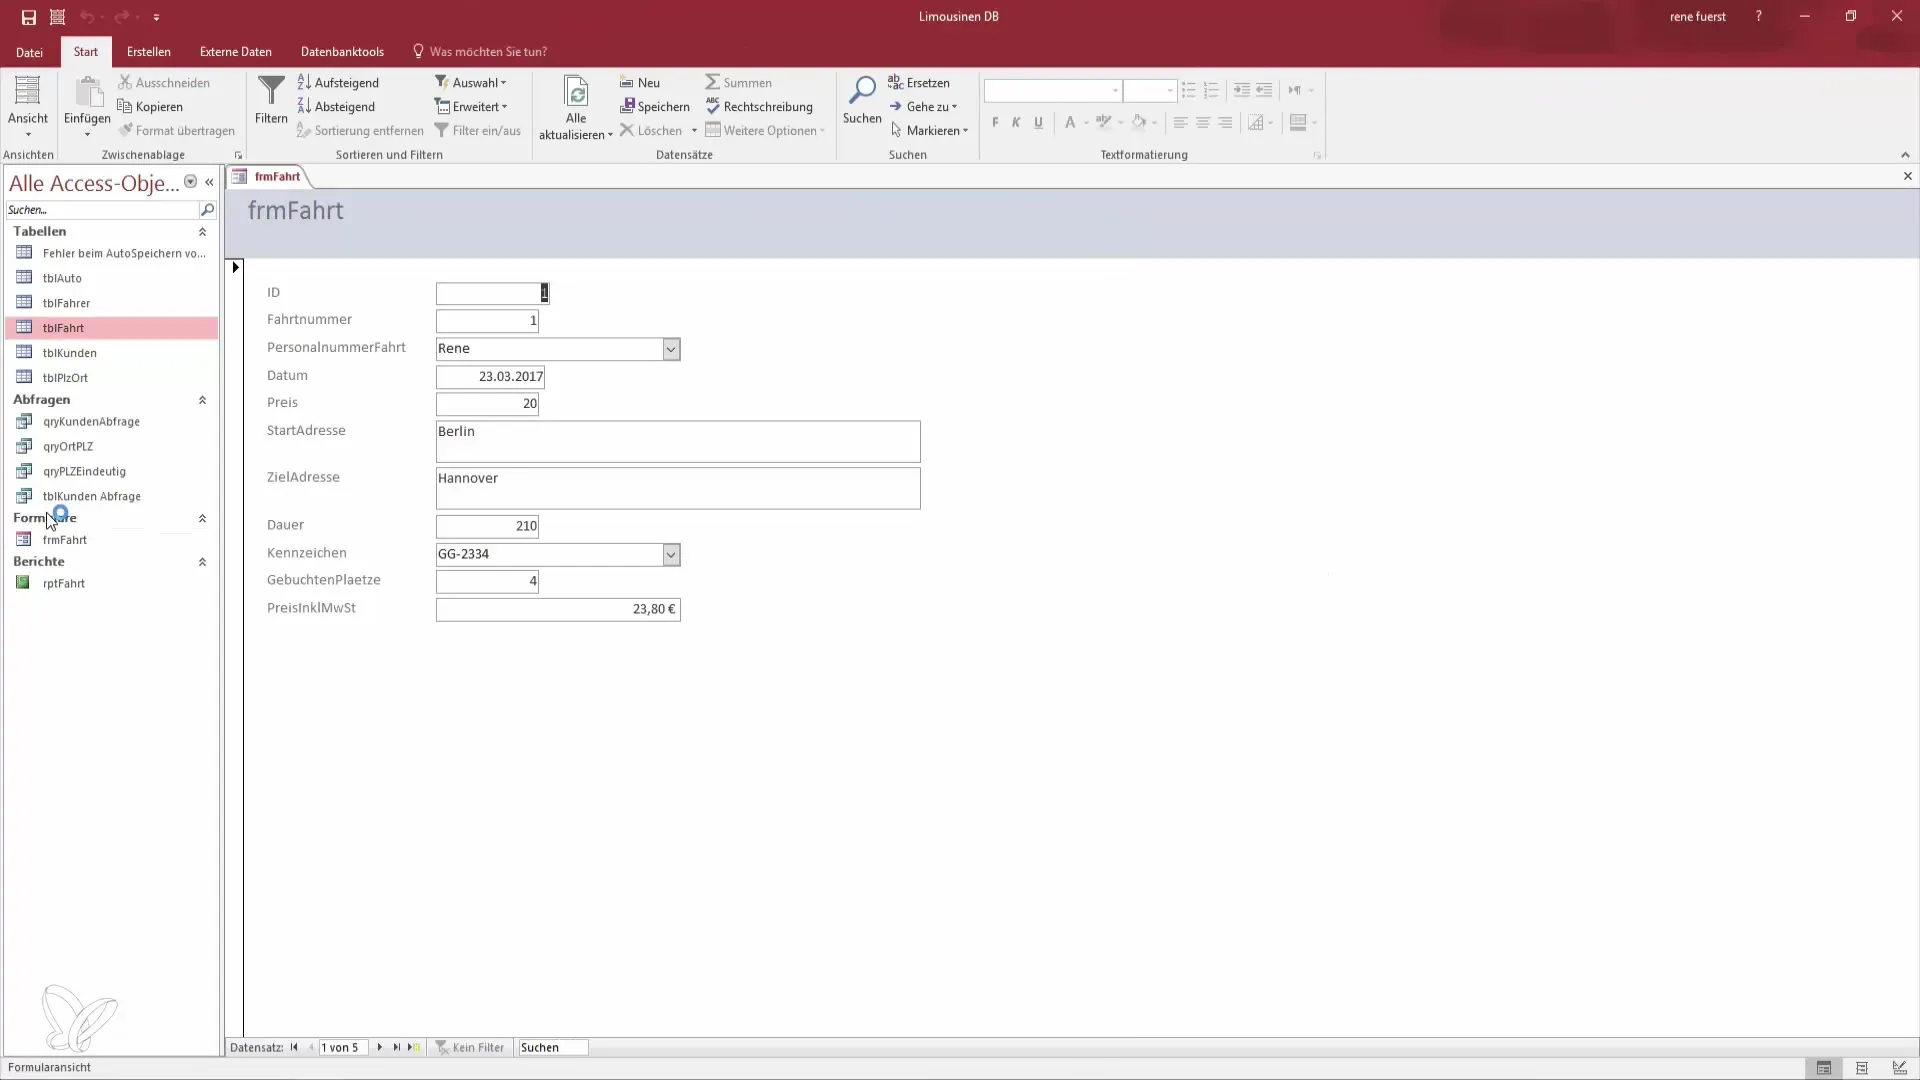
The form will now be created, and you can see that it already looks appealing. In the view, the various fields appear, such as ID, trip number, and date, as well as dropdown fields and other elements that you have set up in the database.

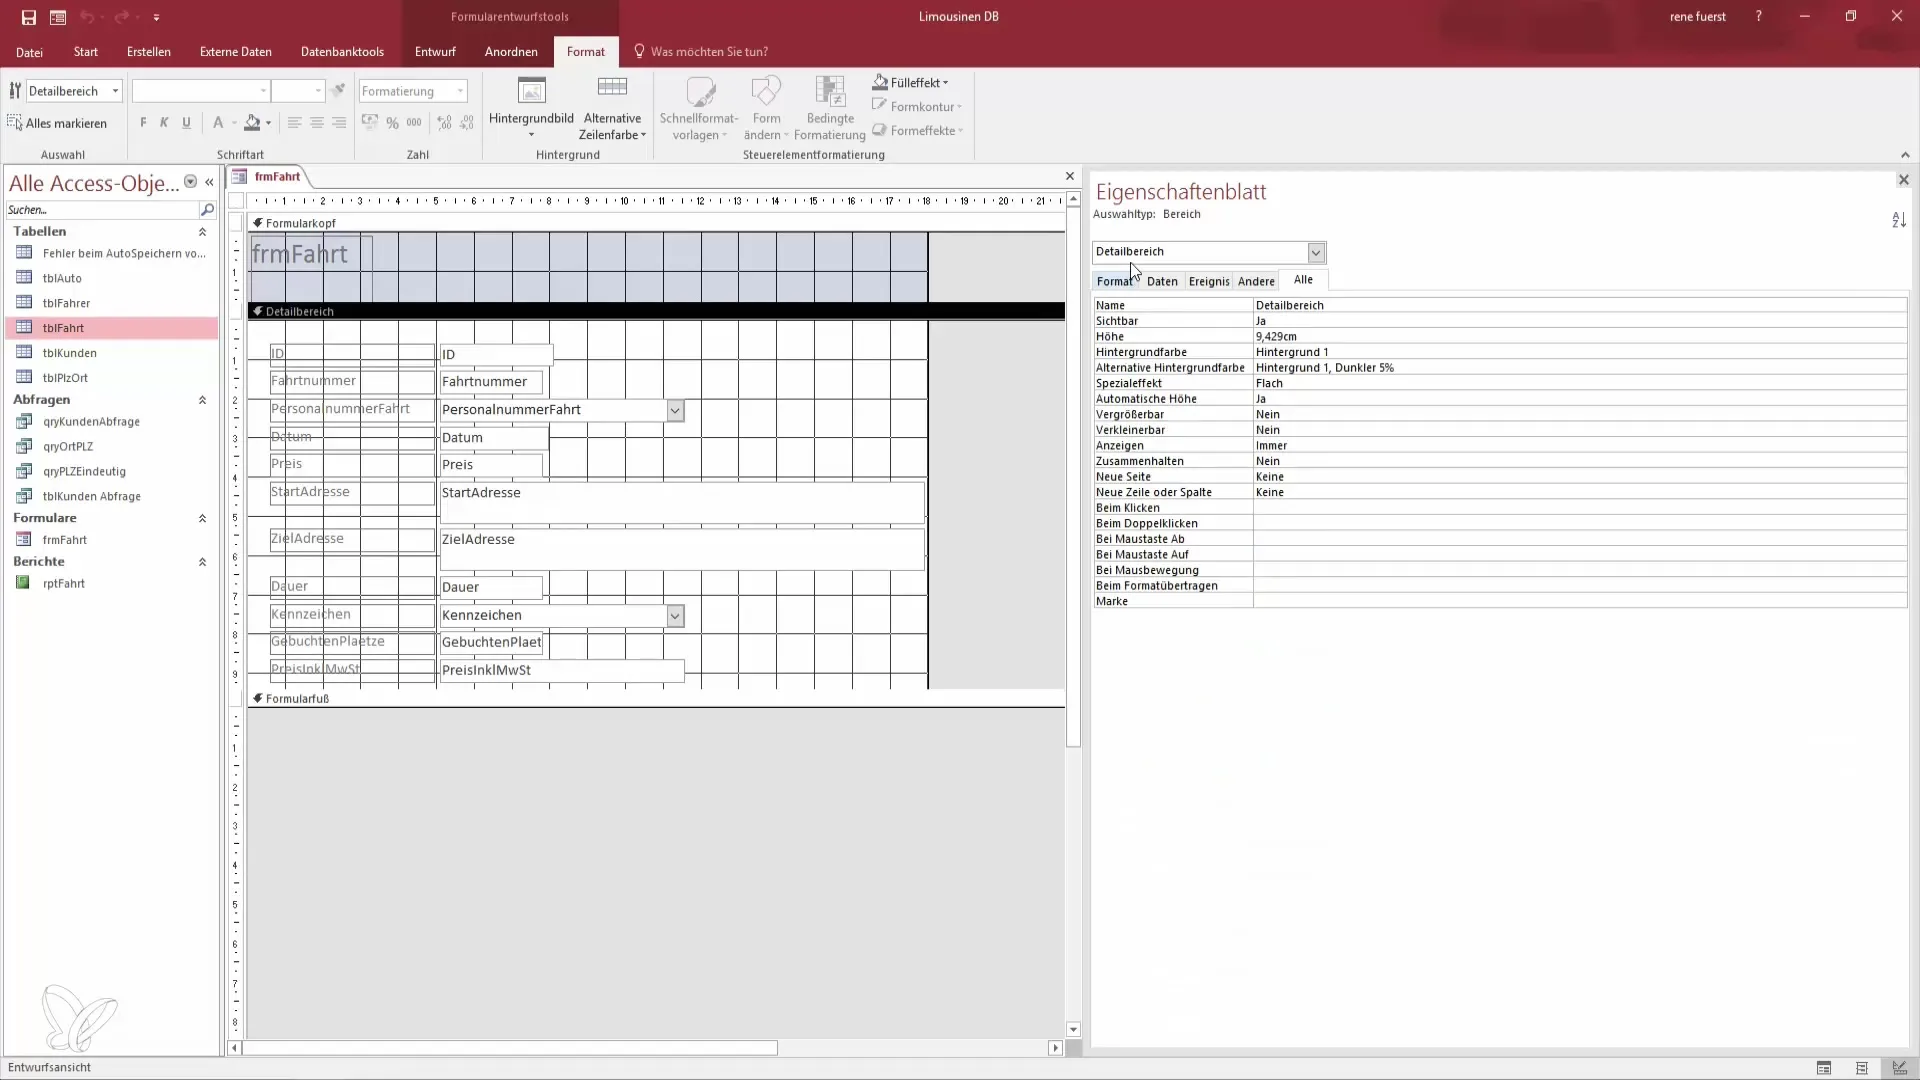
It is advisable to adjust the layout of your form as needed. Through the view, you have the option to switch between different editing modes and design the layout according to your preferences.
If you find the design important, you can also change the detail view or the header and footer of the form. Sometimes it is useful to edit these elements, especially if you plan to print the form.

Additionally, you can quickly hide or show your changes by right-clicking on the background of the form, depending on your needs and preferences.
Now it’s time to test your form. The form typically displays only one record at a time. Make sure everything is working as it should. If necessary, you can return to the design view to make changes.
With this, you have learned how to create a simple form in Access and what options are available to present your data attractively. For further possibilities of beautifying and better utilizing the program features, I will be available in the next lesson.
Summary – Creating Your First Form in Access
You now have a basic understanding of creating a form in Access. This lesson has shown you the steps you need to follow to develop and design a form using the form wizard.
Frequently Asked Questions
Why should I use forms in Access?Forms provide a user-friendly interface for entering, editing, and displaying data in a database.
Can I skip fields while creating the form?Yes, you can select the fields you want to use in the form either completely or partially.
How can I adjust the layout of my form?Through the form wizard, you will be asked about the layout. You can choose between single-column or tabular layouts and later make fine adjustments in the design.
Can I get help for further designing my form?Yes, Access provides help documents and tutorials that can assist you in working with form elements.
How can I ensure that my form always displays only one record?Typically, a form in Access displays only one record at a time by default. For multiple records, you can adjust the view to navigate between them.


