Forms in Microsoft Access provide an important way to capture and display data. When the forms are extensive, the arrangement of various input fields can quickly become confusing. An effective way to save space and organize the user interface is through tabs. This feature allows you to organize information into different categories, ensuring that important data is not overloaded at first glance. In this guide, I will explain how to insert tabs into your forms to create an engaging and functional user experience.
Key insights
- Tabs help present data in a clear format.
- Information can be divided into different categories and displayed in separate tabs.
- This feature ensures that the form does not appear overloaded and only the most necessary data is in view.
Step-by-step guide
Follow these steps to create tabs in your Access form:
Step 1: Open Design View
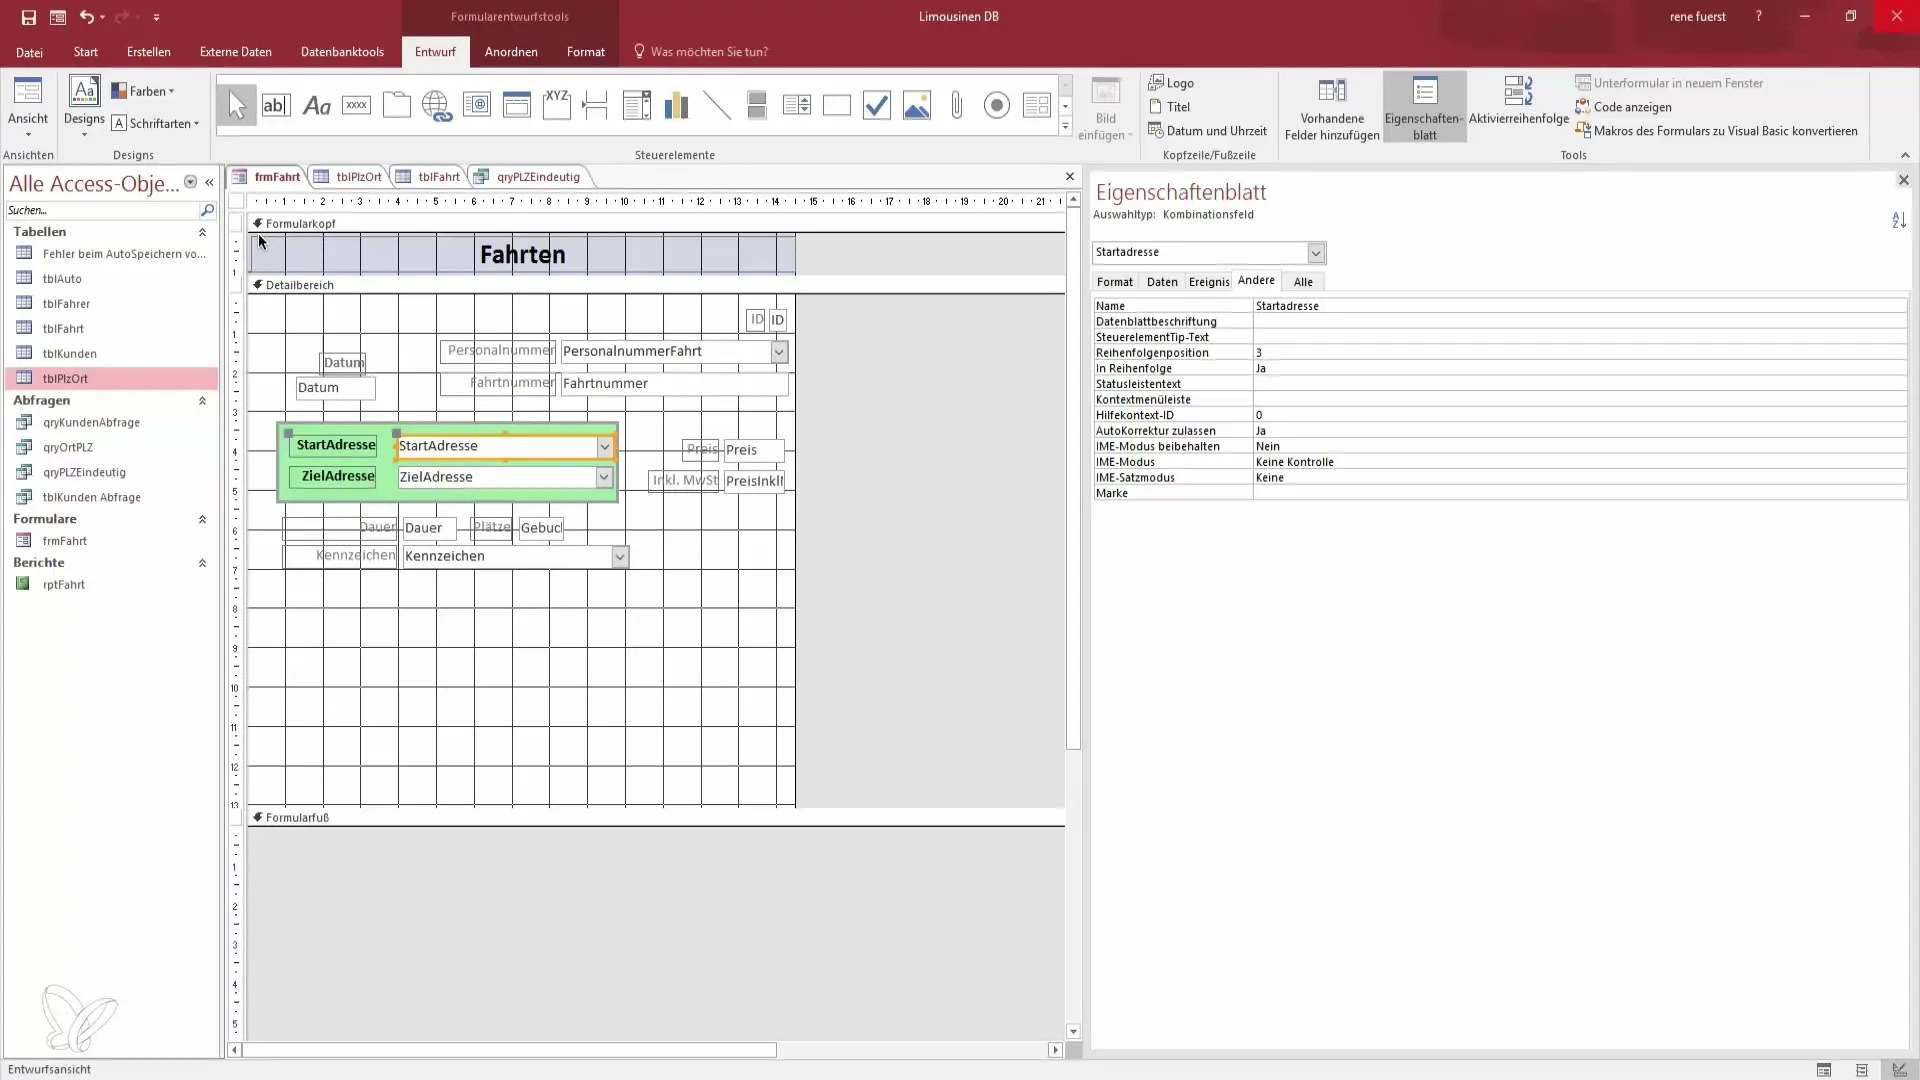
First, make sure you are in the design view of your form to make changes. To do this, click on the appropriate form and select Design View.

Step 2: Select Controls
In the controls area found in design view, you will find various options. Search for the control for tabs. This feature is important for the later structuring of your data.
Step 3: Add Tabs
After selecting the tab control, drag it into your form area and determine the size. Make sure there is enough space for the tabs. The tabs should be large enough to allow for easy navigation.
Step 4: Add Information to the Tabs
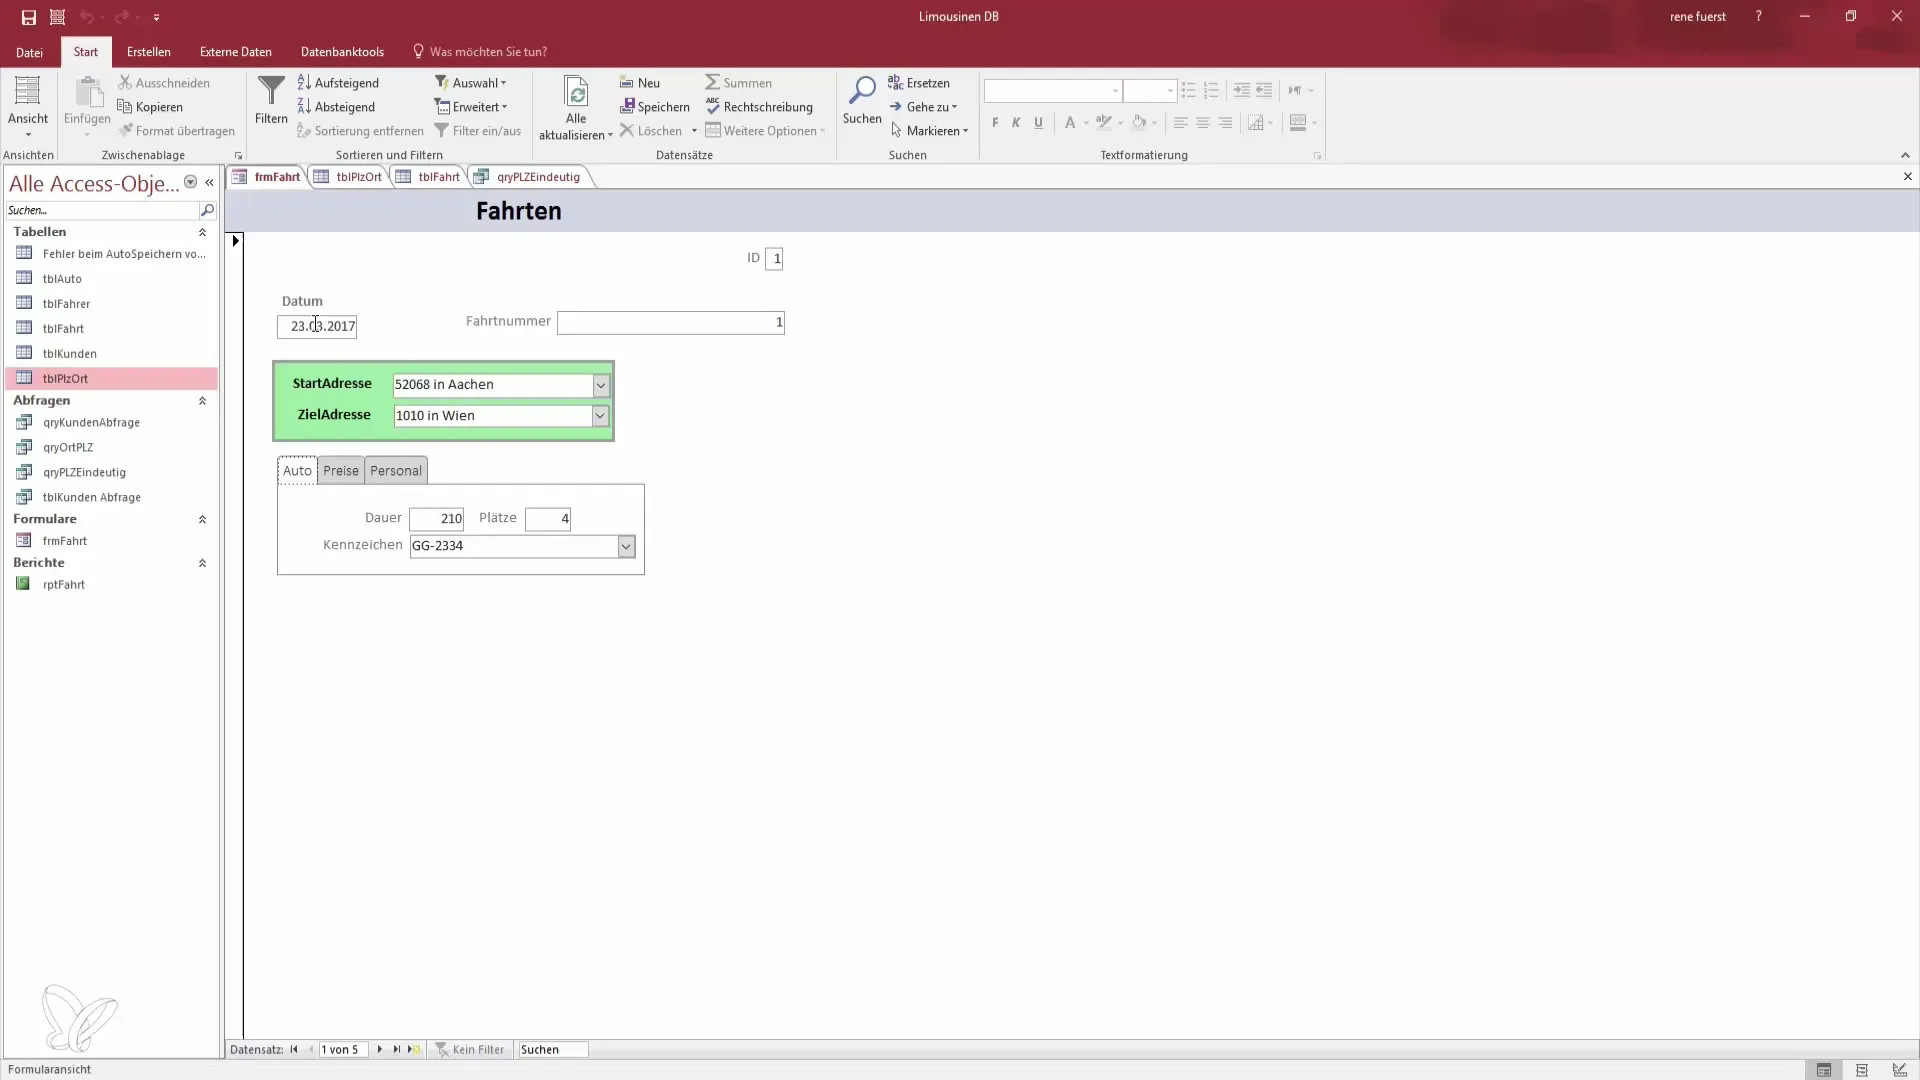
You can now proceed to add content to the individual tabs. Click on the tab, and place the relevant information that is meant for that tab. For example, you can structure information about a car or the price list into separate tabs.
Step 5: Insert Pages for Additional Categories
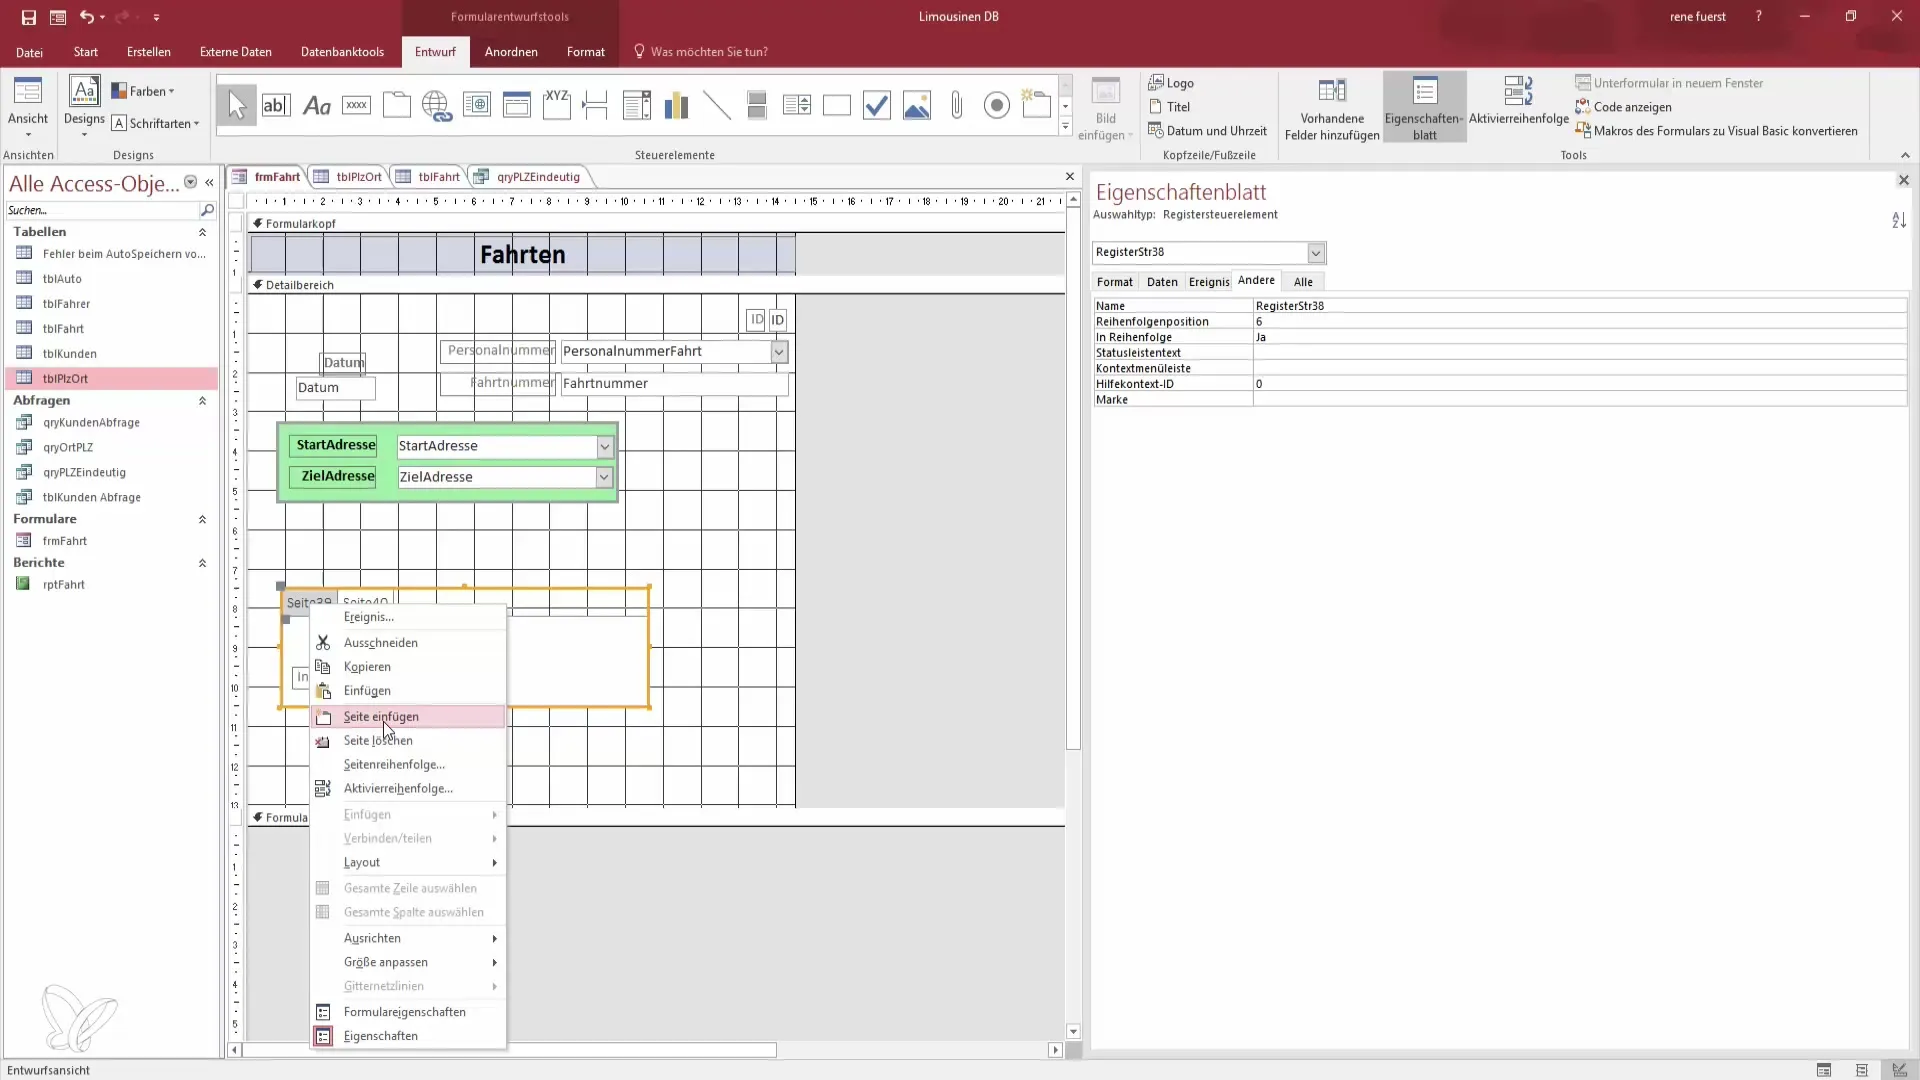
If you have multiple categories, right-click on the tab to add new pages. You can decide which information should be displayed in each tab. This helps to maintain an overview.

Step 6: Adjust and Move Contents
You can now adjust the inserted information. If you want to add example prices or other details, cut the respective text or controls and paste them into the new tab.
Step 7: Test the User Interface
After you have added all the information, test your form in view mode. Check if the tabs work properly and if all information is displayed as desired. Note that during navigation between tabs, the mouse may need to be used, which is worth considering.

Summary - Tabs in Access for Clear Form Design
Implementing tabs in your Access forms provides an excellent way to present extensive data clearly and efficiently. By dividing it into different categories, the form becomes not only clearer but also more user-friendly. Remember to regularly test the user interface to optimize the user experience.
Frequently Asked Questions
How do I add a tab to my Access form?Select the tab control in design mode and insert it into your form area.
Can I customize the contents of the tabs?Yes, you can customize the content in each tab and also add or remove pages.
What should I do if I want to add additional information to the tabs?Select the tab, cut the desired information, and paste it into the tab.
Do I need to use a mouse to navigate between the tabs?Yes, during input, you might need to use the mouse to switch between the tabs.
Where can I find the function to add pages to the tabs?Right-click on the tab to see the option to add, edit, or delete pages.


