In Microsoft Access, you have the option to not only store data but also format it in various ways. By using tables, you can define general properties that directly affect the appearance of the data. This can greatly enhance usability and make data entry easier. In this guide, you will learn how to optimally use the properties of tables in Access to get the most out of your data.
Key Insights
- Access allows customized formatting of data.
- You can consider the case sensitivity of data.
- Input formats for phone numbers and other data can be easily adjusted.
- The formatting only affects the display, not the actual data content.
Step-by-Step Guide to Table Formatting
1. Switch to Design View
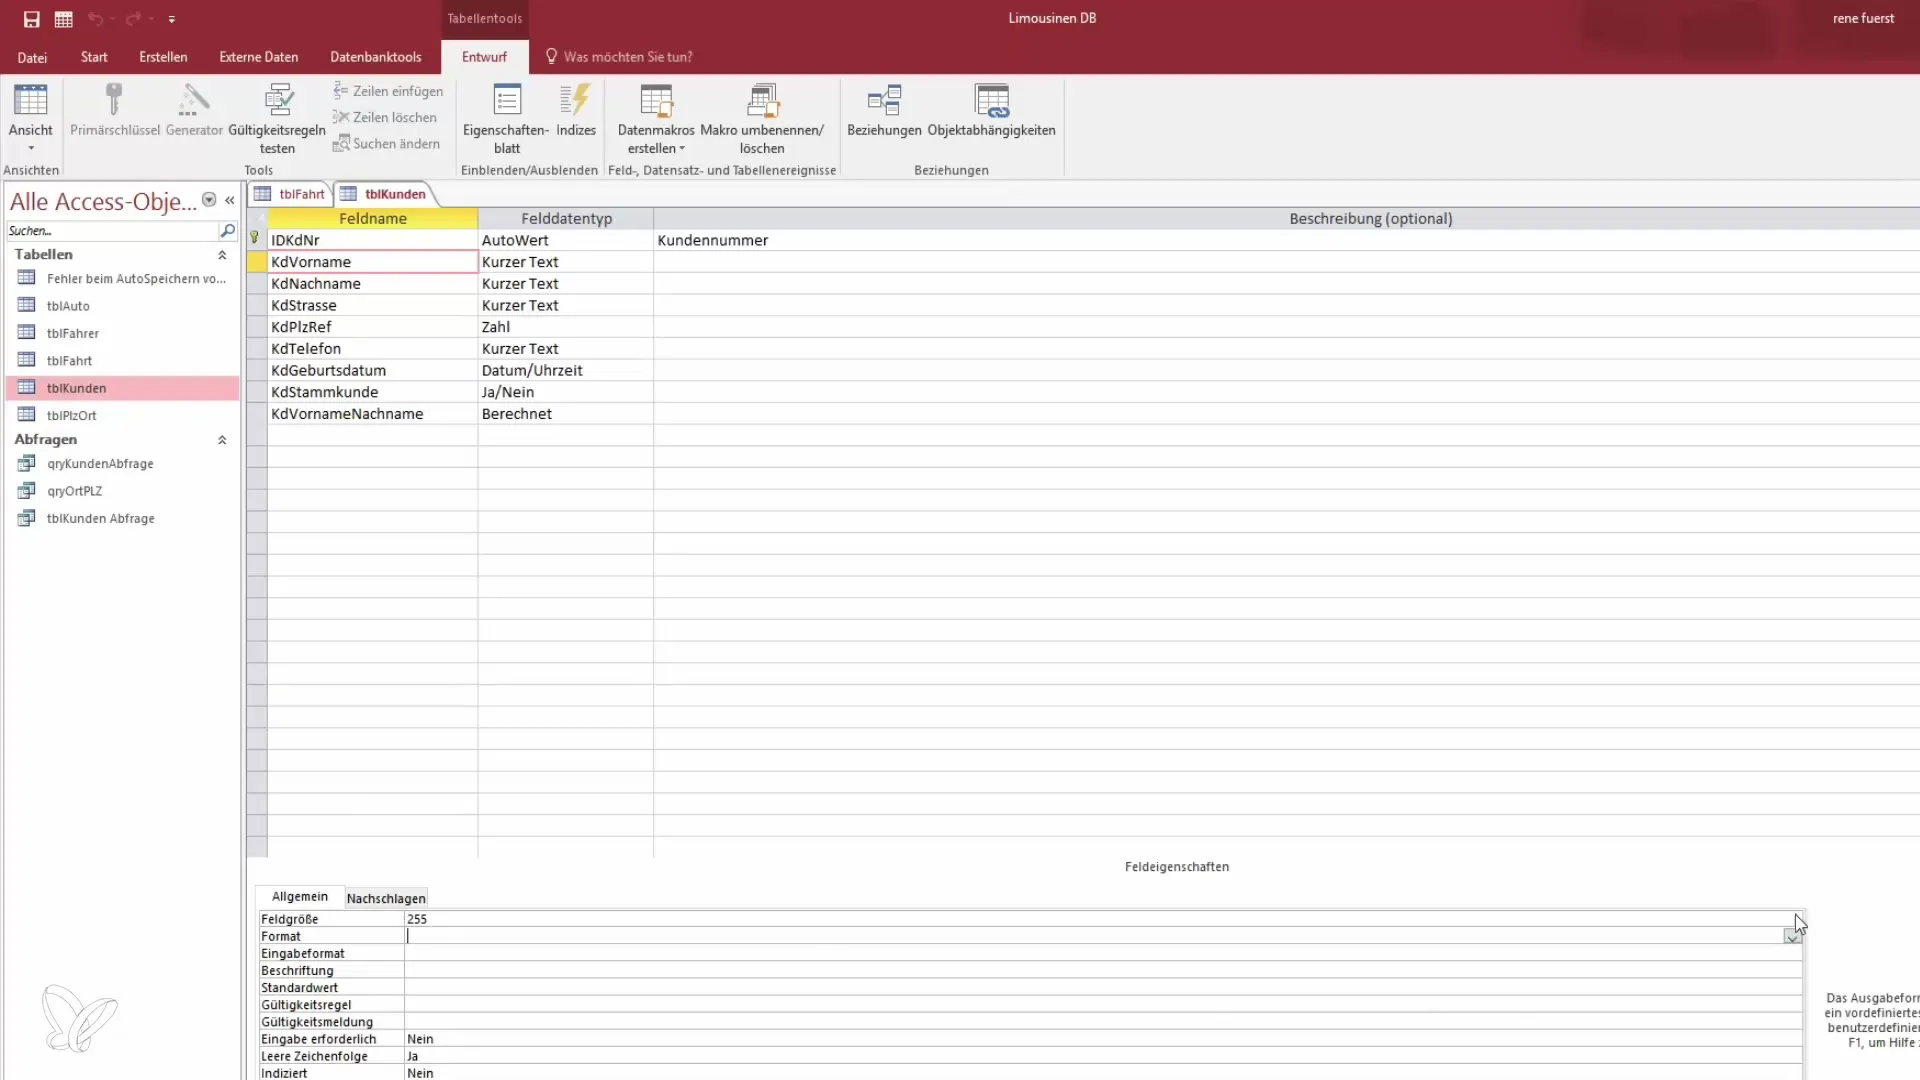
To format your table, you must first switch to Design View. Here, you can access the individual fields and edit their properties. To do this, open Access and select the desired table. Click on “Design View” to display the structure of the table.

2. Formatting Text Fields
For example, take the column “First Name”. Here you can set the display of the text under the properties in the “Format” section. Choose a format type that best suits your needs. If you want all first names to be displayed in uppercase letters, you can select the appropriate format.

3. Applying Specific Formatting
Imagine you want to apply a specific format to a name. You have the option to use characters like the "greater than" symbol and save your settings. This way, the first name will always be displayed in uppercase letters, regardless of how you enter it.
4. Additional Formatting Options
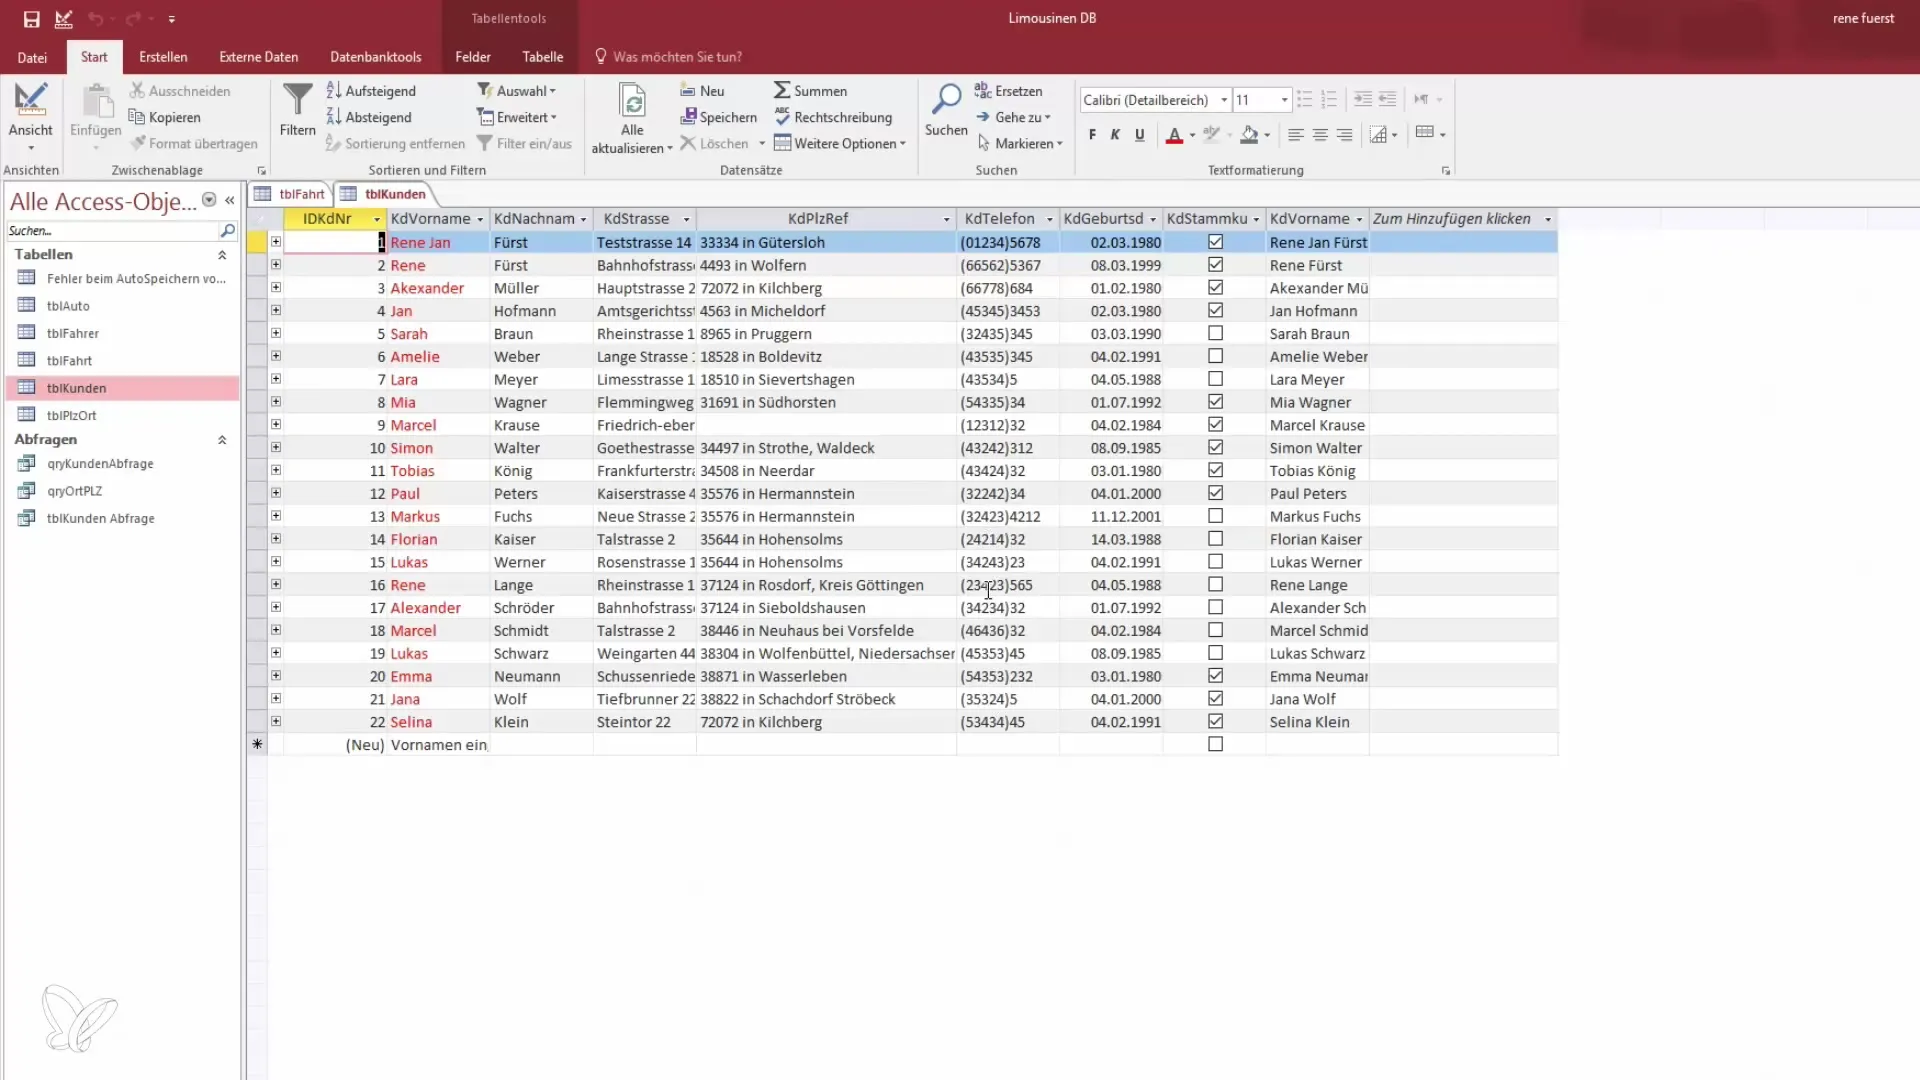
In addition to case sensitivity, the format options also allow you to define colors for displaying your text. You can easily specify these colors between square brackets. For example, if you want to use the color “Red” for the first names, just enter the corresponding format.
5. Added Value through Input Formats
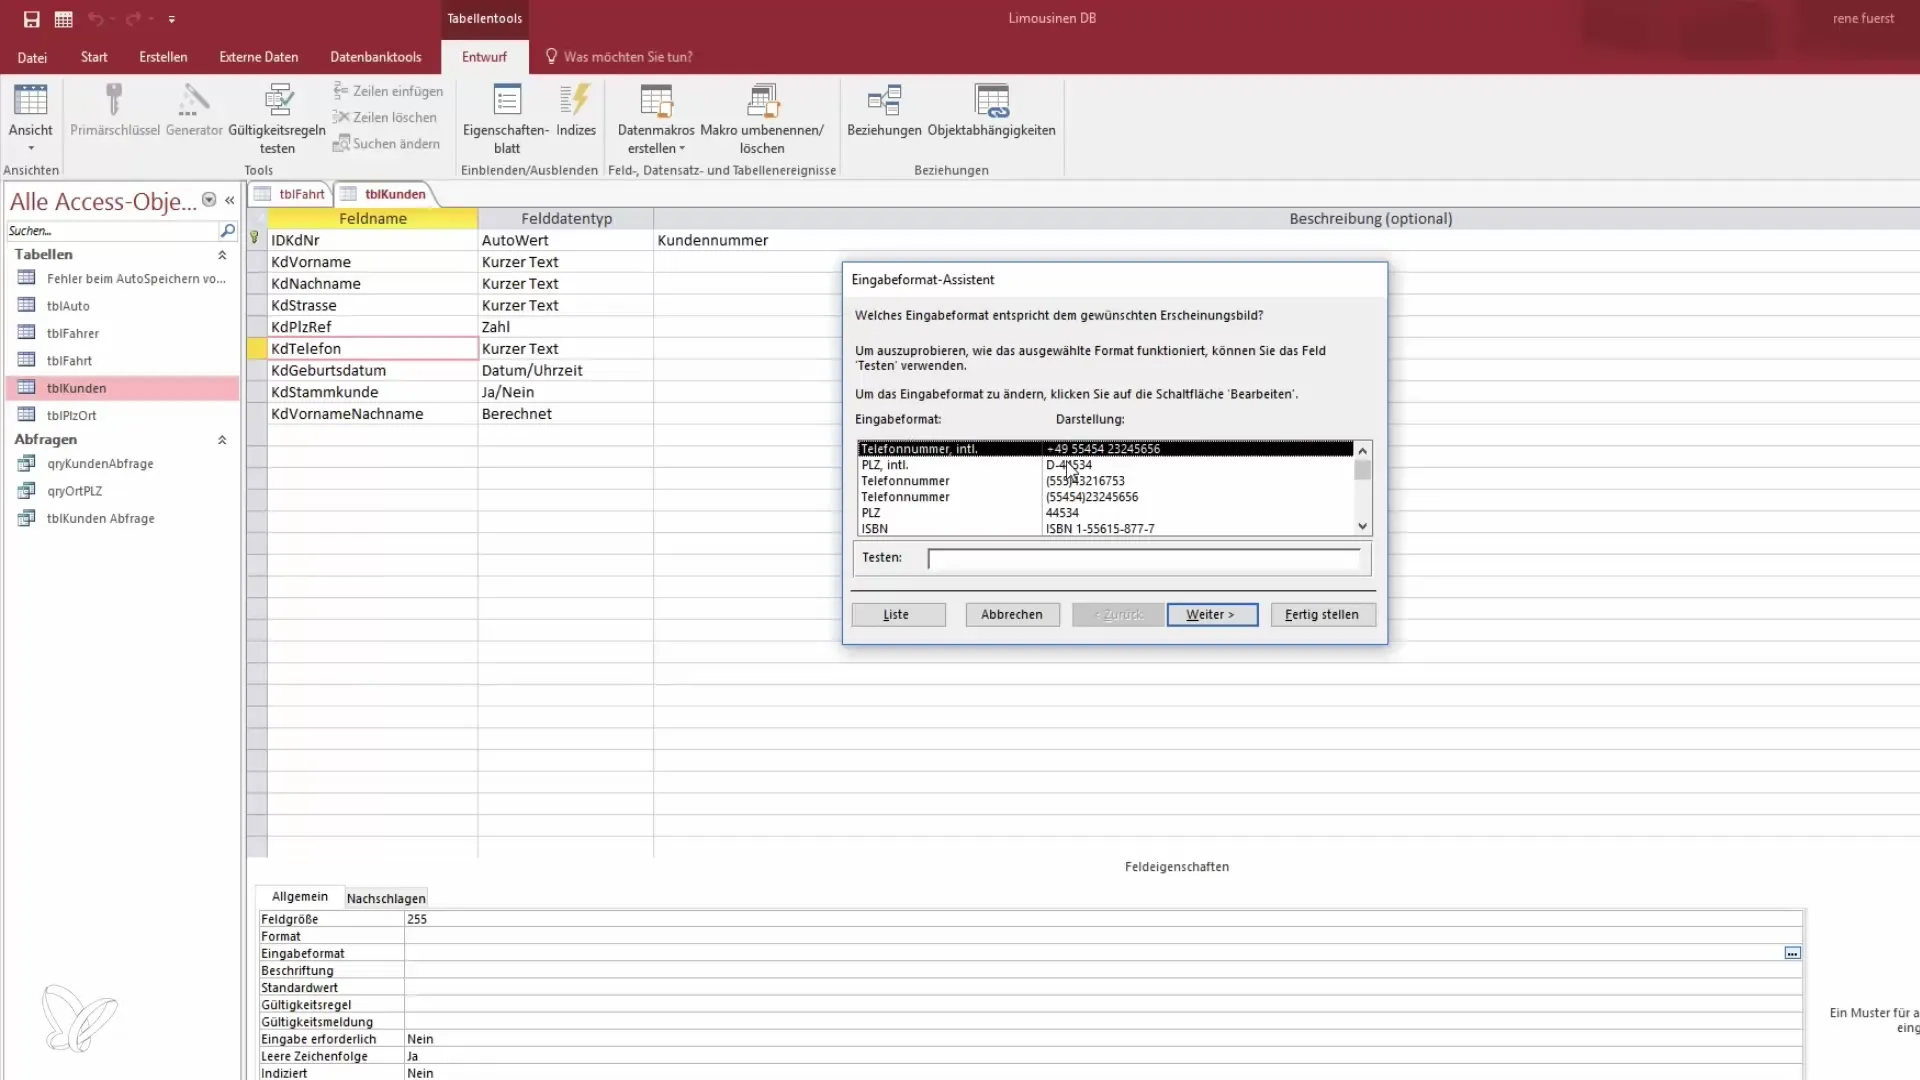
You can also define input formats that help keep the data consistent. For instance, it may be practical to set a specific format with parentheses for the area code when dealing with a phone number. You can choose from various area code formats. Save the configured parameters and see how they appear in the view.

6. Reviewing the Data Display
After you have set the desired formatting, switch back to the view. Here you will see that the inserted phone numbers are now displayed in the selected format, which improves readability and makes use easier. Click on the individual fields to ensure that the input formats have been applied correctly.

7. Adjusting the Formats
If you are not completely satisfied with the appearance, you can always switch back to Design View and adjust the settings. Here, you can not only change the text color or size but also add other visual elements to further enhance the user experience.
Summary – Become a Data Hero: Table Properties in Access
The formatting of tables in Access offers many opportunities to optimize data presentation. You have learned how to apply simple formatting like capitalization, colors, and input formats. By specifically adjusting these properties, you can greatly improve the user-friendliness of your database. Use these tips to make your data even more effective.
Frequently Asked Questions
What is Design View?Design View allows you to edit the structure and properties of table fields in Access.
How can I set the capitalization of text in Access?You can select the desired format in the format area of Design View to automatically display all entries in uppercase letters.
Can I use colors in the formatting of my table?Yes, you can set colors by specifying them between square brackets in the format area.
How do input formats work for phone numbers?You can choose a specific input format for phone numbers that ensures the numbers are entered consistently.
Will the original input be preserved if I change formats?Yes, the original input is stored in the database, while only the display is altered.


