If you work with Microsoft Access, you certainly know how important it is to present data in a structured and clear manner. Especially when you need to process many records, the right format selection can be crucial. This guide will help you create an effective continuous form that provides you with a quick overview of your records. Let's go through the steps together to create a user-friendly and informative form for your customer data.
Main Insights
- You will learn how to create a new form in Access.
- You will find out how to design a continuous form that displays a table of records.
- You can adjust the settings for the form to make it more user-friendly.
Step-by-Step Guide
Step 1: Creating a New Form
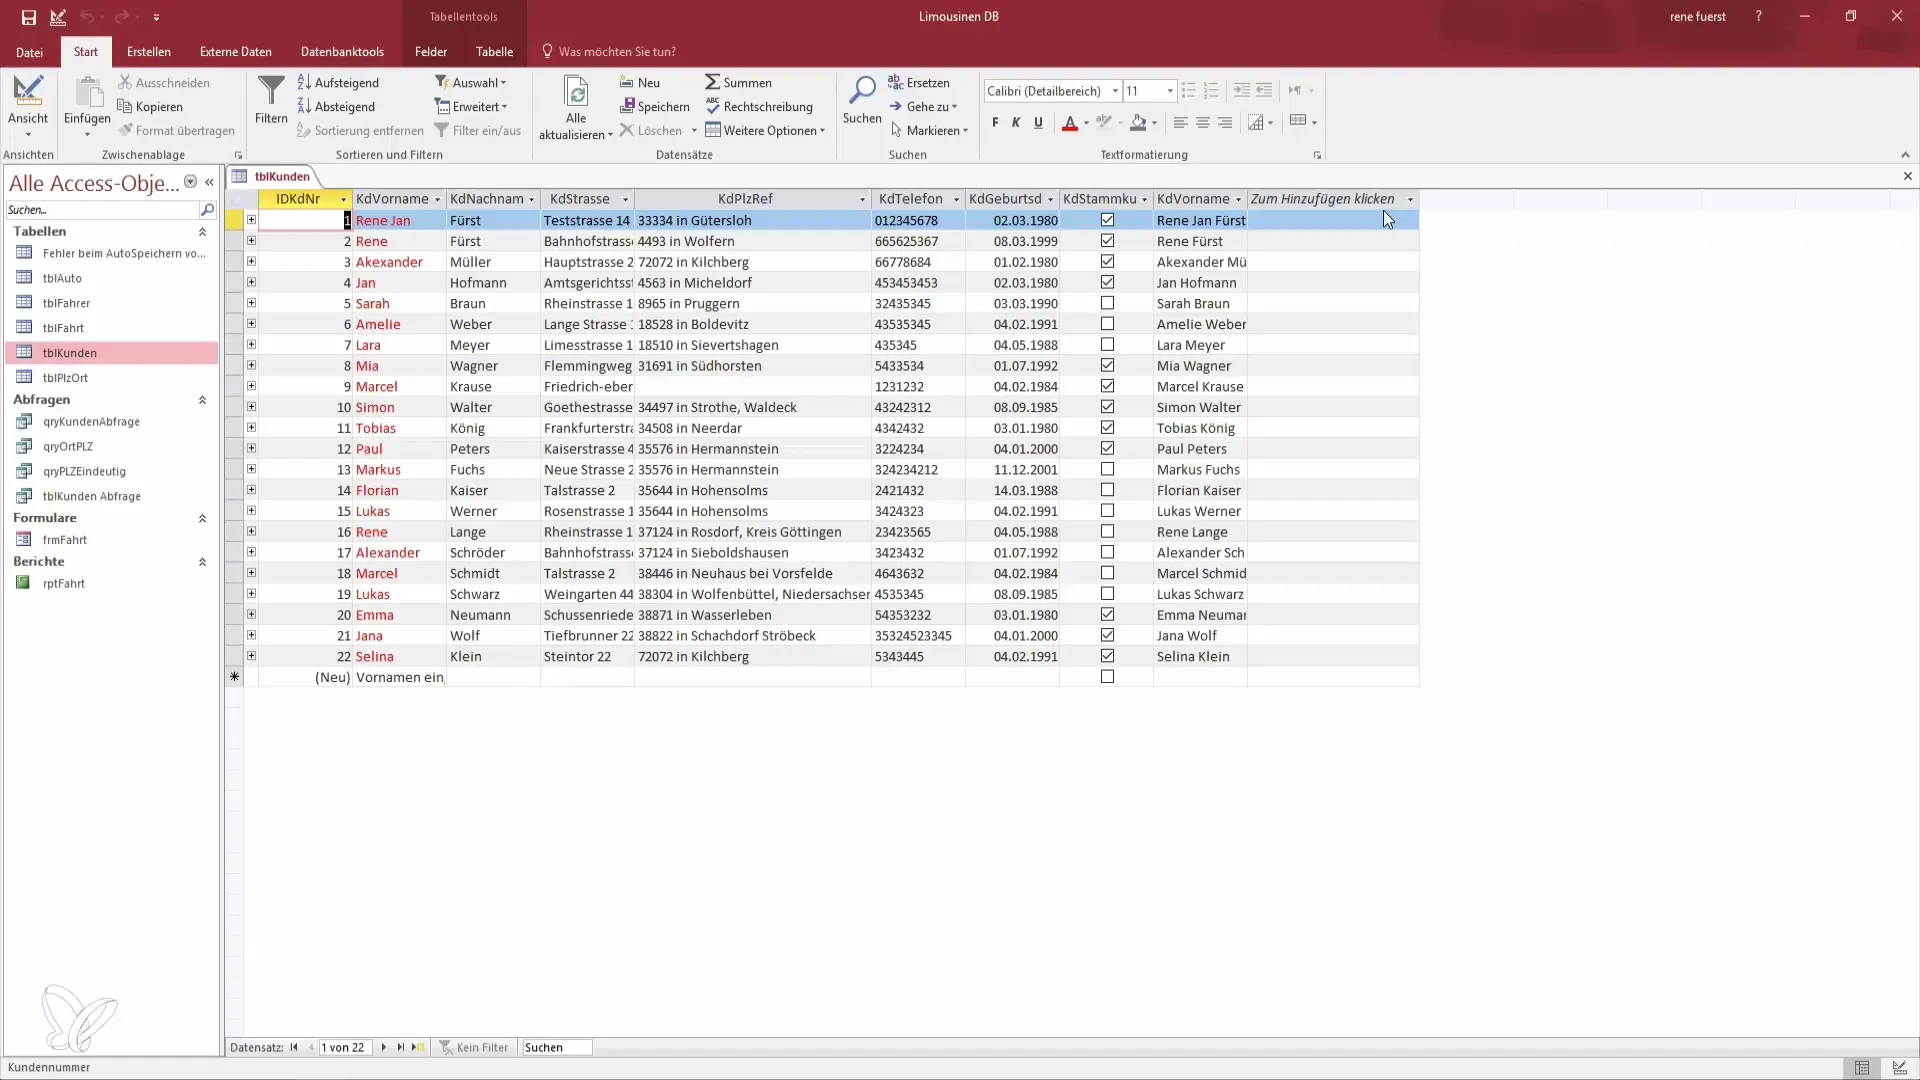
First, you need to create a new form. To do this, open the customer table in Access and choose to create a new form. Click on the relevant options in the menu.

Step 2: Selecting the Form Layout
Select the option for a blank form. This gives you the freedom to choose and design the necessary fields intentionally. This flexibility is crucial in shaping the form according to your vision.
Step 3: Adding Fields
You can now select the fields to be displayed in your form. Choose first name, last name, address, and other relevant customer information. This data is essential for identifying customers, especially regarding their reachability.
Step 4: Access Layout View
After adding the fields, switch to layout view. This allows you to get a better idea of how your form will look. You can adjust the individual elements and create an appealing visualization.
Step 5: Creating a Table
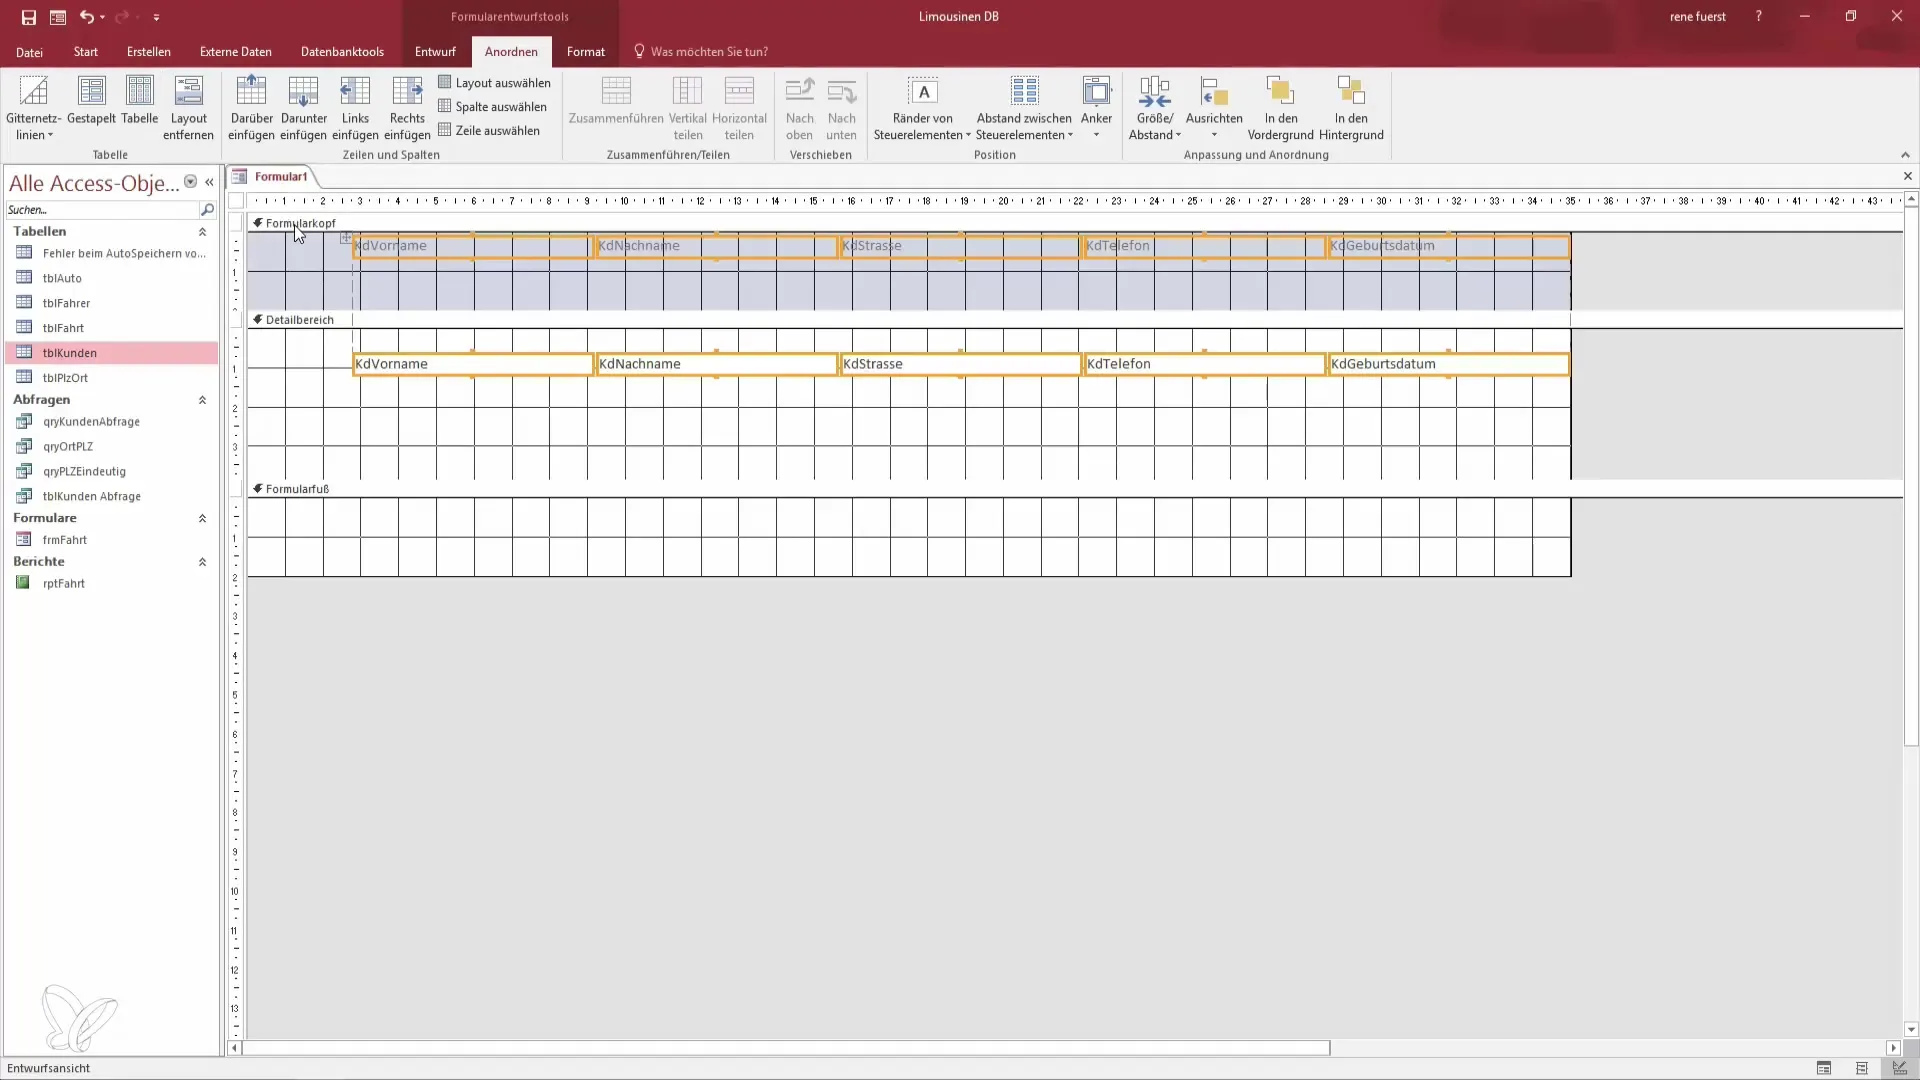
To display the data effectively, you should highlight all relevant data and format it as a table. Click on the option for table creation. Access will automatically assist you in creating the form header, detail area, and form footer.
Step 6: Adjusting the Layout
Now it's time to further refine the layout of your form. Remove unwanted elements to ensure a clear and tidy design. You can change the dimensions of individual fields to save space and improve readability.
Step 7: Adjusting the Footer
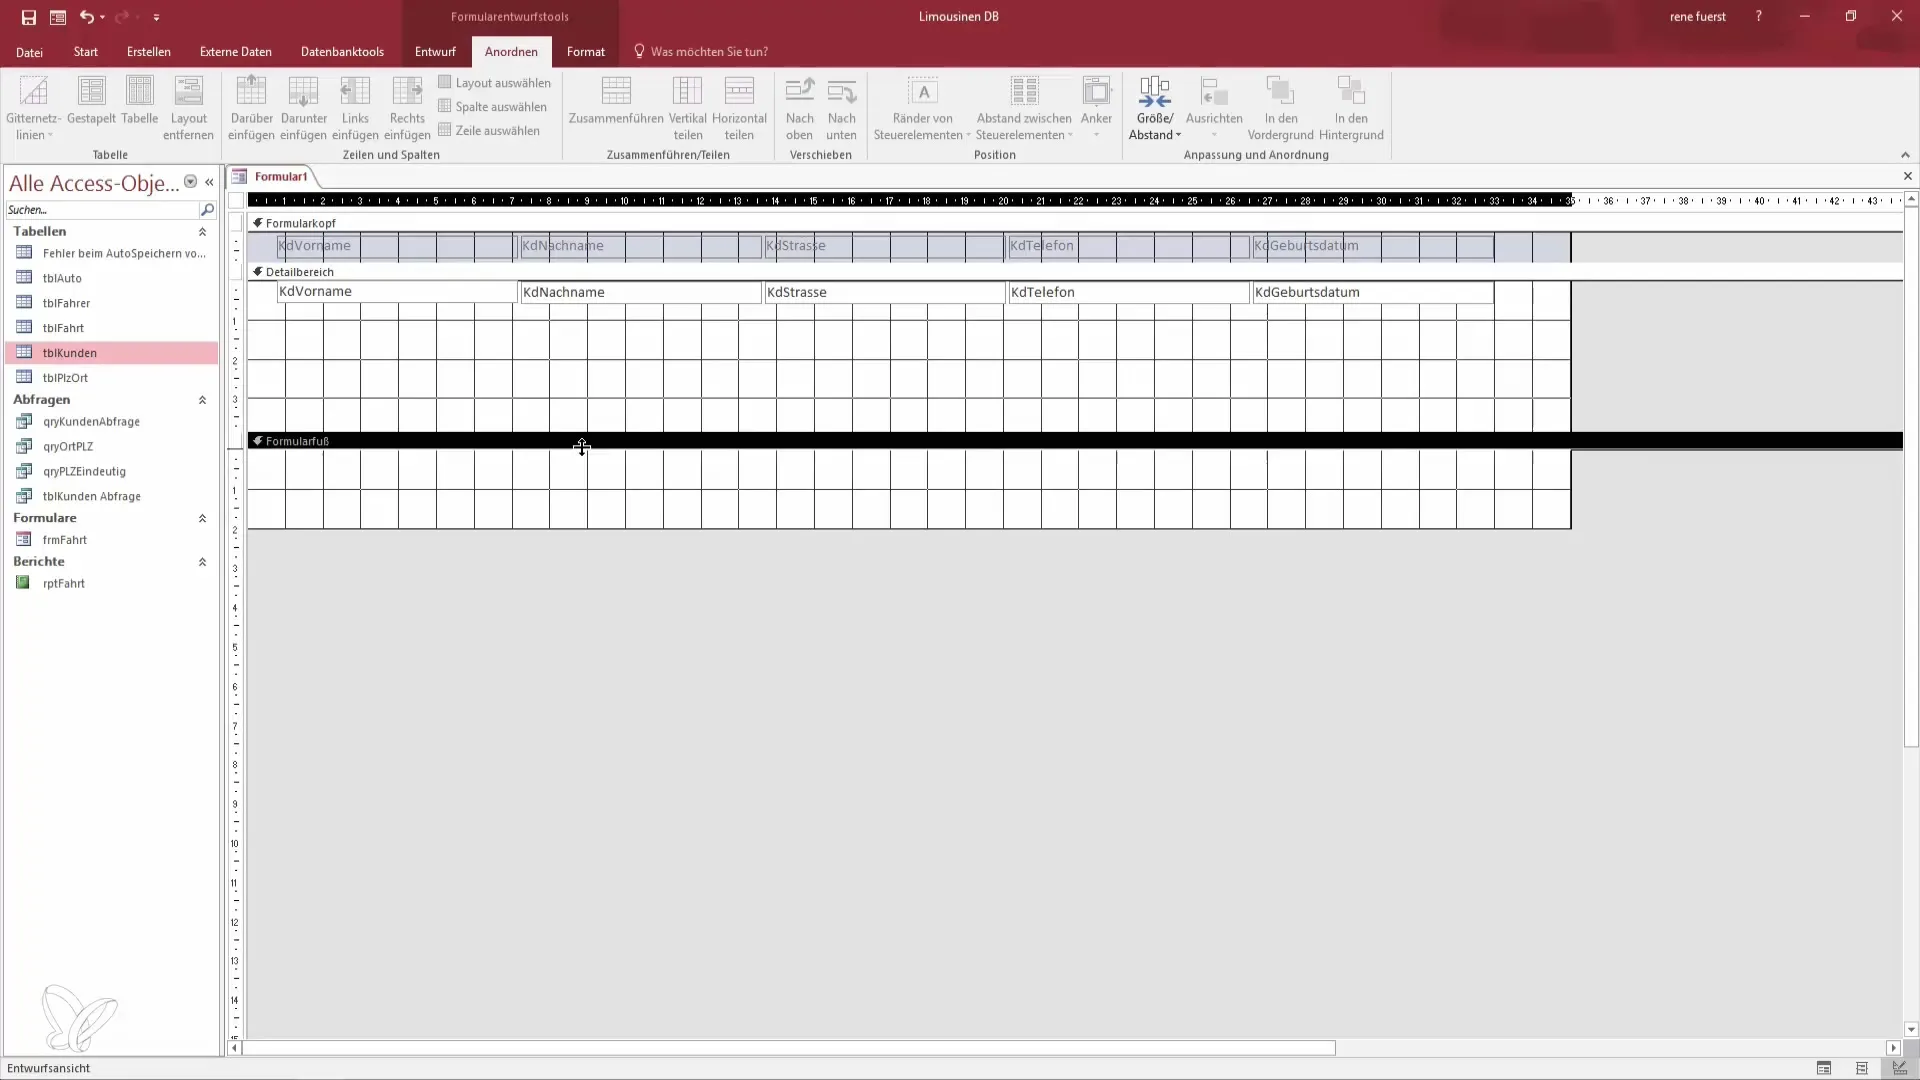
If you find that the footer is unnecessary or takes up too much space, you can reduce or even remove it entirely. This ensures that only the required information is displayed without distractions.
Step 8: View and Record Navigation
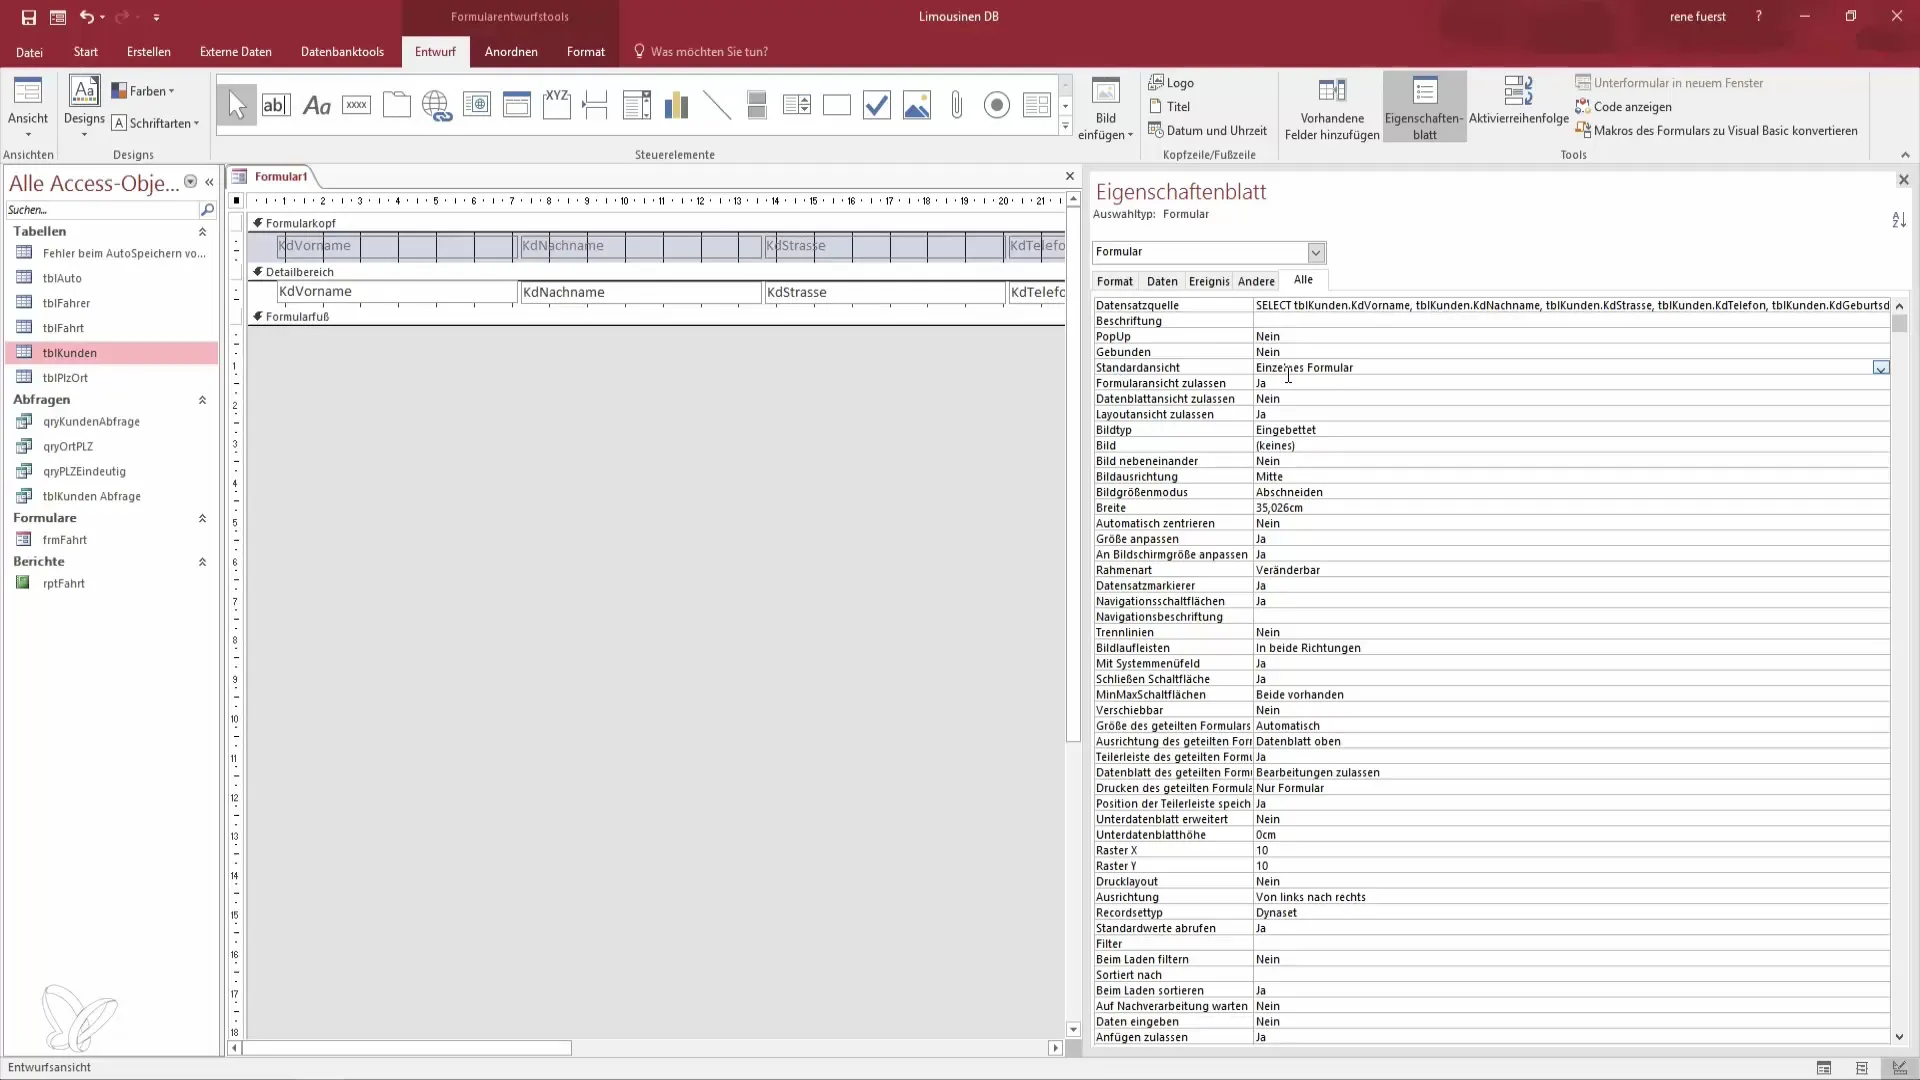
To actually display multiple records simultaneously, return to design view and open the property sheet. Here you can adjust the property for the form. Select the "Continuous Form" option so that all relevant data is displayed on one page without having to navigate between different records.
Step 9: Adjusting Column Widths
Now you can adjust the column widths to your liking. Simply click on the edges of the columns and drag them until they have the desired width. This significantly improves the clarity of your data.
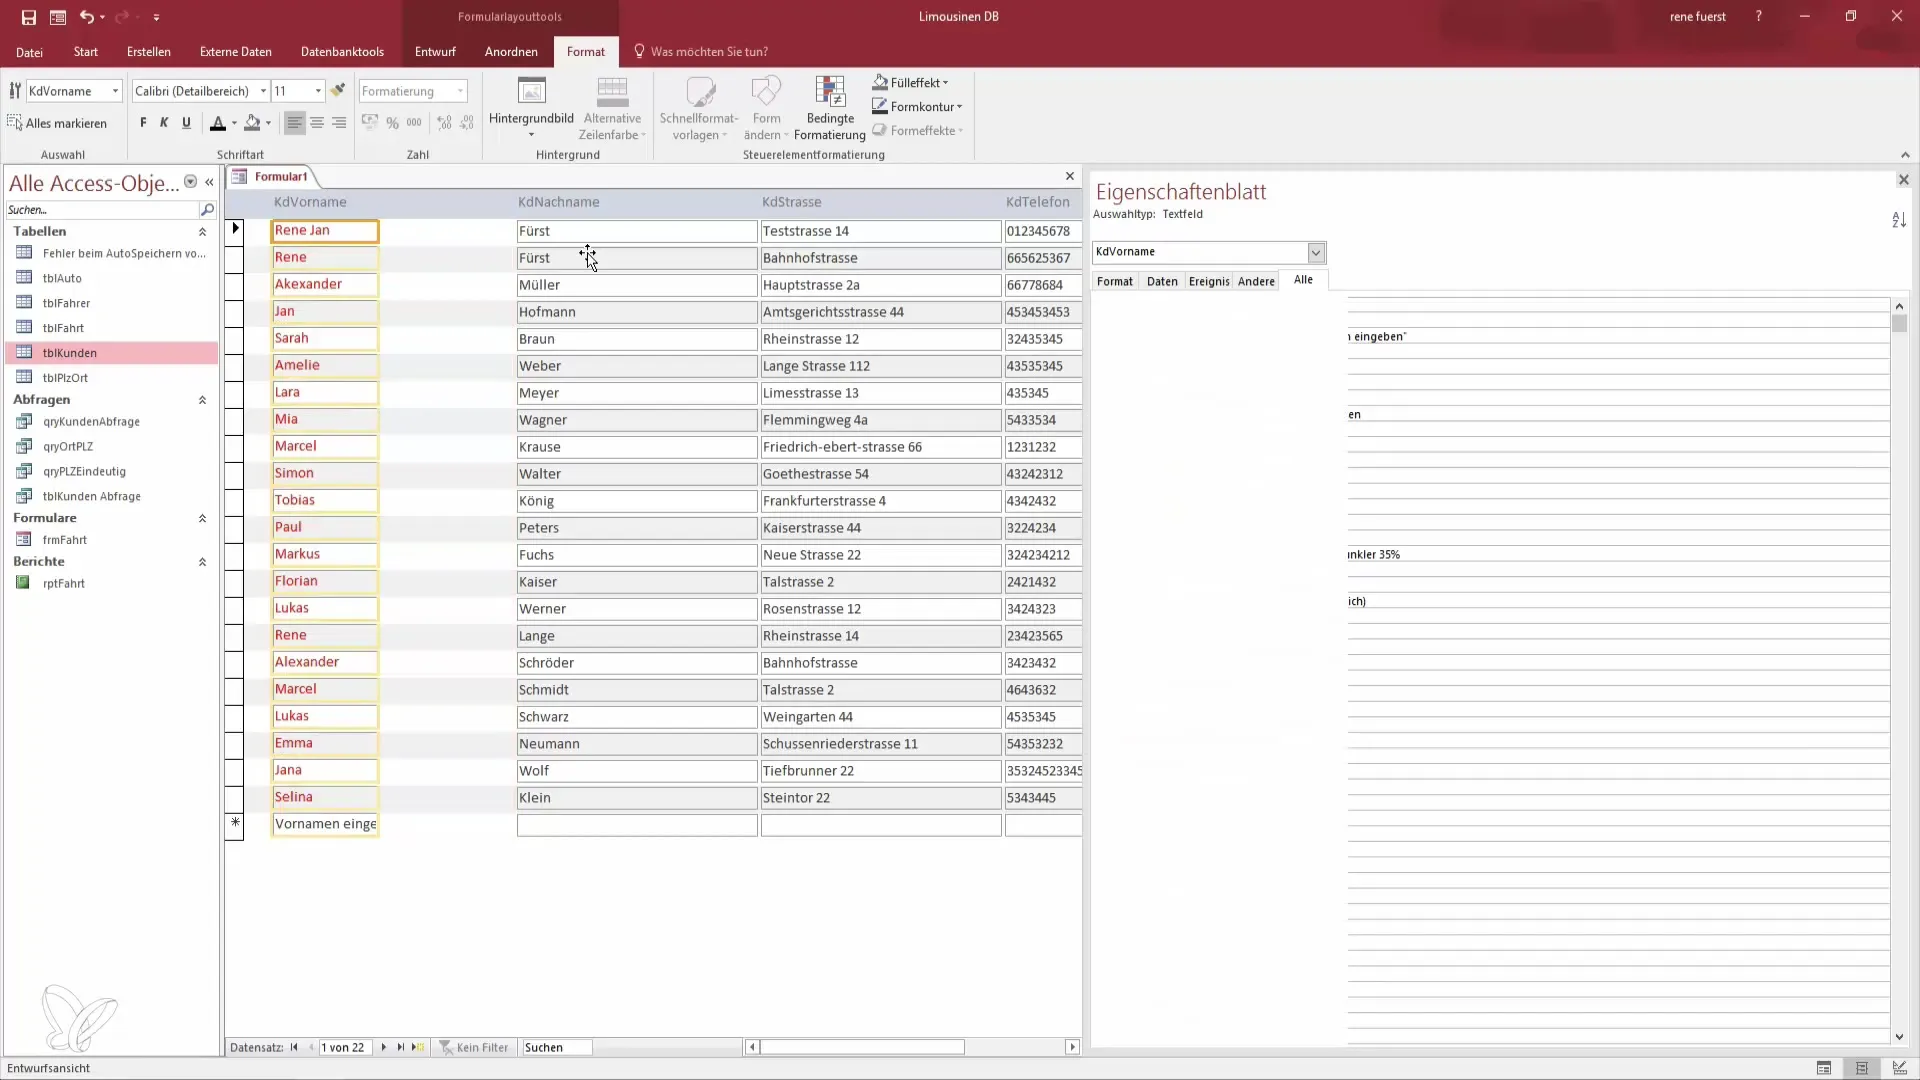
Step 10: Final Adjustments
After making the basic adjustments, review your form once more. Check the presentation and ensure everything looks good. Now you are ready to use your continuous form.
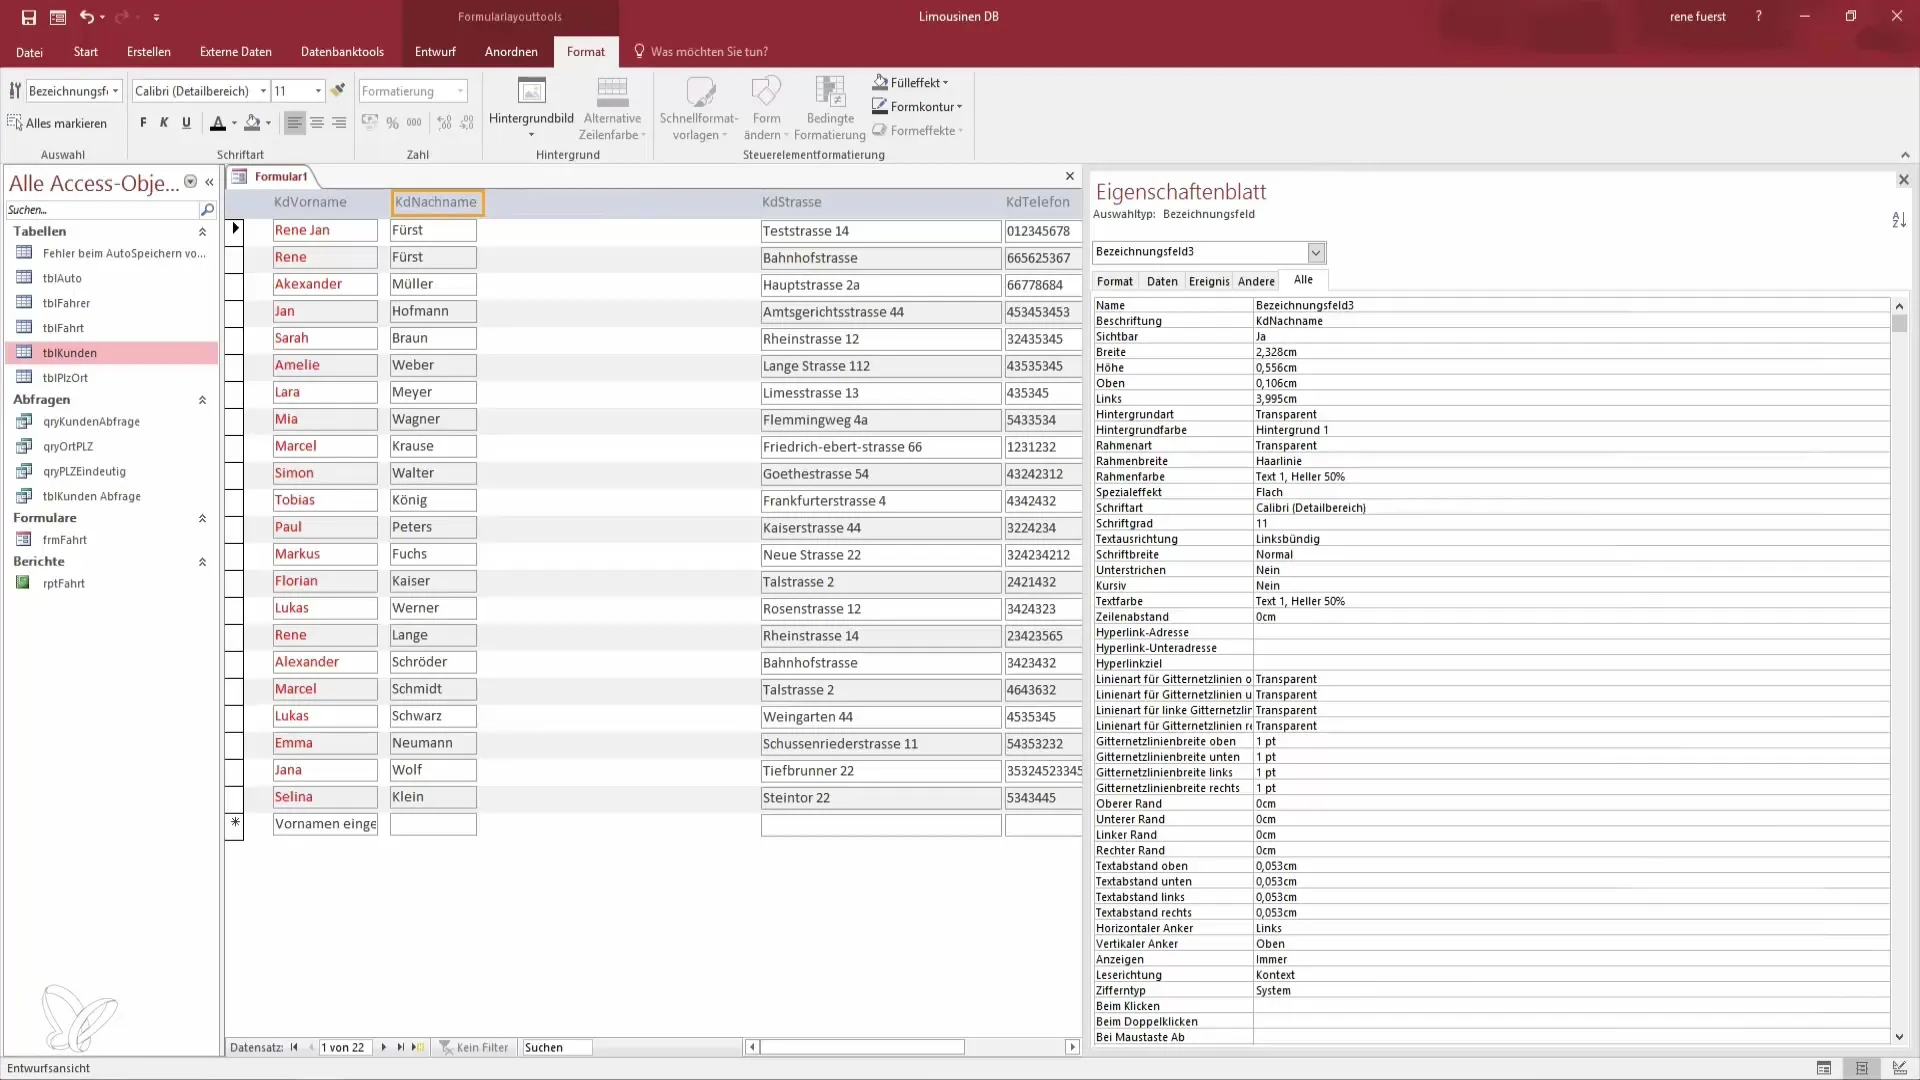
Summary – Master the Presentation of Continuous Records in the Access Form
In this guide, you have learned how to create an effective continuous form in Microsoft Access. By adding the necessary fields, adjusting the layout, and configuring the display properties, you now have the ability to present your customer data in a clear and organized format.
Frequently Asked Questions
How do I create a new form in Access?You open the desired table and select the option for a new form.
What fields should I include in a customer form?Recommended fields include first name, last name, address, and phone number.
What is a continuous form?A continuous form displays multiple records on one page without having to switch between records.
How do I adjust the column widths in my form?Click on the edges of the columns and drag them to change the width.
Can I make further layout adjustments?Yes, you can make additional adjustments to the size, position, and visibility of the elements.


