Do you want to take your retouching in Photoshop to the next level? Using the frequency separation technique and a suitable helper layer, you can specifically identify and edit skin imperfections. This guide shows you how to set up and effectively use a helper layer to retouch your image more clearly and finely.
Key Insights
The use of a helper layer to enhance micro-contrasts allows you to identify retouching areas more easily. By toggling this layer on and off, you get a better view of skin imperfections. With the clone stamp tool and a suitably high opacity, you can precisely remove skin blemishes.
Step-by-Step Guide
To effectively use the helper layer for frequency separation, follow these steps.
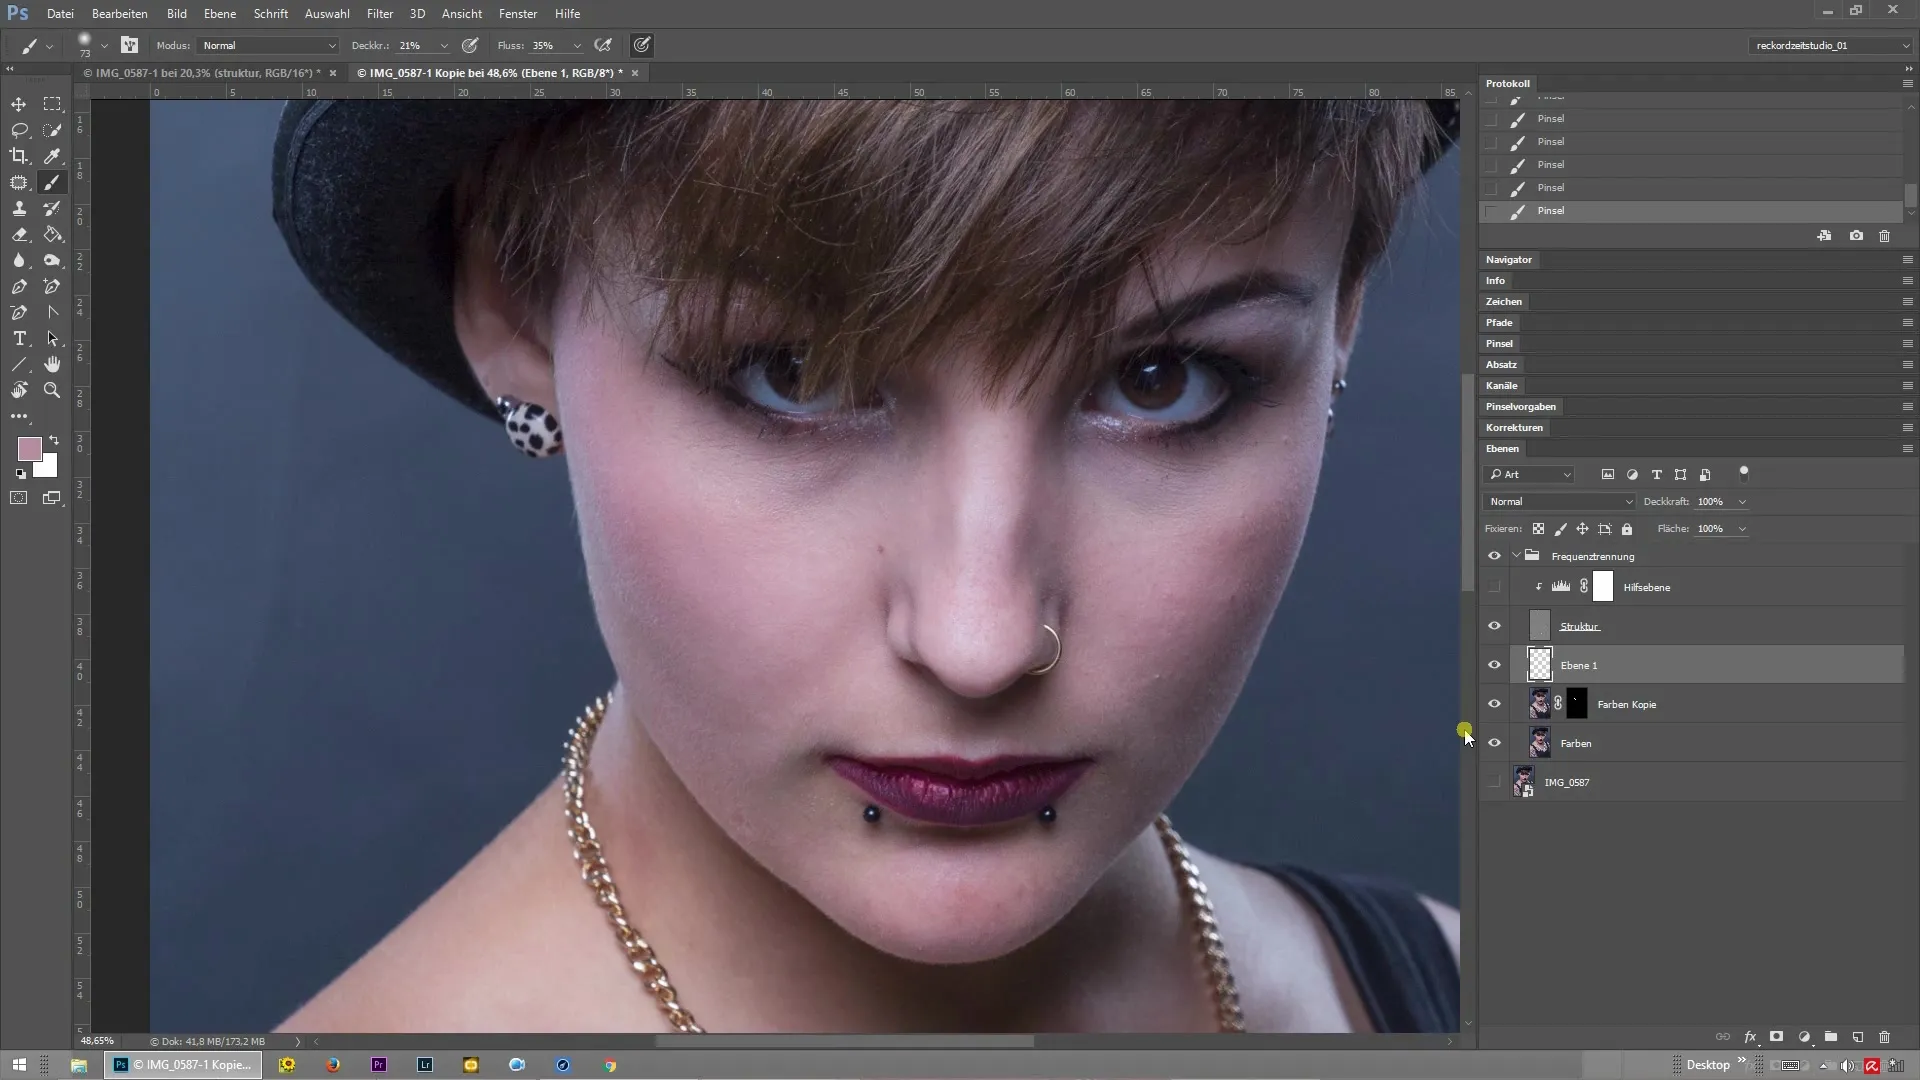
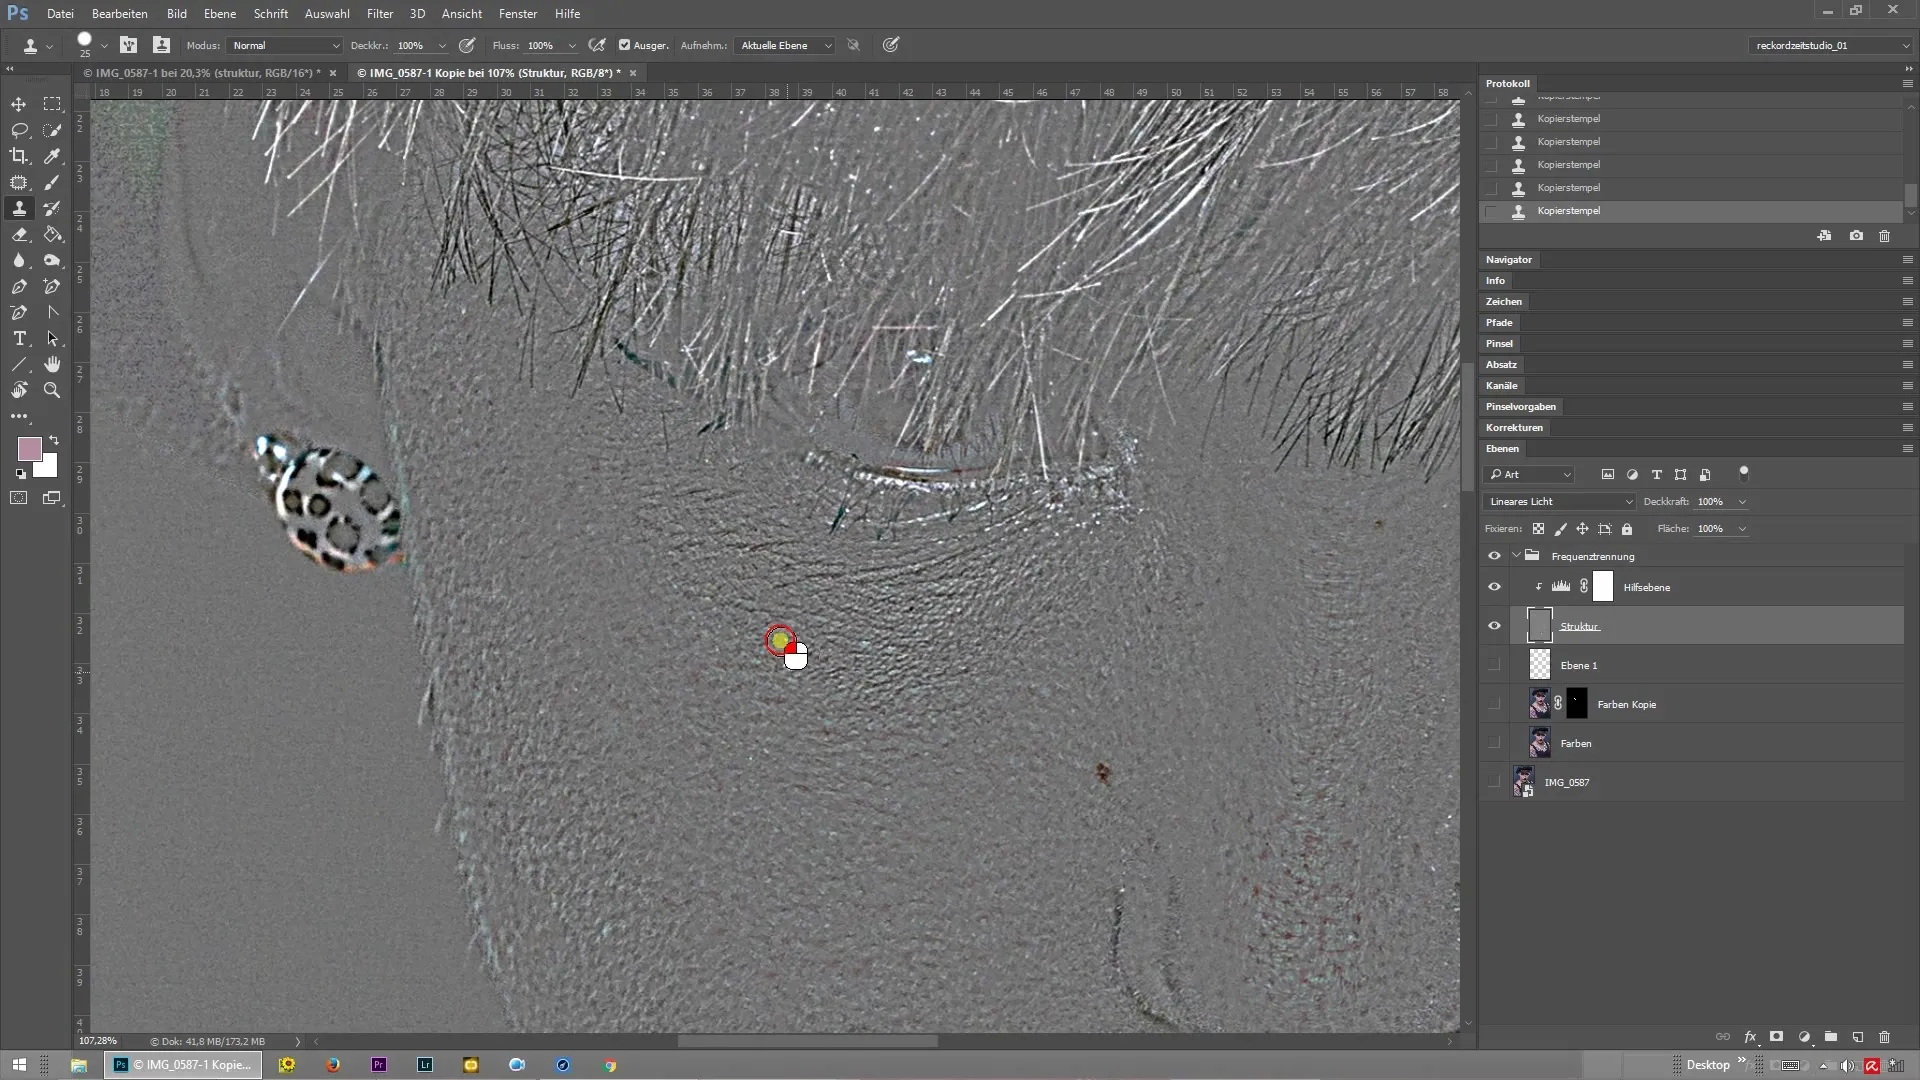
First, it is important that you create a helper layer that applies a levels adjustment as a clipping mask to your structure layer. This usually happens right after creating the frequency separation. To display the helper layer, toggle it on. This way, you can see where you might need to do further retouching.
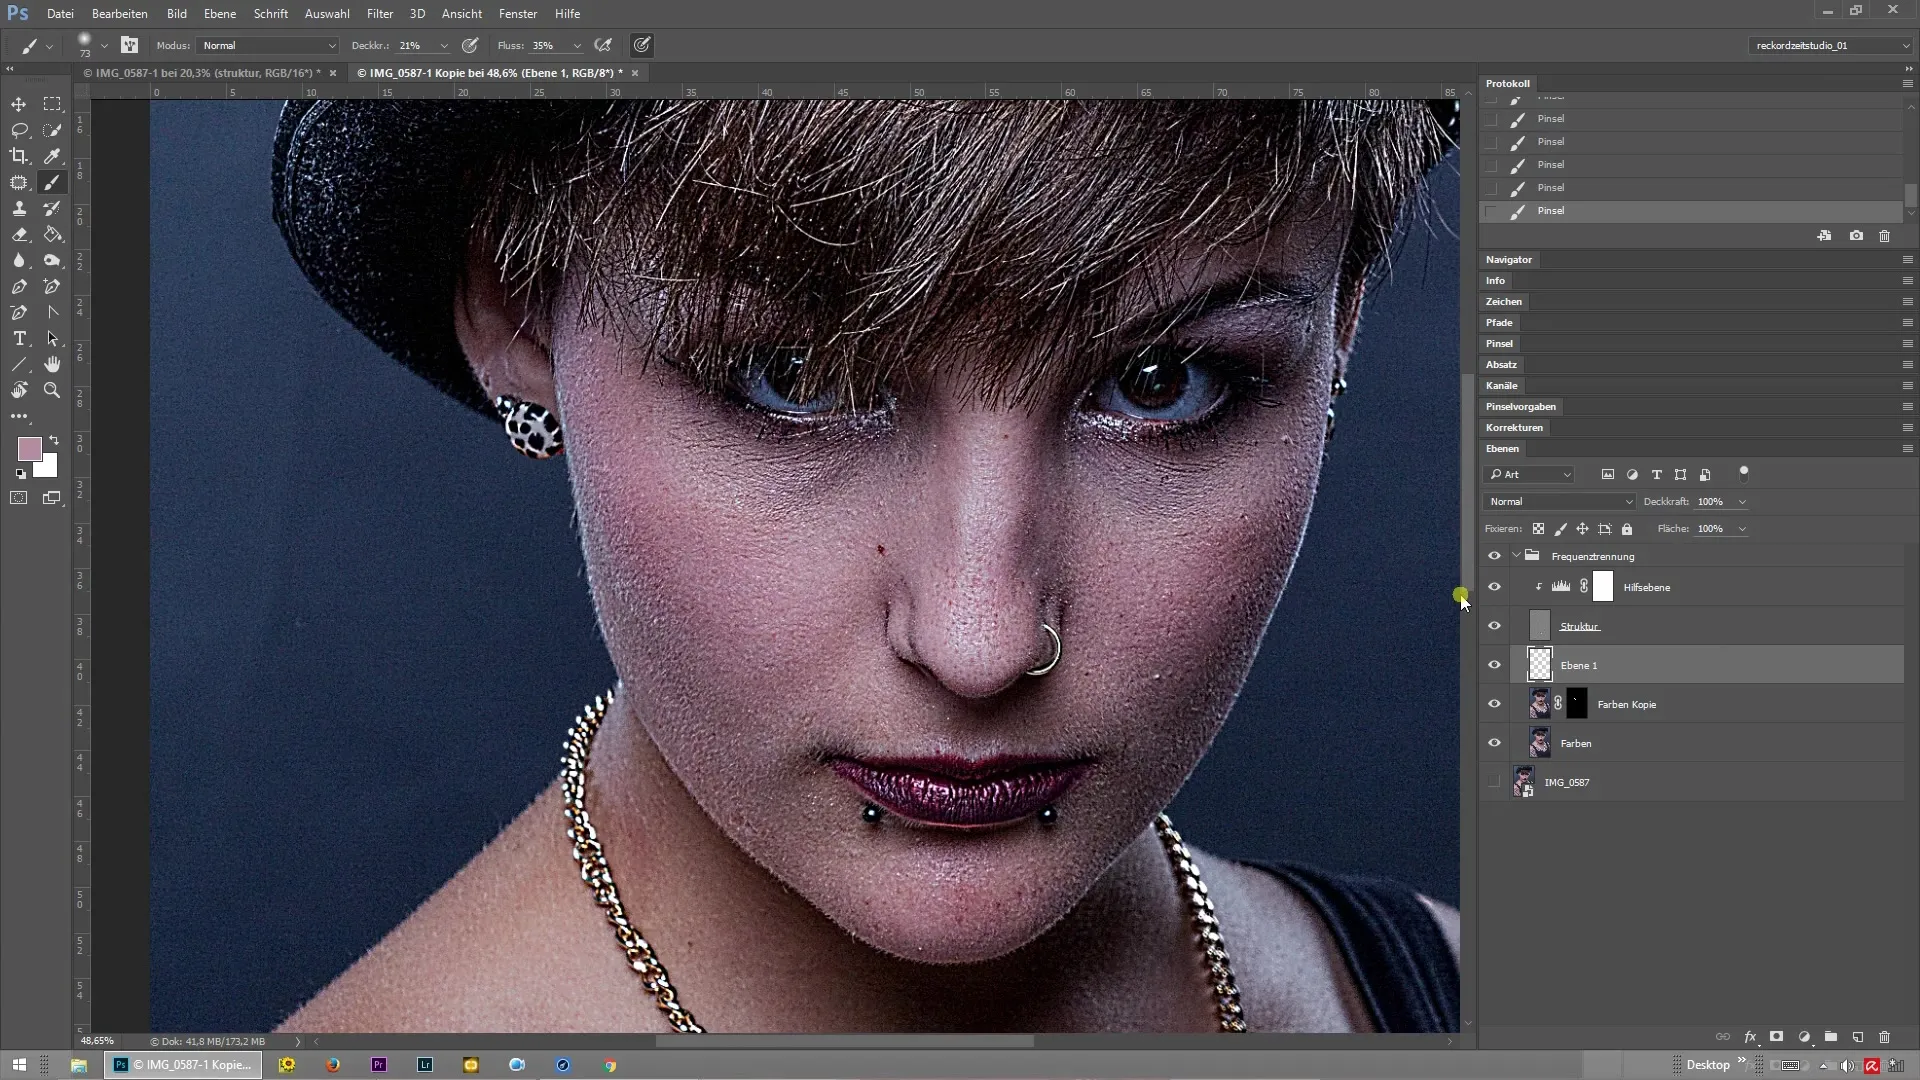
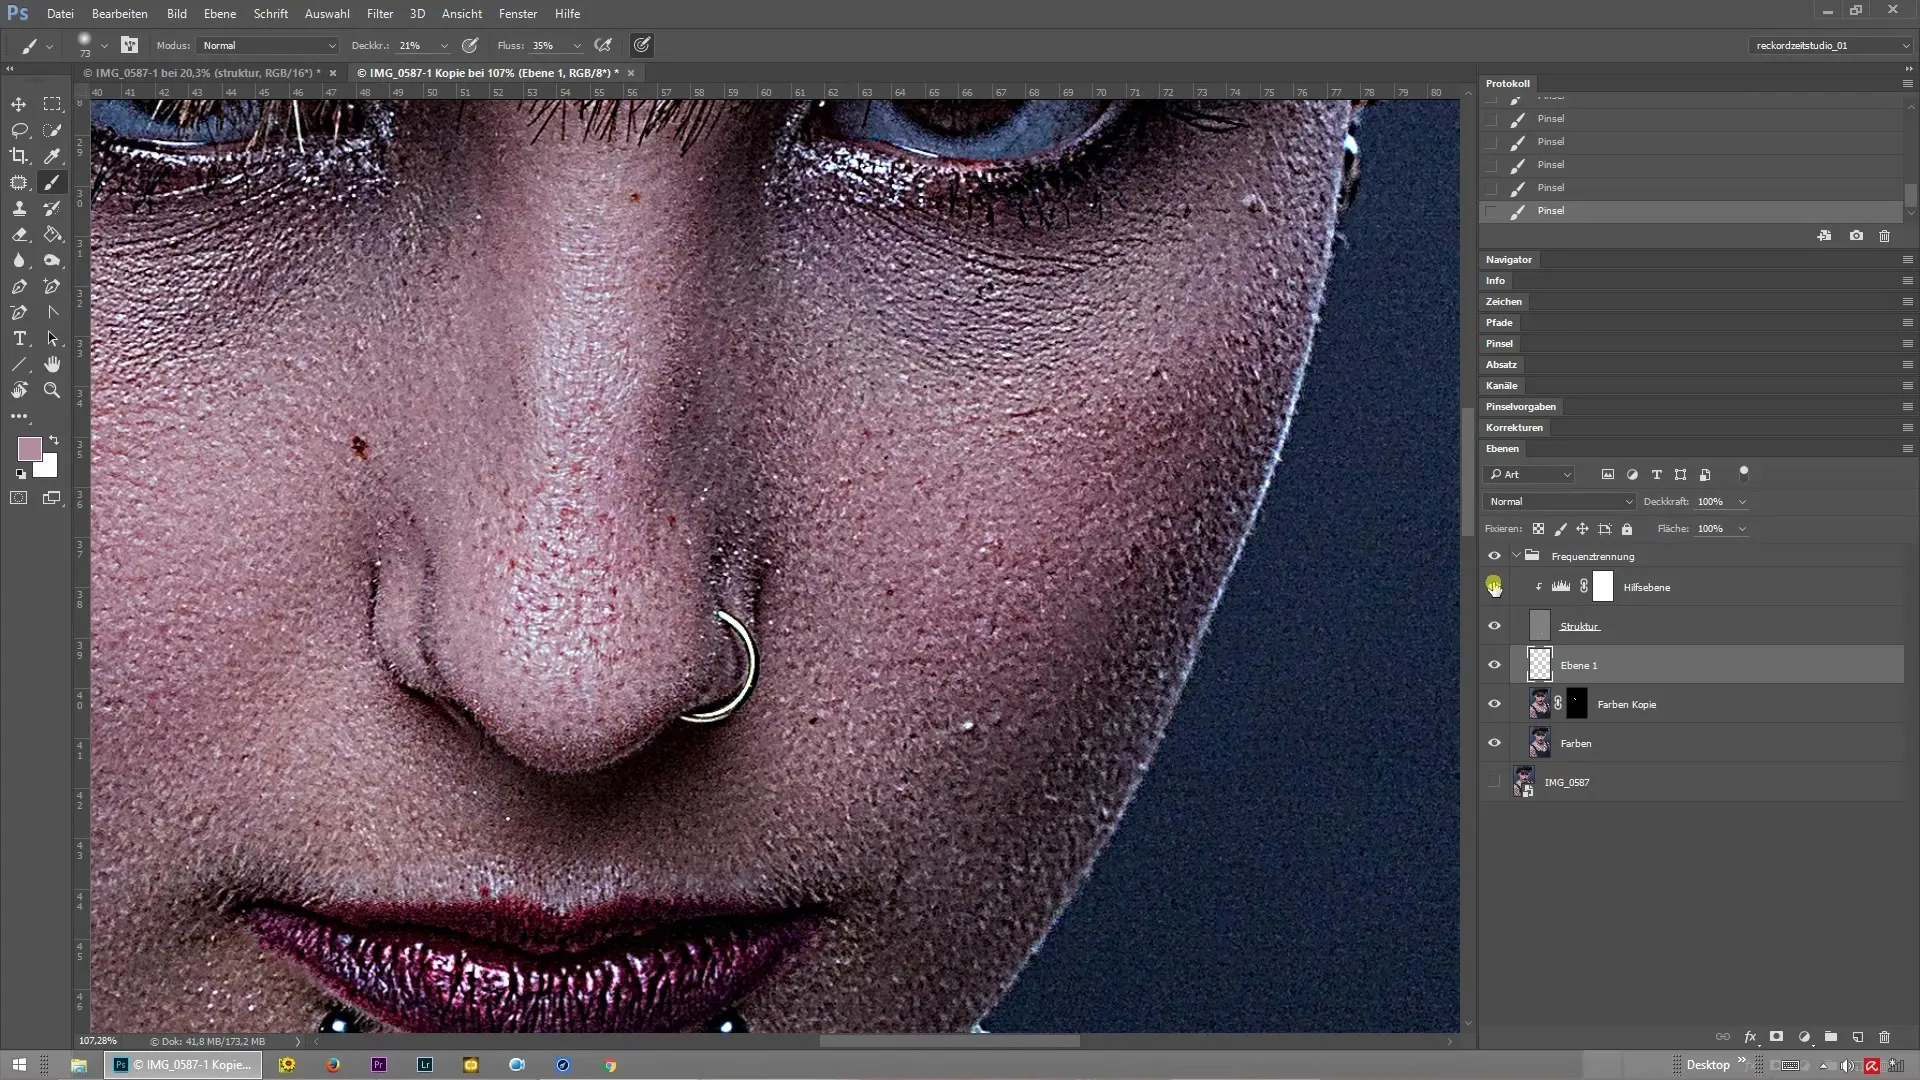
Once the helper layer is visible, you can clearly perceive the micro-contrasts in your structure layer. Make sure these contrasts are significantly enhanced now. Zooming into the image makes it easier to recognize which areas still need editing.
To facilitate effective retouching, toggle off the helper layer again. You will quickly notice that the structure looks unchanged, but when you turn on the helper layer, you can clearly see the skin imperfections. This allows you to work more precisely.
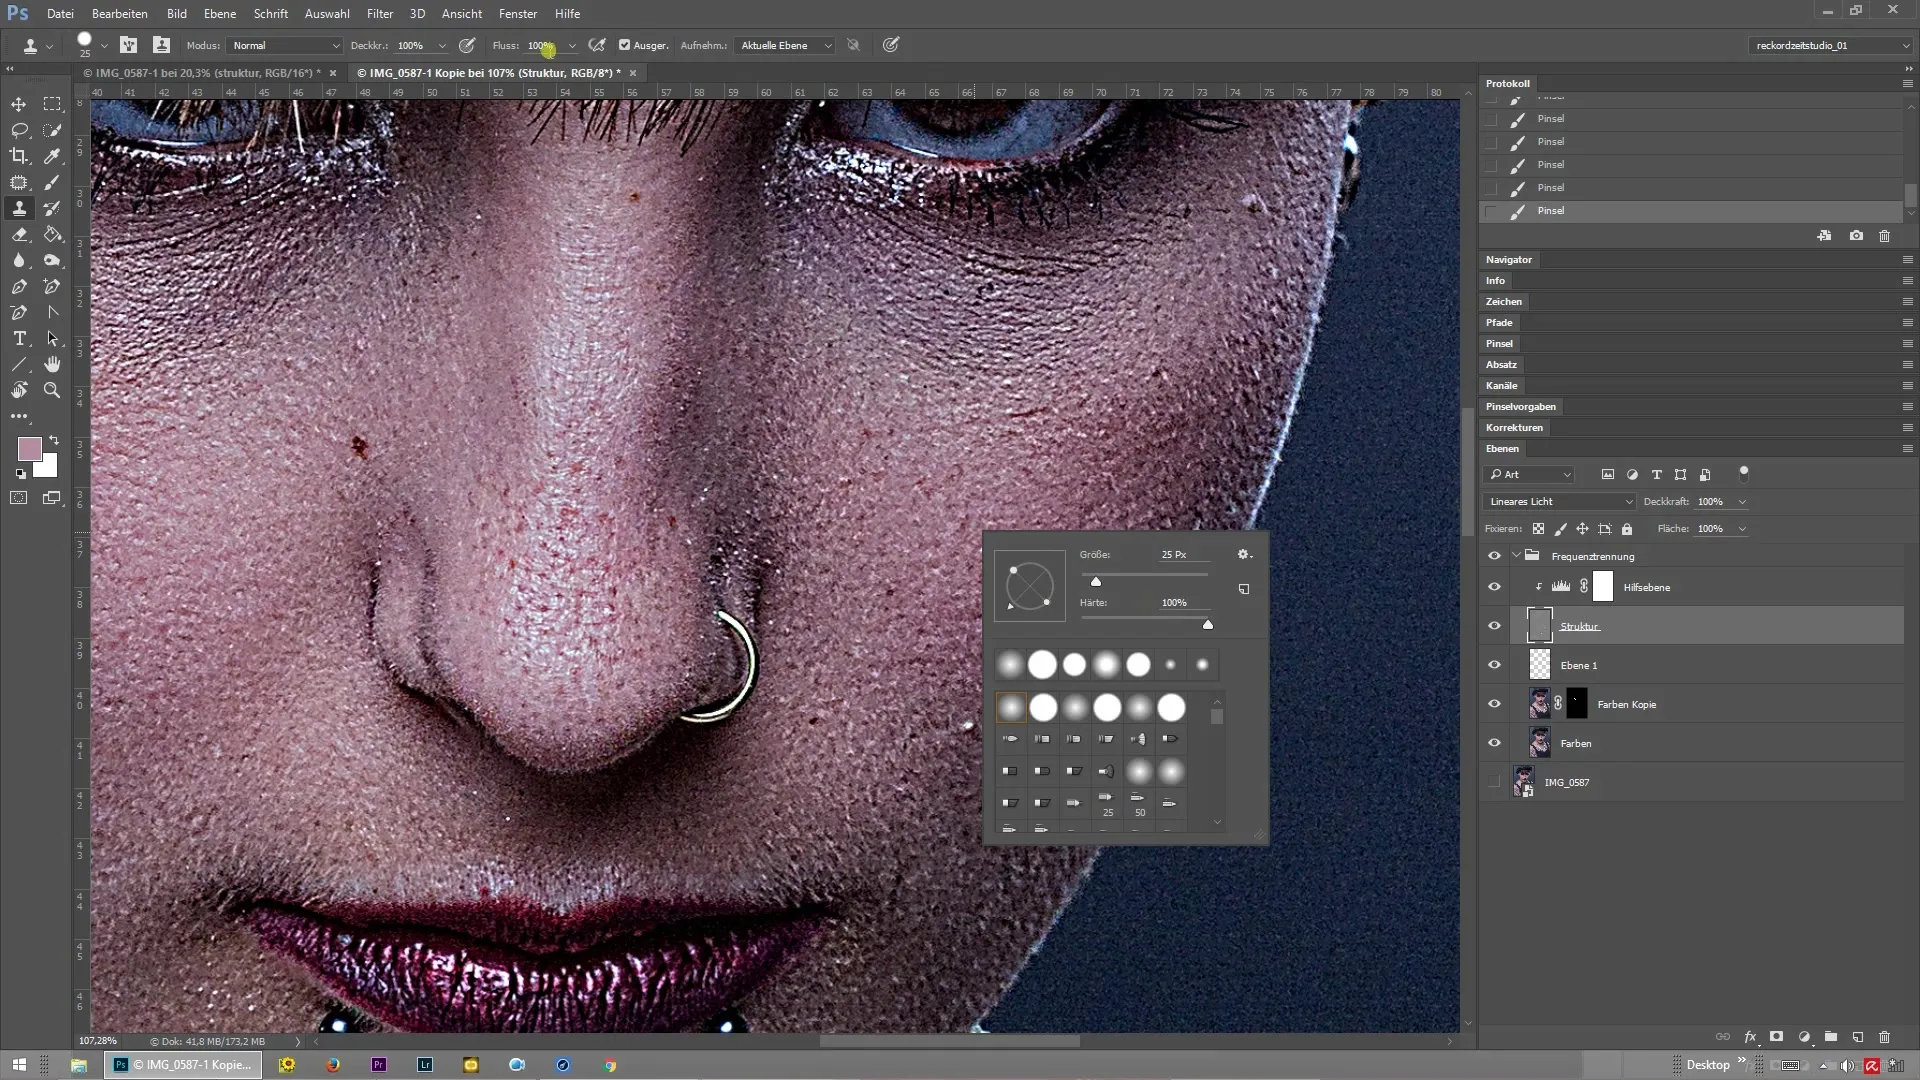
Now you can select the clone stamp tool. Make sure the edge is hard and the opacity is set to 100%. With these settings, you can carry out the desired retouching on the structure layer. Since you have the helper layer available, you can recognize all changes much more clearly.
If you are unsure whether a spot is a mole or a skin blemish, briefly hide the helper layer. This way, you can see exactly what color is present and decide whether to keep or change the spot.
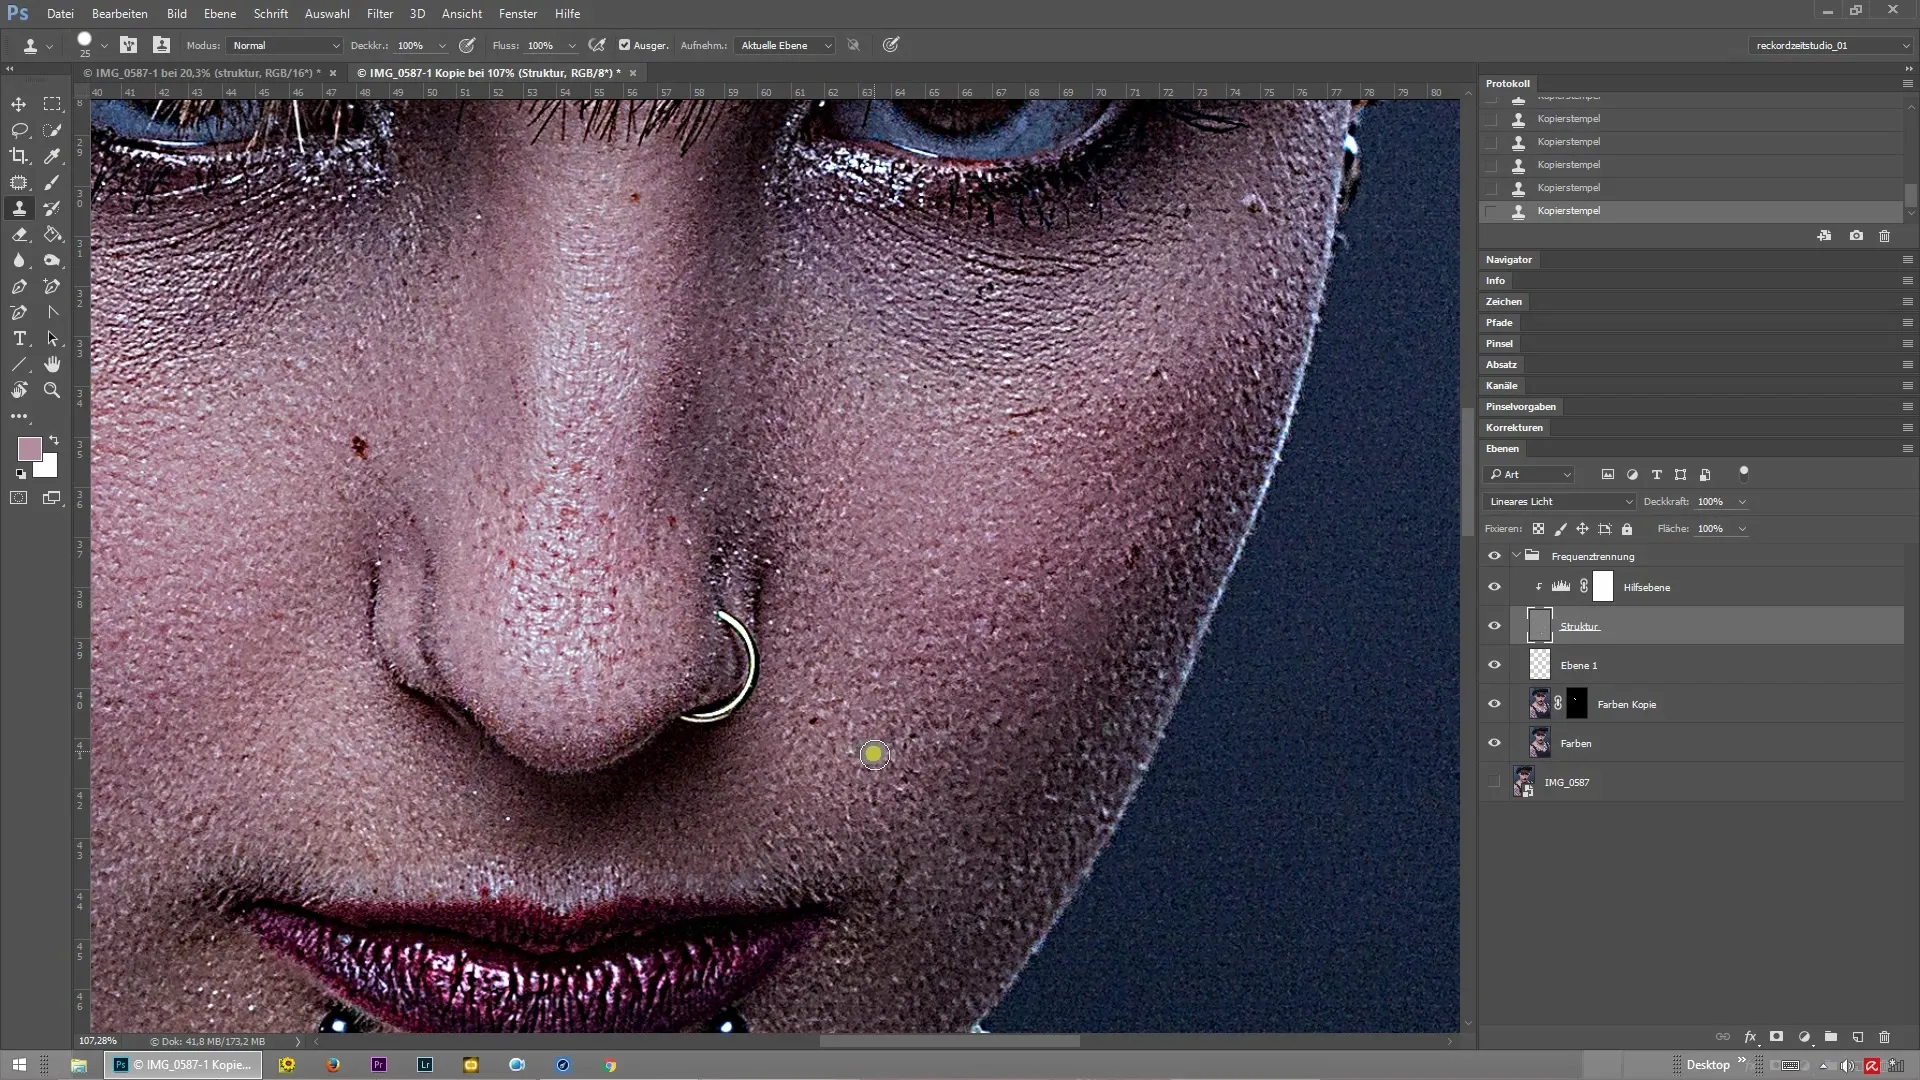
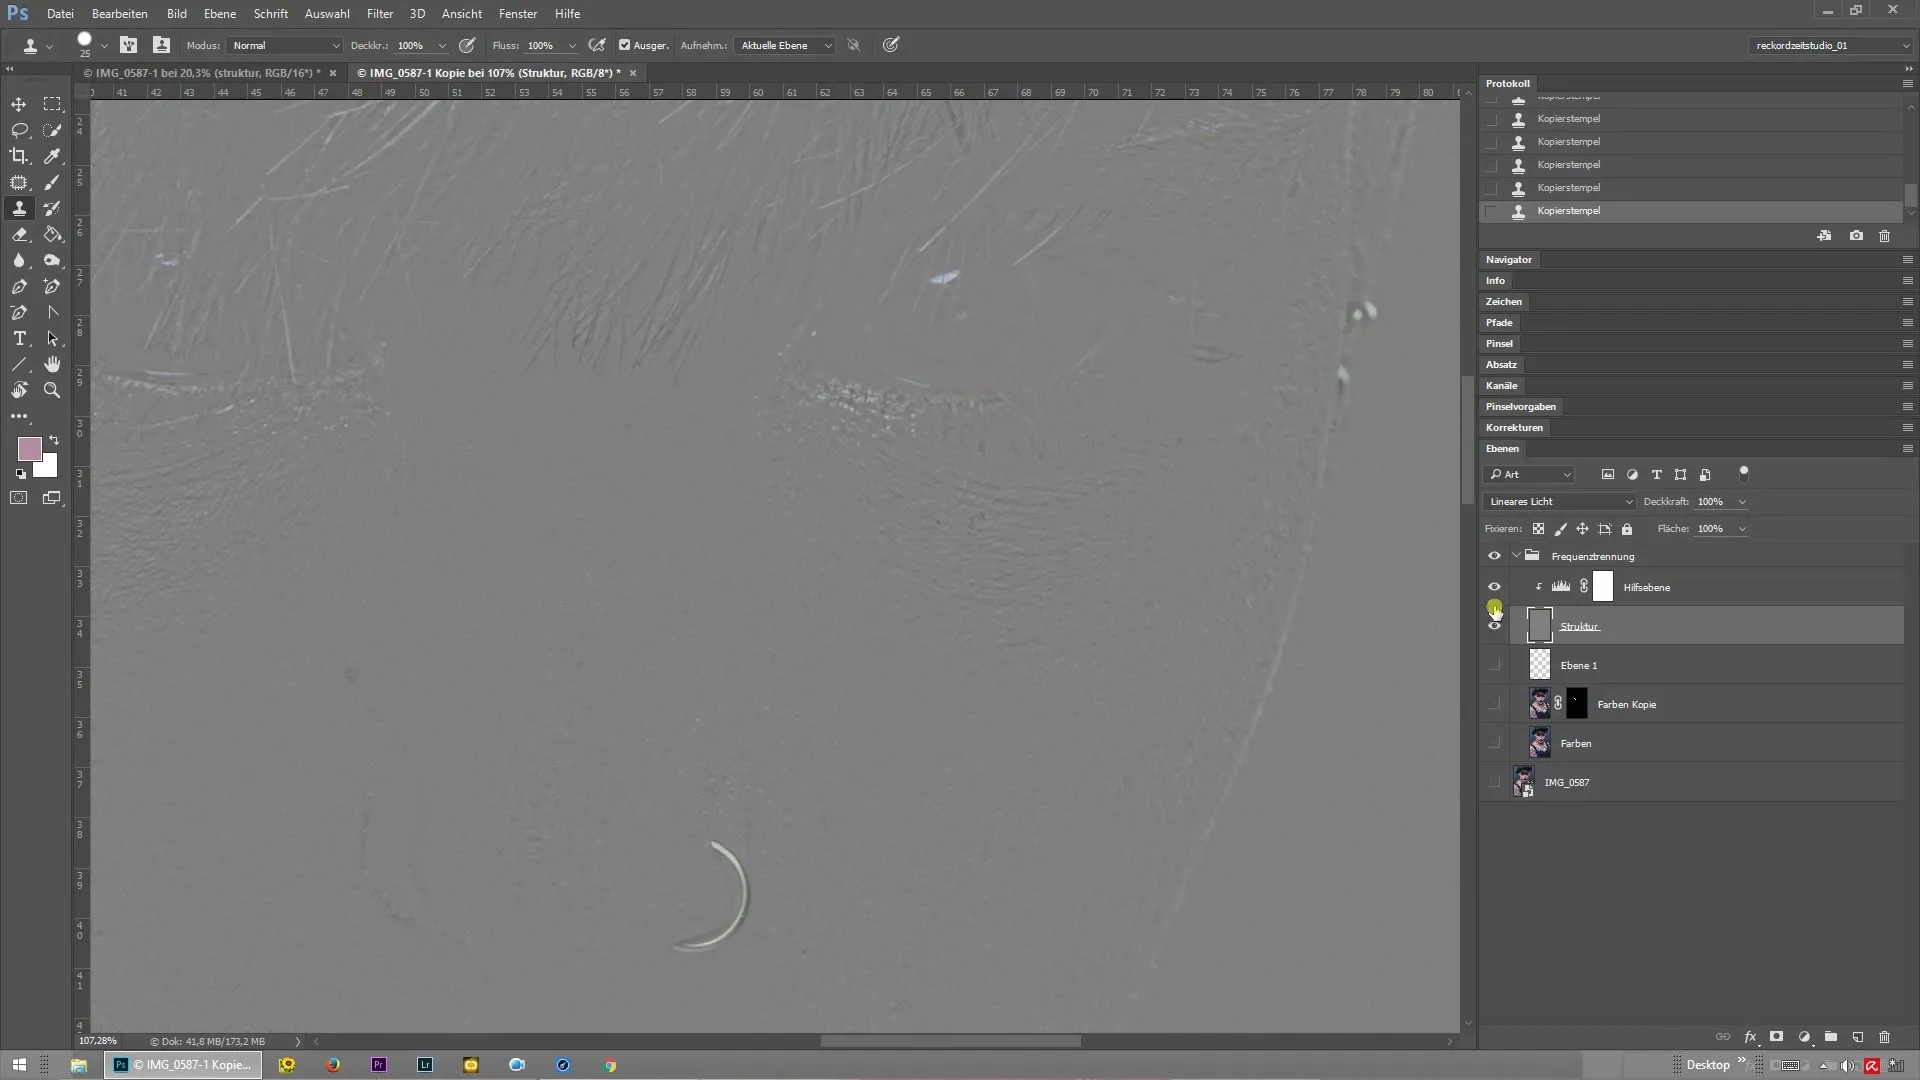
If the colors in the image are distracting, you can also hide the lower layers. This way, you have an extremely clear view of the structure layer and can carry out precise retouching.
Continue to systematically go through the image, ensuring that you don't miss anything. This way, you can ensure that the retouching is perfect and the image gains in quality.
Summary – Frequency Separation and Helper Layer for Perfect Retouching
In this guide, you have learned how to use a helper layer for frequency separation in Photoshop. By creating a helper layer, you can enhance clear contrasts and efficiently identify and edit skin imperfections. Use this technique to refine your retouching and elevate your image to a new level.
Frequently Asked Questions
How do I create a helper layer in Photoshop?You create a helper layer by applying a levels adjustment as a clipping mask to the structure layer during frequency separation.
Why is the helper layer useful?The helper layer enhances the micro-contrasts, allowing you to better identify retouching areas.
What tools do I need for retouching?You need the clone stamp tool with hard edges and an opacity of 100%.
What should I do if I'm unsure about a spot?Toggle off the helper layer to see the color and texture of the spot more clearly.
How can I hide the lower layers?You hide the lower layers to get a clear view of the structure layer and be able to retouch precisely.


