
Frequency separation is one of the most effective techniques for retouching, and it can be implemented much faster with an action. The video covers the last part of this series: recording the high-pass variant. You will learn which layers you need to clean up beforehand, how to record the action step by step, and why you still have to adjust radius values later.
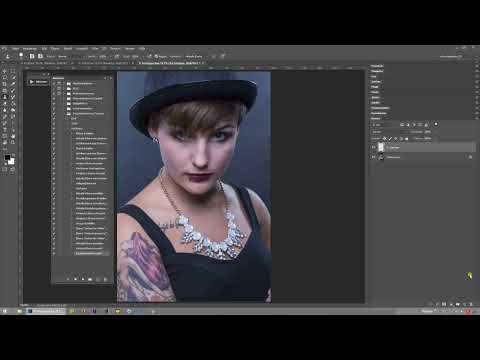
The video is only loaded from YouTube when you play it – data (including your IP address) is then transmitted to YouTube/Google. More in the privacy policy
The tutorial assumes that you know the basics of layers and the Actions panel in Photoshop. The keyboard shortcuts refer to Windows. If you are working with actions for the first time, it is worth doing a test run with a practice image alongside the tutorial.
Key Takeaways
Recording the high-pass action takes place in several consecutive steps: auxiliary layers, merges, blur, high-pass filter, and a layer mode set to Linear Light. You do not enter values for the blur and the high-pass filter during recording, but only when playing the action. The radius must be identical for both filters. With the checkmarks in the Actions panel, you control which steps are executed during playback.
Step-by-Step Guide
Clean Up Before Recording
Before you record the action, you should remove all auxiliary layers from the previous run. To do this, switch to the background layer and delete unnecessary layers so that the recording starts with a clean document. Only then do you create the required auxiliary layer anew.

Create the Action and Start Recording
Select the background layer and open the Actions panel. There, create a new action via the folder icon menu and give it a clear name, for example "High Pass". Then start recording with the record button. From this moment on, each of your steps is recorded, so you should think in advance about which commands you need and in what order.

Build the Layer Structure with Merges
Now you create the first working layer. Press Shift, Ctrl and N to create a new layer, and name it "Farben für Aktion". Then move the layer all the way to the top with Shift, Ctrl and the right square bracket. This keeps the structure clear, and the merges that follow affect the correct layers.

With Shift, Alt, Ctrl and E, you merge all visible layers into a new layer without changing the original layers. Then create another layer named "Struktur" and afterwards merge all visible layers again. This process ensures that the contents of the layers are stacked cleanly on top of each other before you work with the filters.
Insert Gaussian Blur
Now the current layer is moved down one level with Ctrl and the left square bracket. Then select the layer above it, "Farben für Aktion", with Alt and the period key. The next step is the actual filter work: In the "Filter" menu, choose Gaussian Blur from the Blur filters section. Make sure not to use the noise filter, but actually the Gaussian Blur.
Confirm the dialog during recording without entering a value. You set the values only during playback.

Apply Contrast and High-Pass Filter
Select the lower layer with Alt and the comma, then move the layer up one level again with Ctrl and the right square bracket. Then open the "Brightness/Contrast" dialog under "Image", "Adjustments". Check the box for "Use Previous Value" and set the contrast to minus 50. Confirm with OK.
The high-pass filter follows next. Go to "Filter", "Other" in the menu and choose "High Pass". Here too, you first confirm without entering anything, because the radius is set later during playback.
Set the Layer Mode to Linear Light
Now you need the layer mode of the high-pass layer. To do this, double-click the layer in the Layers panel, or right-click it to get to the layer options. Set the mode to "Linear Light" and confirm with OK.
If you look at the layer now, the image appears very harsh and unpleasant. That's normal, because the radius values are still missing from the recording. The finished action will correct this image later.

Create an auxiliary layer with Levels
So that the result is correct in the end, you create another auxiliary layer. Go to "Layer", "New Adjustment Layer" and choose "Levels". Confirm the layer and set it as a clipping mask so that it only affects the layer beneath it.
Enter the values as follows: input 110 for the dark tones, 1.00 for the midtones and 150 for the light tones. Then confirm. These values are crucial for the action, so you should enter them exactly.


Bundle layers in a group
Now you combine all the layers of the action in a group so that the Layers panel stays organized. Select the layers and click the folder icon at the bottom of the Layers panel while holding the Alt key. In the dialog, name the group "Frequenztrennung" and confirm with OK.

Rename layers and choose the Clone Stamp
Open the group and double-click the layer "Farben für Aktion" to rename it. Then select the layer above it with Alt and the period key. Finally, you activate the Clone Stamp tool. With that, the recording is complete, and you can stop the recording.
Play the action and set the radius values
Before the first test, you should clean up the layers of the recording document. Delete the brush selection as well as all layers that do not belong to the action. Then select the high-pass layer and play the action.
When the action stops at the Gaussian Blur, you enter a radius. In this example, it is 6 pixels. You should remember the chosen value, because it must be identical for the High Pass filter. Then confirm with OK. For the High Pass filter, you then enter the same 6 pixels and confirm again.


Check the result and hide the auxiliary layer
After playing, the image initially looks very high in contrast. This is because you did not hide the auxiliary layer during the recording. So hide it manually using the eye icon. Then the image shows the desired look again.
If you accidentally deselected the eye icon during the recording, you can correct the step afterwards. To do so, find the relevant layer in the group and set the checkmarks in the Actions panel so that the hiding step is no longer executed.


Continue the action from a specific step
If you only want to run the action up to a certain point, you remove the checkmarks in front of the remaining steps. When playing, only the steps that are still checked will then be executed. This way you can test the action in a targeted manner and readjust individual sections.
Set the checkmarks completely again as soon as you need all the steps. After that, you can play the action all the way to the end. The radius of 6 pixels is also consistently applied here in both filters.

Final check with a fresh layer structure
Finally, you check the result by deleting the layers again and selecting the high-pass layer once more. Play the action with 6 pixels. Afterwards, you should see the original image again while the auxiliary layer is hidden. If the result is correct, your action works properly.

Summary – Frequency Separation: Recording a High-Pass Action in Photoshop
Recording the high-pass action follows a clear sequence. First, you tidy up the document and create the action. Then you build the layer structure with merged layers, apply the Gaussian Blur and the High Pass filter, and set the layer to Linear Light. A Levels adjustment as a clipping mask adds further control. When playing the action back, you enter a radius of 6 pixels for both filters and hide the auxiliary layer. With the checkmarks in the Actions panel, you control which steps are executed. This gives you an action with which frequency separation can be reliably applied to your images.
FAQ
Why shouldn't I enter any values for the blur and High Pass filter during recording?The values are only set when the action is played back, because you have to determine the appropriate radius individually for each image.
Does the radius have to be the same for the Gaussian Blur and the High Pass filter?Yes, both filters should use the same radius so that the frequency separation works cleanly and no image information is lost.
Why does my image look so high-contrast after playback?This is usually because the auxiliary layer is still visible. Hide it using the eye icon, and the image will show the desired look again.
What do I do if I accidentally deselected the eye icon during recording?You can correct the step afterwards by setting the checkmarks in the Actions panel so that the hide step is not executed during playback.
Why do I merge the layers multiple times with Shift, Alt, Ctrl and E?The merges ensure that the layers are stacked on top of each other in a defined order before the filters are applied.
What is the purpose of the "Frequenztrennung" group?The group bundles all layers of the action and keeps the Layers panel organized, so you can find your way around more easily when making later adjustments.


