
Before you work with the stamp, the repair brush or frequency separation, it is worth taking a look at the foundation: the raw development. Many retouches fail not because of the technique, but because of an image whose contrast, colors or sharpness are off from the start. If you carry out the development cleanly, you will have more room to maneuver in every further editing step and will have to correct less later on.
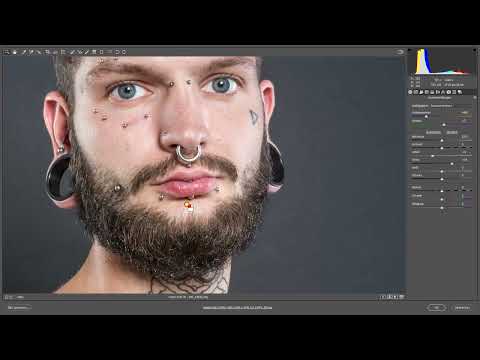
The video is only loaded from YouTube when you play it – data (including your IP address) is then transmitted to YouTube/Google. More in the privacy policy
In this tutorial, I will guide you step by step through raw development with the Camera Raw filter in Photoshop. You will learn how to protect your original, adjust color temperature, shadows and highlights, sharpen correctly, and finally fine-tune clarity and saturation.
Key Takeaways
Always work on a copy as a Smart Object so that your original image remains unchanged at all times. The order of the settings is important: first white balance and tonal ranges, then sharpness, and finally clarity and color. When sharpening, hold down the Alt key to make structures and noise visible. Do not overdo either clarity or saturation, because exaggerated values are difficult to rein in again during retouching.
Step-by-Step Guide
Step 1: Secure the Original Image as a Smart Object
The first step determines whether you can later trace what the original image looked like. Open your image in Photoshop and do not click directly on the Smart Object, because then you would apply the Camera Raw filter to the original. Instead, right-click on the layer and choose the option to create a new Smart Object via Copy. The original layer thus remains untouched, and your raw development runs on the copy.

Step 2: Open Camera Raw and Prepare the View
Double-clicking the new Smart Object opens the Camera Raw filter. It is best to switch to full-screen view so that you can assess the image without distraction. Make sure you work through the settings in the right order, because later sliders affect the earlier ones.

Step 3: Check Color Temperature and Color Casts
Start with the white balance. At the top of the panel you will find the slider for color temperature, with which you can make the image cooler or warmer. First reset the slider to the original shot to see the starting point. In the example, the value is 5200 Kelvin. For this subject, a somewhat cooler look of around 4400 Kelvin was chosen. Then check whether there is a color cast, that is, a magenta or green cast. You correct this using the tint slider. If you pull it back from +7 to 0, a slight green cast already appears in the example, which is why the value is deliberately left as it is here.

Step 4: Brighten Shadows and Reveal Structures
Zoom into the image to identify dark areas that hide details from you. With the Shadows slider, you push these areas to the right. This brings out structures that were barely recognizable in the original. You don't have to go up to 100 percent. In the example, a value of about 35 is enough to open up the shadows so that the image remains natural. Double-clicking the hand icon resets the view to the overall display.

Step 5: Control the Highlights
After the shadows, you turn to the highlights. In the example, there are slight shiny highlights on the forehead. You could also treat these with dodging or burning, but it is faster in the Camera Raw filter. Carefully pull the Highlights slider to the left until the bright areas no longer blow out. In the example, a value of about minus 30 is chosen. Observe that only the brightness values in the image change, while the colors remain untouched.

Step 6: Sharpen Correctly
Raw images are usually soft because the camera works without post-sharpening. In the Details section you will find the Sharpening slider. First set it to zero and then hold down the Alt key while moving the slider. Now you see in a black-and-white view exactly which structures are being sharpened. Without the Alt key, the colors distract you, which is why this method is more advantageous. In the example, you set the amount to about 60 and the radius, also with the Alt key held down, to 1, so that only fine edges are emphasized.

Step 7: Adjusting Details and Masking
With the Details slider, you determine how strongly fine structures are emphasized. In the example, a value of 25 initially produces too strong an effect, so it is reduced to about 15. The Masking slider is also interesting, and you use it while also holding down the Alt key. Everything displayed in white receives the sharpening, while black areas are left out. This way you avoid giving flat areas such as skin or backgrounds unnecessary grain and artifacts. You do not need noise reduction for this image because it was shot at ISO 100, an aperture of f/7.1, and an exposure time of 1/160 second, and no noise is visible.

Step 8: Using Clarity in Moderation
The Clarity slider adds more punch to the image by strengthening midtone contrast. Proceed carefully here, because with values that are too high the image quickly looks oversharpened and the contrasts become harsh. A negative value is also not a good solution, because valuable structures are then lost. In the example, a slightly positive value of about 15 is a good compromise between clarity and a natural look.

Step 9: Fine-Tuning Vibrance and Saturation
Finally, you decide on the color intensity. With the Vibrance slider, you subtly boost the muted colors without overloading tones that are already strong. If you drag it to the left, the colors lose intensity. With the Saturation slider, you can control the colors even more precisely. In the example, it is set to about minus 9 to minus 10 until the color effect appears balanced. Make sure the skin tones remain natural, because oversaturation is immediately noticeable in portraits.

If you like the result, you confirm the settings by clicking "Open". The image is then available in Photoshop as an edited Smart Object, and you can begin the actual retouching. Since all settings remain saved in the Camera Raw filter, they can be adjusted again at any time afterwards.
Summary – Raw Development in Photoshop: Optimally Preparing the Image Before Retouching
Raw development forms the foundation of every clean retouch. You start with a copy as a Smart Object so that the original is preserved. Then you adjust the color temperature and color casts, bring out details from the shadows, and control the highlights. Sharpening works reliably when you use the Alt key, and you apply clarity and saturation in moderation. This way you go into retouching with a balanced image, in which you will have to correct less later.
FAQ
Why shouldn't I perform the raw development directly on the Smart Object?If you work directly on the Smart Object, it is no longer possible to trace later what the original image looked like. With a copy, the original layer remains unchanged.
What is the Alt key used for when sharpening?With the Alt key held down, the image is displayed in a black-and-white view. This lets you see exactly which structures are being sharpened, and the colors do not distract you.
When do I need noise reduction?Noise reduction is mainly useful at higher ISO values. At low ISO values such as 100, there is usually no visible noise.
Why shouldn't I set the Clarity slider too high?A Clarity value that is too high oversharpens the image and excessively strengthens the contrasts. A moderate value around 15 provides punch without looking unnatural.
What is the difference between Vibrance and Saturation?Vibrance mainly affects muted tones and spares colors that are already strong. Saturation, on the other hand, changes all colors evenly.


