
A portrait only looks three-dimensional when light and shadow sit where they belong. That is exactly what this tutorial is about: You will learn how to use the dodge-and-burn technique to model faces precisely without destroying the skin texture. The foundation is a frequency separation, in which skin color and skin texture sit on separate layers. The dodge-and-burn work takes place on the light and the dark layer. This way, you correct brightness and contrast without shifting color and structure.
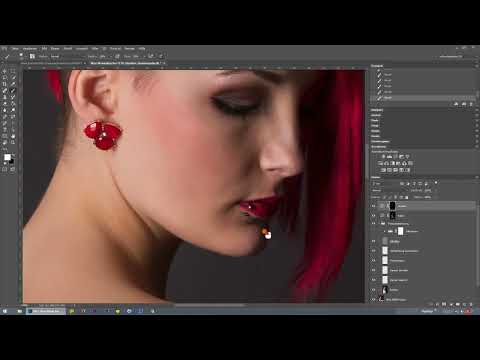
The video is only loaded from YouTube when you play it – data (including your IP address) is then transmitted to YouTube/Google. More in the privacy policy
The video is just under two and a half minutes long. In that time, it shows a complete walkthrough: from zooming in, through working on the nose, forehead, and eyebrows, to clothing, neck, and wrinkles. The following guide leads you step by step through this process.
Key Takeaways
- Dodge and burn means lightening and darkening. With both tools, you shape the face instead of just changing its color.
- An auxiliary layer makes irregularities visible before you correct them.
- Work with small, soft brush tips and low opacity. Several subtle strokes look more natural than a single strong one.
- Nose, forehead, eyebrows, and nostrils are typical areas where you can achieve a lot with little effort.
- Hair, neck, and clothing also deserve attention, because they determine the overall impression of the image.
Step-by-Step Guide
Step 1: Zoom in on the face and check the starting point
Begin by looking at the overall image and then zoom gradually in on the face. Only in the close-up view can you see which areas need shape, such as skin transitions, shadow edges, and small unevenness. To do this, use the key combination Ctrl or Cmd and the plus key, and navigate through the image with the space bar. This way, you keep an overview while going into the details.

Step 2: Give the nose more dimension
The nose sits in the middle of the face and decisively shapes it. On the light layer, choose a soft brush with low opacity and apply light to the bridge and tip of the nose. This makes the nose look slimmer and more three-dimensional. Make sure the transition stays soft. A hard spot of light would immediately look artificial.

Step 3: Subtly brighten the forehead
The forehead usually catches the light directly and gives a fresh appearance. If you brighten it only very subtly, the skin stays natural. Apply a few strokes and work your way up slowly. You can undo the effect at any time with Ctrl or Cmd plus Z, so it pays to proceed carefully.

Step 4: Use an auxiliary layer for control
Before you continue, create an auxiliary layer. Create a new layer, fill it with 50% gray, and set the layer mode to Overlay. With white and black, you now draw on this layer to make light and shadow visible. The auxiliary layer shows you spots where a correction is still missing, and can be hidden at any time. This way you recognize unevenness that is easily overlooked in the normal image.
Step 5: Perform a before-and-after comparison
Keep toggling the layers on and off to check your changes. The comparison shows whether the brightening actually fits the shape or whether you have overdone it. Often a correction looks stronger in comparison than it appears when simply looking at it. Reduce the layer's opacity if the effect is too noticeable for you.
Step 6: Darken eyebrows on the dark layer
Now switch to the darker layer. Here you work with a smaller brush tip, because eyebrows are fine and require precision. Darken the eyebrows slightly so that they frame the face more strongly. Proceed in short strokes in the direction of the hair. A brush that is too large would unnaturally darken the area around the eyes.

Step 7: Intensify makeup and darken nostrils
Makeup can be emphasized with targeted darkening. Work on the spots where contours and shadows are supposed to sit anyway, and intensify the effect carefully. Afterwards, you tackle the nostrils. A slight darkening here emphasizes the shape of the nose and gives the face depth without making the nose look heavy.
Step 8: Increase contrast in the lower face area and on the hair
In the lower face area, such as the chin and cheeks, you can raise the contrast slightly. Make sure the shadows flow evenly. Then darken the hair very slightly. This creates more separation from the lighter skin tone, and the face stands out more clearly. Here, too, it is better to work in several subtle steps.

Step 9: Include the body, neck, and clothing in the editing
The face alone doesn't make a cohesive image. Therefore, also edit the body, neck, and clothing. The neck benefits from a soft shadow under the chin, which models the shape of the neck. For clothing, you emphasize folds and fabric textures by carefully darkening the recesses. This way, the face and body look like they are all of one piece.

Step 10: Strengthen the edges and shadows of the clothing
With clothing, you can emphasize the edges somewhat more. A clear edge makes the fabric look three-dimensional and draws the eye to the subject. Place the brush on the shadow side of the edge and work in soft movements. Make sure the transitions don't become hard, otherwise a cut-out silhouette effect results.

Step 11: Add matching shadows and balance the highlights
After you have applied the brightening, the matching shadows follow. Darken the areas that are located next to the previously brightened spots so that the balance is maintained. A face with many highlights needs just as many shadows, otherwise it looks flat. Check the result regularly with the helper layer.

Step 12: Subtly enhance wrinkles
Finally, you enhance the wrinkles in the face very slightly. Wrinkles are part of the model's personality, so they should remain visible and not look exaggerated. A small shadow in the recesses is usually enough. Finally, check the overall image in comparison to the original state before you save the file.

Summary – Dodge and Burn on the Face: Placing Highlights and Shadows in Photoshop with Precision
With Dodge and Burn, you shape the face without losing its natural texture. You begin by zooming in and analyzing the image, work your way from the nose, forehead, and eyebrows to the hair, neck, and clothing, and check each step with a helper layer. Patience, small brush tips, and low opacity are crucial here. If you always place highlights and shadows in pairs, the portrait stays balanced and lively.
FAQ
How much opacity should I use when brightening and darkening?Usually work with low values, often between 5 and 15 percent, and build up the effect over several strokes.
Why do I need a helper layer if I can paint directly on the image?The helper layer makes irregularities and shadows visible that get lost in the normal image, and can be shown and hidden at any time.
Which brush tip is suitable for fine details like eyebrows?A small, soft brush tip provides precise results without hard edges.
Do I also have to edit clothing and hair?Not necessarily, but subtle adjustments to clothing edges and hair increase the contrast with the skin and make the portrait more cohesive overall.


