
The skin looks smooth after retouching, the transitions seem coherent, and yet the question remains whether everything really fits. This is exactly where check layers come in. With them, you make brightness differences and color deviations visible that are easily overlooked in the normal image. In this tutorial, you will see how to use two curves adjustment layers as check layers and correct the spots you find in a targeted way. The instructions follow the flow of the video and supplement the work steps with tips on the procedure.
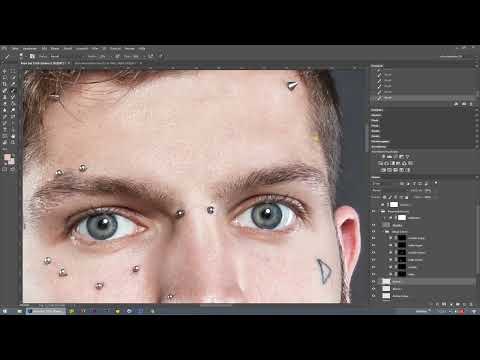
The video is only loaded from YouTube when you play it – data (including your IP address) is then transmitted to YouTube/Google. More in the privacy policy
You create all check layers as adjustment layers above the frequency separation folder. This keeps your corrections flexible, and you can step back at any time if an adjustment turns out too strong.
Key Takeaways
- Check layers are adjustment layers above the frequency separation folder that you use only for checking and delete again at the end.
- A strongly darkened curves layer shows blotches and wrinkles in dark areas, while a brightened curve reveals unevenness in light areas.
- With a rainbow check layer, you can recognize different brightness and color values at a glance.
- The eyedropper with a sample size of 5 × 5 pixels helps you pick up color tones from neighboring areas.
- Fine corrections work best on a separate layer with a soft brush, while details such as hairs or skin blemishes are edited with the clone stamp on the texture layer.
Step-by-Step Guide
Step 1: Check the image with a dark curves layer
First create a curves layer and drag it into the layers panel above the frequency separation folder. Then lower the curve so far that the entire image becomes significantly darker. In this state, spots stand out that look inconspicuous in the normal view. Pay particular attention to areas where the skin texture looks uneven or a blotch stands out as a shadow. This check shows you unevenness that may not yet have been addressed during retouching.

Step 2: Make bright areas visible with a brightened curve
Next, drag the same curves layer in the opposite direction and brighten the image significantly. Now irregularities in the bright areas become apparent, such as small wrinkles or blotches that previously disappeared in the light. Make a note of these spots, because you will correct them in the next step. A look at the neck, the forehead, and the cheek areas is particularly worthwhile here.

Step 3: Touch up the spots you found on a separate layer
Create a new empty layer between the check layer and the frequency separation folder. Select the brush tool with a soft brush tip and a low opacity. Hold down the Alt key to pick up a suitable color tone from the surroundings with the eyedropper, and then paint subtly over the blotches and wrinkles. Work with small brush strokes so that no visible edges appear. The correction takes place on a separate layer, so you can readjust or delete it at any time.

Step 4: Use the rainbow check layer
As a second check, you use a curves layer with a saved rainbow check layer. This layer pattern shows you color and brightness differences in a color gradient. How to create and save the rainbow check layer is explained in the video training, so this step is only briefly touched on in the tutorial. Load it into your document and also place it above the frequency separation folder.
Step 5: Recognize uneven colors and brightness
Look closely at the image with the rainbow layer. Extreme unrest appears where hair, tattoos, or beard areas are located, because they create strong contrasts. Then check even surfaces such as the forehead and cheeks. The same colors in the original image should also look the same in the rainbow pattern. If one spot shows green while the neighboring area appears pink, these are different brightness values that you need to even out.
To adjust the brightness values, pull the curve of the rainbow check layer upward. Then use the eyedropper to pick up a color tone that should match the target area, and compare it with the surrounding areas.

Step 6: Set the eyedropper's sample size correctly
Before you continue working, set the sample size to 5 × 5 pixels in the options bar of the eyedropper tool. This gives you an average value from a small area, which delivers more reliable results than a single pixel. For the sampling options, you have three choices. You can sample all layers, in which case the rainbow layer also factors into the value. You can choose all layers without adjustments, in which case your adjustment layers are left out. Or you can sample only the current and underlying layers. For your work on the new brush layer, the last option is usually the most suitable, because it lets you pick up the color from the image without taking the check layer into account.

Step 7: Match Color Deviations by Painting Over Them
Now select the Brush tool, pick up the target tone with the eyedropper, and paint over the areas until they show the same color as the reference area. Start with the green areas from the rainbow view and then work your way to other areas. Check repeatedly whether the results are right by switching the rainbow check layer on and off. A one-hundred-percent match is not necessary, as the curves adjustment is very finely graduated. What matters is that the transition looks even.

Step 8: View the Entire Image
Then zoom out of the view so you can assess the retouching in the overall image. Small deviations that stand out at high magnification disappear in the overview. Make a note of remaining spots that you still want to correct. Often this reveals blemishes in the background or on body edges, which are better edited on the texture layer.

Step 9: Remove Individual Blemishes on the Texture Layer with the Clone Stamp
Hide the rainbow check layer by deactivating the eye icon, and switch to the texture layer. This is where the blemishes in the background are, which you remove with the Clone Stamp tool. Set the brush diameter so that it matches the size of the structure. Since there are hardly any foreign structures in the background, the Clone Stamp usually works reliably. Place the source as close as possible to the spot being corrected so that the transitions look natural.

Step 10: Edit Stray Beard Hairs and Hair Remnants
In the upper area of the image, you notice individual beard hairs sticking out beyond the contour. You shorten these with the Clone Stamp by directly covering the hairs. On the head you can see hair remnants, which you also remove. Work carefully so that the contours of the hairstyle or beard still look natural. Retouching them away completely is not always sensible; targeted shortening is often enough.

Step 11: Correct Difficult Areas on the Background Layer
Some areas cannot be edited cleanly on the texture layer. For these, switch to the background layer and work with the Brush tool. In the video, a gradient from yellow to blue is used to pick up color tones and paint over the affected areas. Pick up the matching tonal values with the eyedropper and keep painting until the values in the yellow area and in the blotchy areas match. Here too: work in several small passes instead of covering heavily in one go.

Step 12: Remove the Check Layer Again
When all checks are complete, you delete the curves adjustment you used for control. The check layers served only for analysis and should not remain in the final file. Your corrections on their own layers are retained. Then save the document and check the result once more in the normal view.

Summary – Check Layers in Frequency Separation: How to Verify Your Retouching in Photoshop
With two curves adjustments as check layers, you can spot brightness errors and color deviations that are easily overlooked during retouching. The dark curve shows you blemishes in the shadows, while the light curve reveals unevenness in the highlights. The rainbow check layer makes uneven color and brightness values visible. Correct the spots you find on separate layers with a soft brush, use the eyedropper with 5 × 5 pixels as a reference, and edit hairs as well as background blemishes with the Clone Stamp. Finally, you delete the check layer and review the result.
FAQ
Why do you need check layers if the retouching is already finished?Check layers make unevenness visible that looks inconspicuous in the normal image, helping you make final corrections in a targeted way.
Why should the check layer be above the frequency separation folder?Only then does it affect the entire image, and you see the results of your retouching directly in context.
Why do you work with a 5 × 5 pixel eyedropper?The sampling area provides an average value from several pixels, which makes the sampled color tone more stable and reliable.
Does the color have to be matched one hundred percent?No, a nearly even match is enough, because the curves adjustment is very finely graduated and small deviations are hardly noticeable in the overall image.
When do you use the Clone Stamp and when the Brush?You use the Clone Stamp on the texture layer for blemishes, hairs, and fine details, and the Brush on separate layers or the background layer for color and tonal value corrections.
Why should you delete the check layer at the end?Check layers serve only for control and do not permanently change the image, so they do not belong in the final file.


