
At the beginning, a few layers seem harmless. But as soon as ten or more are added, you quickly lose track of which eye is currently visible and which layer you are currently editing. That is exactly what this tutorial is for. Using a cartoon motif as an example, I will show you how to place body parts on their own layers, name them sensibly, and keep an overview with thumbnail sizes, hiding, and colors. The basis is the video "Photoshop für Einsteiger & Aufsteiger – 3.4 Ebenen sortieren und benennen" with a running time of just under six minutes.
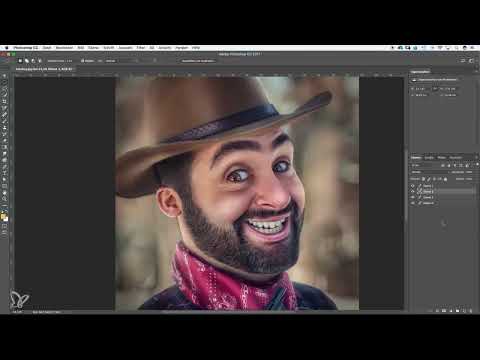
The video is only loaded from YouTube when you play it – data (including your IP address) is then transmitted to YouTube/Google. More in the privacy policy
Key Takeaways
- With the selection tool and the keyboard shortcut Command + J or Ctrl + J, you copy part of an image to a new layer.
- Before each new copy operation, make sure which layer you are on.
- Large thumbnails make it easiest to recognize the content of a layer.
- With a double-click on the layer name, you assign meaningful names.
- Alt + click on the eye icon shows only that one layer.
- Color labels help you and others on the team quickly find important layers.
Step-by-Step Guide
Step 1: Select an eye and copy it to a new layer
First, take the selection tool from the toolbar. Use it to draw a generous frame around the eye, because fine detail work is not necessary here. Make sure the selection is on the layer that contains the pixels. Then press Command + J (Mac) or Ctrl + J (Windows). Photoshop automatically places the selection on a new layer, which is named "Layer 1". The lower layer with the original motif is called "Layer 0".

Step 2: Place the mouth on its own layer and pay attention to the right layer
For the mouth, you proceed in the same way: make a selection, then press Command + J or Ctrl + J. The most important point here is the choice of layer. Before you copy, click on the lower layer again, that is, on the original. If the selection is on a layer without matching pixels, an empty or wrong copy is created. So get into the habit of taking a quick look at the Layers panel before each copy operation.

Step 3: Add more body parts
Now take another element, such as the ear. Select it with the selection tool, make sure again that you are on the original layer and not on the mouth layer, and copy with Command + J or Ctrl + J. After this step, the eye, mouth, and ear are each on their own layers, plus the original motif. By now at the latest, the layer list is getting long, and that is exactly when the following organization pays off.

Step 4: Adjust the thumbnail size for a better overview
The thumbnails in the Layers panel show you the content of each layer. You can find the setting by right-clicking in an empty area of the Layers panel and choosing the option "Large Thumbnail". The default size is usable, but with many layers it is often too small. The smallest variant shows you no preview at all, so you can hardly tell whether an eye or the mouth is hidden behind it. In practice, the large thumbnail is usually the best choice.
Step 5: Name layers sensibly
The name "Layer 1" says little about the content. So show and hide the layers one after another so that you can reliably recognize what each layer shows. Then double-click on the layer name, type in the new name, and confirm with Enter. For the left eye, you could write "Left eye", for example. Clear, short names save you a lot of searching later.

Step 6: Display individual layers in isolation
If you only want to see the mouth, you don't have to laboriously click all the other eye icons. Hold down the Alt key and click on the eye icon of the mouth layer. Photoshop hides all other layers, and only the mouth remains visible. Another click on the same icon while holding the Alt key restores the display. With this trick, you can also quickly view the left eye or the ear on its own.
Step 7: Show all layers again
After isolating, you usually want to have all layers back in the image. To do this, click in the column with the eye icons, hold down the mouse button, and drag from top to bottom over all layers. This makes them visible again at the same time. This is much faster than clicking each eye individually.

Step 8: Color-code layers
If you still have too many layers in view, you can additionally mark them with colors. To do this, right-click the layer and choose a color. You decide for yourself what the colors mean. For example, I use red for layers that I don't want to change or that should keep their position. For me, green stands for layers that are safe, such as the left eye. If you create several versions of a file and don't know which one to use, a color marking is also enormously helpful. The colors can be changed at any time. They are especially useful in teams or when you share a PSD file with others, because then everyone immediately understands which layers are important.

Summary – Sorting and naming layers in Photoshop
With a clear structure, your file stays organized even with many layers. You copy parts of the image onto their own layers with Command + J or Ctrl + J, pay attention to the active layer, use large thumbnails, and assign descriptive names. With Alt + click you isolate individual layers, and dragging over the eye icons makes everything visible again. Color markings round off the organization and make teamwork easier.
FAQ
Why should I name layers at all?Named layers show at a glance what is on them. This saves time, especially when you reopen the file after some time or pass it on to others.
What happens if I copy on the wrong layer?If the selection is on a layer without matching pixels, an empty or unwanted copy is created. Simply delete it and switch to the correct layer before copying.
Which thumbnail size is the best?For most cases, the large thumbnail is optimal. The smallest option is too small to recognize the contents well.
How do I display only a single layer?Hold down the Alt key and click the eye icon of the desired layer. With another Alt-click on the same icon, you bring the display back.


