
Imagine you only want to brighten the sky in a photo, give a face more contrast, or separate a subject from the background. That is exactly what you need selections for. They define which area of an image gets edited and leave the rest untouched. Photoshop offers a whole range of tools for this, which differ significantly in how they are operated and how precise they are. In this tutorial I will show you the most important ones, explain what they are suited for, and tell you honestly where their limits lie.
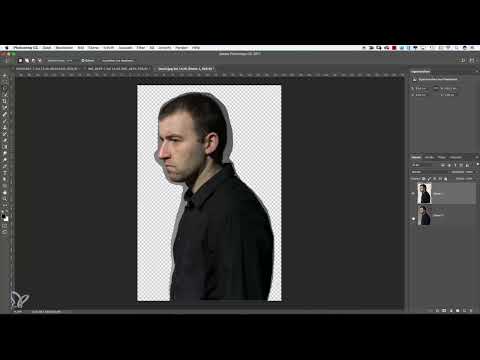
The video is only loaded from YouTube when you play it – data (including your IP address) is then transmitted to YouTube/Google. More in the privacy policy
Key Takeaways
Selections separate areas of an image and ensure that corrections only take effect where you need them. The Elliptical Marquee and the Rectangular Marquee are suited for simple shapes, Lasso variants for freeform contours, and the Quick Selection tool for fast, largely automatic results. A feathered edge makes transitions more natural, and by holding down the Shift key or the Alt key you can add to or subtract from selections.
Step-by-Step Guide
Step 1: The Elliptical Marquee for Round Areas
The Elliptical Marquee is the simplest tool, and you recognize it by its thin, blinking lines, the so-called marching ants. Select it and, while holding down the mouse button, drag a circle over the desired area, for example over a head. Hold down the Shift key while doing so, and you get an exact circle instead of an ellipse. When dragging it out, make sure you really hit the area, because a selection cannot be reshaped afterwards. You can, however, move it as long as it is still active. Simply click inside the selection and drag it to the right place.

Step 2: Copy a Selection to Its Own Layer
Once the selection is in place, you can copy the marked area to a new layer using the keyboard shortcut Command plus J (on Windows Ctrl plus J). Make sure you are on a pixel layer when doing this, otherwise the command will not work as desired. This step is especially handy when you only want to move or change part of the subject, such as a head, and the rest of the image should remain unchanged. A selection does not have to be perfect to be useful, by the way. With rough contours, however, the result quickly shows in the image, and then a second attempt is worthwhile.
Step 3: Soften Hard Edges with a Feathered Edge
The selections you have created so far have hard edges. This often looks artificial when you apply a correction to them. Via the Select menu and the Refine Edge or Feather command, you can make the transition softer. You have to try out the right value, because it depends heavily on the subject. In the example I chose a value of 500 pixels, which suits this case, but it can look quite different for other images. A selection with a feathered edge may still look hard at first glance, but when you apply a correction, the soft gradient becomes apparent.
Step 4: Apply Corrections Selectively with Adjustment Layers
With a selection you can intervene selectively without changing the entire image. To do so, create an adjustment layer, for example a Levels adjustment. Photoshop then automatically creates a layer mask that represents your selection. In the example, the area around the neck is brightened, and thanks to the feathered edge the correction blends harmoniously into the image. This principle works with all adjustment layers. You can edit the mask later at any time with the brush or gradient tool if something is not right.
Step 5: The Rectangular Marquee for Areas and Graphics
The Rectangular Marquee is suited for rectangular areas and is just as easy to use as the ellipse. With it you can, for example, place a bar across the subject. To do so, create a color fill, which you fill with black for example, and you get a simple bar that partially covers the subject. This way you can build graphic elements, for example in the style of an album cover. If you also add a drop shadow and adjust the size, the result quickly looks professional.
Step 6: Combine Multiple Selections
A special feature of many selection tools is that you can combine them. Hold down the Shift key while you draw another selection, and a small plus sign appears next to the cursor. The new selection is then added to the existing one. This creates, for example, several stripes that together form a grid-like pattern. You can then copy this pattern to its own layer and move it as usual.
Step 7: The Lasso Tool for Freeform Shapes
If you want to trace contours freely, the Lasso tool is the right choice. You set the starting point, hold down the mouse button, and follow the contour. The selection closes as soon as you release the mouse button. However, this requires a steady hand and a lot of patience, because a stroke that has been started cannot be undone. With the Escape key you cancel and start over. The result is often not perfect, and that is exactly why Photoshop offers an alternative.
Step 8: The Polygonal Lasso for More Precise Lines
The Polygonal Lasso works with individual clicks instead of one continuous stroke. You place point after point and thereby connect straight line segments. This is much more even than freehand drawing, but with round subjects it leads to angular, almost cartoon-like outlines. Therefore, zoom in closer to the subject for fine work so that you can place points more accurately.
Step 9: The Magnetic Lasso for Contours with Edges
The Magnetic Lasso is probably the most helpful lasso tool. It automatically detects edges in the image and keeps the selection along them. You just carefully trace the contour without making major corrections. It is important that you complete the stroke in one go, because a pause can cause the selection to become inaccurate. In the example, the selection was much cleaner than with the regular Lasso, but the tool still takes time and concentration.
Step 10: The Magic Wand as an Outdated Tool
The Magic Wand selects areas with similar color. It used to be the standard tool for selections, but today it is only of limited use. The results are often messy, and the settings are hard to get right with complex subjects. You should therefore use it rather for simple areas with clear color differences.
Step 11: The Quick Selection Tool as a Modern Alternative
The Quick Selection tool is nowadays the tool of choice when you want to work quickly. You simply click on the subject or drag over it with the mouse button held down, and Photoshop recognizes the connected areas on its own. In the example, a single stroke over the shirt was enough to select it reliably. Be sure to enable the Auto-Enhance option in the options bar, because then the contours become noticeably more precise.
You adjust the size of the Quick Selection tool with the Alt and Ctrl keys, depending on whether you want to work more coarsely or more finely. To subtract too much of what has been selected, hold down the Alt key and drag over the affected area. This is how you correct, for example, a beard area that was mistakenly included.
Step 12: Checking the Result
Before you continue using a selection, it is worth checking it. A quick way is to place a color fill beneath the mask and make it visible. This way you immediately see whether edges are missing or areas have been included that shouldn't be. A selection doesn't have to be flawless, as long as it is sufficient for your purpose.

Summary – Photoshop Selection Tools: Lasso, Quick Selection & Co. at a Glance
Selection tools are the foundation for targeted image editing in Photoshop. For simple shapes, you reach for the Elliptical Marquee or the Rectangular Marquee. You draw free-form contours with the Lasso, with the Polygonal Lasso you achieve more even lines, and with the Magnetic Lasso you get especially close to edges. The Quick Selection tool handles many tasks the fastest, and the Magic Wand is now only of limited use. With feathering, adding, and subtracting, you refine your selections, and adjustment layers ensure that your corrections remain flexible.
FAQ
Which tool is suitable for round selections?The Elliptical Marquee. With the Shift key held down, you draw an exact circle.
How do I move a selection without redrawing it?As long as the selection is active, click inside it and move it with the mouse button held down.
How do I copy a selection to a new layer?With the keyboard shortcut Command plus J, on Windows Ctrl plus J, provided you are on a pixel layer.
What does feathering do?It softens the transition of the selection so that corrections look more natural. You have to try out the right value depending on the subject.
How do I add an area to multiple selections?Hold down the Shift key while you draw another selection. A plus sign then appears next to the cursor.
How do I subtract an area from a selection?Hold down the Alt key and drag over the area you want to remove.
Can I undo a lasso stroke?No, that isn't possible with the Lasso tool. With the Escape key you cancel the process and start over.
Why is the Magnetic Lasso often better than the regular Lasso?It automatically detects edges in the image and keeps the selection along them, so you have to work less precisely.
Why should I rather avoid the Magic Wand?It only works with color similarity and often delivers messy results with complex subjects.
What should I definitely enable for the Quick Selection tool?The Auto-Enhance option, as it makes the contours of the selection significantly more precise.


