
An image crop often decides whether a photo looks powerful or goes unnoticed. You don't have to get everything perfect when taking the picture, because the Crop tool in Photoshop allows you to define the crop afterwards, rotate it and even straighten it. At first glance the tool seems simple, but there is a surprising amount to it. In this tutorial, I will guide you step by step through the most important functions, from aspect ratios to content-aware fill.
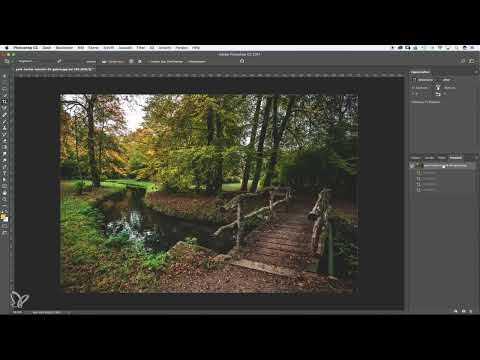
The video is only loaded from YouTube when you play it – data (including your IP address) is then transmitted to YouTube/Google. More in the privacy policy
Key Takeaways
- The Crop tool can also be adjusted afterwards, as long as cropped image areas have not been permanently deleted.
- You choose aspect ratios such as 4:5, 5:7, 2:3 or 16:9 directly in the options bar, and you can also create your own presets.
- The option "Delete Cropped Pixels" determines whether parts of the image are retained or lost for good.
- With "Content-Aware", Photoshop automatically fills empty areas after rotating, but the result depends heavily on the subject.
- With Straighten, you correct tilted images by drawing a line in the subject.
Step-by-Step Guide
Step 1: Activate the Crop Tool
Select the Crop tool in the toolbar. A frame immediately appears around your image, with handles at the corners and edges. You can grab these handles to change the crop. The frame is your work area: everything outside of it will be cut off later.

Step 2: Set the Aspect Ratio
By default, the proportions remain locked. As a result, your image does not become distorted when you shrink the crop. This is ideal if you only want to select a tighter area and keep the format. If that doesn't suit you, you will find a dropdown menu in the options bar at the top with fixed formats such as 4:5, 5:7, 2:3 or 16:9. A square format is suitable, for example, for an Instagram image, while 16:9 is appropriate for a YouTube banner.

Step 3: Use Custom Presets and the Free Format
If you always need the same format, for example for a Facebook banner, a custom preset is worthwhile. Once created, it is available to you in every new project. If, on the other hand, you need complete freedom, you choose the free format. Then you determine height and width yourself and can compress or stretch the image as you like.

Step 4: Move and Scale the Crop
Grab the frame and drag it across the image until the desired area is visible. If you want to shrink the crop evenly from the center, hold down the Alt key, or the Option key on a Mac, and drag a handle. The frame then scales outward from the center. If, on the other hand, you only want to work in one direction, move the anchor point to a corner, for example to the bottom right. When scaling, the opposite corner then stays fixed, and you keep control over the composition.

Step 5: Rotate the Image
To rotate the image, grab the frame outside a corner and move the mouse in the desired direction. It doesn't matter whether you grab at the bottom left or top left. During the rotation, a grid appears that helps you align the subject exactly. In this way, you can position the crop so that no distracting edges remain.

Step 6: Confirm the Crop and Refine It Later
Confirm your crop with the Enter key or via the checkmark in the options bar. The nice thing about this: you can reopen the crop at any time. If you activate the Crop tool again, Photoshop displays the frame once more, and you can expand a crop that is too tight afterwards. Whether this fully succeeds, however, depends on a setting that becomes important in the next step.

Step 7: Understanding Delete Cropped Pixels
In the options bar, you will find the "Delete Cropped Pixels" setting. If it is deactivated, the cropped parts of the image are retained in the background. This means you can expand the crop at any time. If you activate the option, however, those areas are permanently removed. The frame then shows only transparent areas, and the deleted pixels cannot be recovered.
The decision is a trade-off. The advantage of the deactivated option is flexibility, while the disadvantage is the additional storage required for data that is not visible. Try out both variants and decide which way of working suits you better.

Step 8: Content-Aware Fill
If you rotate an image beyond its original boundaries, empty corners appear. The "Content-Aware" option helps here. Photoshop then tries to automatically fill the empty areas with matching content. However, the function is not guaranteed to succeed. With some subjects, such as an even meadow, the fill looks convincing. With others, you will notice repetitions or unnatural transitions. So test the function on your own subject and try it out before you commit.

Step 9: Comparing the Result with the Original
To judge whether the fill was successful, it is worth taking a look at the original. Undo the operation and compare both versions side by side. This way you can see which areas were filled in automatically. Often it is not noticeable at first glance, especially with inconspicuous backgrounds.

Step 10: Straightening Crooked Images with the Straighten Function
A photo often looks slightly crooked, and that is exactly what the Crop tool's "Straighten" function is for. Activate it in the options bar and look in the image for a line that should actually be straight, such as a horizon or vertical tree trunks. Set a point at the start of the line, hold down the mouse button, and drag along the line to the end. Photoshop shows you the angle, which was 1.9 degrees in the example. When you release, the image is rotated accordingly. Then confirm with the Enter key.
Note that after straightening, empty areas can appear at the edges. You can either trim these with a tighter crop or fill them with the content-aware option.

Step 11: Discovering Additional Settings in the Gear Icon
In the options bar of the Crop tool, you will find a gear icon. Behind it are further settings and display options that are not immediately obvious. Feel free to click on it and try out the possibilities. Especially with a tool that is this versatile, experimenting is worthwhile. This way you will quickly find out which combination suits your workflow.

Summary – Crop Tool in Photoshop: Define and Straighten Your Image Crop Perfectly
The Crop tool is far more than a frame for trimming. You set aspect ratios, use your own presets or the free format, move and scale the crop, and rotate the image as needed. With the "Delete Cropped Pixels" setting, you decide whether parts of the image are retained. Content-aware fill helps with filling empty edges, but you should always check the result. You can quickly straighten crooked photos with the Straighten function. If you also take a look at the settings in the gear menu, you will quickly notice how much control this seemingly simple tool offers.
FAQ
Can I still change an image crop after saving?That depends on whether the "Delete Cropped Pixels" option was activated. If it is deactivated, the cropped areas still exist and can be selected again.
How do I create my own aspect ratio for recurring projects?Create a preset with the desired values in the Crop tool. This makes the format directly available for every further image.
Why is my content-aware fill unusable?The automatic fill does not work equally well with every subject. Even areas usually turn out better than complex structures. Compare the result with the original and then decide whether to accept the fill.
How do I straighten a crooked image?Activate Straighten in the options bar and draw a line along a feature that should actually be horizontal or vertical. Photoshop then rotates the image automatically.


