
Maybe you know this: You've captured a good shot with your camera, you open the file on your computer and find that exposure or white balance are difficult to correct. The solution often lies in the file format. If you set your camera to RAW instead of JPEG, you save more image information and can decide on the editing later at your leisure. This tutorial shows you how to open a RAW file in Photoshop, which settings in the dialog are important, and how you can adjust the image again at any time even after opening it.
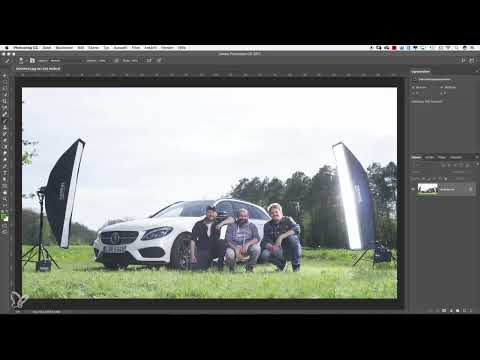
The video is only loaded from YouTube when you play it – data (including your IP address) is then transmitted to YouTube/Google. More in the privacy policy
The procedure differs significantly from opening a JPEG file. We will work out exactly this difference step by step.
Key Takeaways
- RAW files contain significantly more image information than JPEG files and are therefore also much larger.
- When you open a RAW file in Photoshop, the Camera Raw Converter appears first, not the image directly.
- In the workflow dialog, you set the color space, color depth, size, and resolution.
- The "Open as Smart Object" option allows you to readjust the corrections again at any time later.
- A JPEG, on the other hand, is already fully developed, and intervening in the raw data is no longer possible.
Step-by-Step Guide
Step 1: Recognize the Size Difference Between JPEG and RAW
Start by taking a look in the Finder or Explorer. In the example, a JPEG file of the same subject weighs about 8.9 MB. The same image as a DNG file, i.e. as a RAW format, comes to just under 27 MB. The RAW file is therefore many times larger, and that is exactly where its advantage lies: It stores the unprocessed sensor data pixel by pixel. This gives you more room to maneuver during later editing, for example with heavily overexposed or underexposed areas.

Step 2: Open the JPEG for Comparison
For comparison, first open the JPEG file directly in Photoshop. You can do this via File and Open or by drag-and-drop. The image lands immediately as a normal layer in the document, and you can start editing without detours. Retouching, creating selections, or removing distractions works here just as usual. The downside: The image information is already firmly fixed.

Step 3: Load the RAW File in Photoshop
Drag the RAW file into the Photoshop window via drag-and-drop. Instead of a normal image window, the Camera Raw Converter now opens. It is part of Photoshop but works with its own interface, designed specifically for developing RAW data. Here you can adjust exposure, contrast, or colors before the image even appears in Photoshop.

Step 4: Open the Image Without Adjustments
If you first just want to get to know the opening process, you don't need to change any sliders in the converter. At the bottom of the dialog, you'll find the "Open Image" button. One click on it brings the image into Photoshop as a normal layer. The result looks similar to the JPEG, although in this case you haven't used any function of the converter. The real advantage only becomes apparent in the following steps.

Step 5: Access the Workflow Options
Open the RAW file again via drag-and-drop. At the bottom edge of the Camera Raw Converter, you'll find the "Workflow Options" link. One click on it opens a window with several settings that determine how the image is brought into Photoshop. Here you decide which parameters your image should start with.

Step 6: Set the Color Space
In the workflow dialog, you first choose the color space. In this example, the photo was taken in sRGB, and exactly this color space is also set here. Alternatively, Adobe RGB is available, which covers a larger color gamut. If you choose Adobe RGB, the image will be opened with this color space accordingly. Which color space is the right one depends on your goal. For photos that are primarily meant to appear on the web or on standard monitors, sRGB is completely sufficient in most cases.

Step 7: Determine the Color Depth
Right below that, you set the color depth, either 8-bit or 16-bit. A 16-bit file contains significantly more color information, which can be especially helpful for smooth gradients and extensive corrections. The price for this is a larger storage requirement: an image of 50 MB becomes about twice as large at 16-bit, so around 100 MB. For getting started, 8-bit is recommended. You save storage space, work faster, and still achieve good results for most projects.
Step 8: Set Size and Resolution
Next, you can set the dimensions of the image. You can accept the default values if you want to keep the original size. In addition, you can specify the resolution, for example 300 ppi for print. For purely on-screen display, the resolution plays a minor role. Think in advance about what the image is intended for, and set the values accordingly.
Step 9: Open the Image as a Smart Object
The most important point in the workflow dialog is at the very bottom: the option "Open as Smart Object". Activate the checkbox and confirm with OK. Then you click on "Open Object". The image now appears in Photoshop with a small icon in the layer thumbnail that indicates a Smart Object. This icon is crucial, because it permanently links your image to the Camera Raw Converter.
Step 10: Repeat the Development at Any Time
Double-clicking the Smart Object icon in the Layers panel opens the Camera Raw Converter again. There you can adjust, supplement, or undo your corrections, even if you have already saved multiple times. As an example, the exposure was reduced to make the image slightly darker. By confirming, you land back in Photoshop, and the image shows the new version.

This is exactly where the difference from JPEG becomes apparent. A JPEG is a finished file, and interventions in the original shot are no longer possible afterwards. A RAW file, on the other hand, remains editable at any time. So you can develop it today, reopen it in a year, and adjust it with new knowledge.

Summary – Opening RAW Files in Photoshop: Using Camera Raw Correctly
A RAW file gives you more freedom than a JPEG because it stores all image information unchanged. When opening it in Photoshop, the Camera Raw Converter is used, in which you set the color space, color depth, size, and resolution. With the option "Open as Smart Object", the development remains repeatable at any time. If you master these steps, you can edit your shots flexibly and traceably.
FAQ
Why is a RAW file so much larger than a JPEG?RAW files store the uncompressed sensor data of the camera. JPEG files, on the other hand, are compressed and lose image information in the process.
Do I have to use the Camera Raw Converter for every RAW file?No, you can work directly in Photoshop with "Open Image". However, this way you do not use the development options of the converter.
Which color space should I choose?For most applications, sRGB is sufficient. Adobe RGB offers a larger color gamut and is suitable if you want to work with a larger color space.
Is 16-bit better than 8-bit?16-bit contains more color information, but requires significantly more storage space and processing power. For getting started, 8-bit is usually sufficient.
What does the option "Open as Smart Object" do?The image is linked to the Camera Raw Converter. You can reopen and adjust the development at any time by double-clicking.
Can I still edit a JPEG in the Camera Raw Converter later?Not in the sense of a RAW development. A JPEG is already fully processed, which is why the editing options are significantly limited.


