If you are working with Adobe Photoshop and want to highlight your images in a comic style, adjusting colors and brightness is crucial. The Camera Raw Filter is a highly effective tool for precisely changing color nuances, controlling brightness, and achieving intense saturations. In this guide, I will walk you through the process step by step, so you can get the best out of your images.
Key Insights
- The Camera Raw Filter allows for selective adjustments of color, brightness, and saturation.
- Luminance is useful for manipulating the brightness of individual hues.
- Changes in saturation can dramatically affect the overall image.
- By skillfully combining different adjustments, you can achieve impressive results.
Step-by-Step Guide
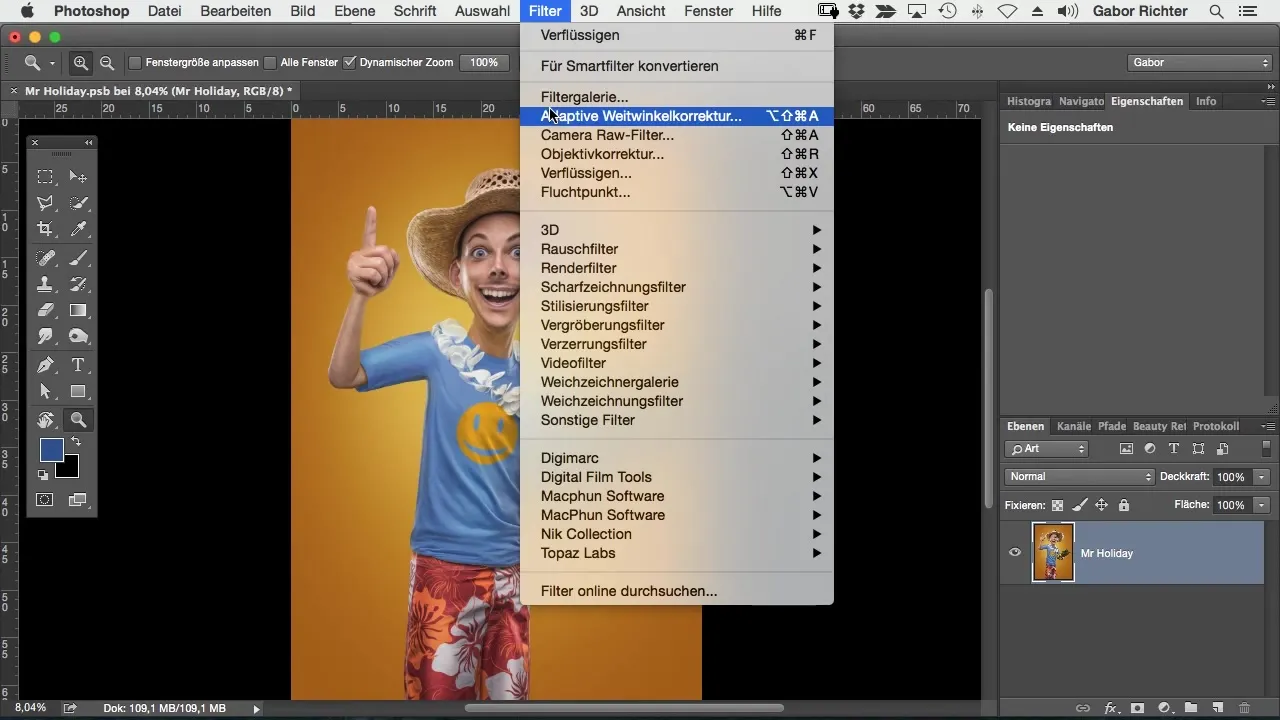
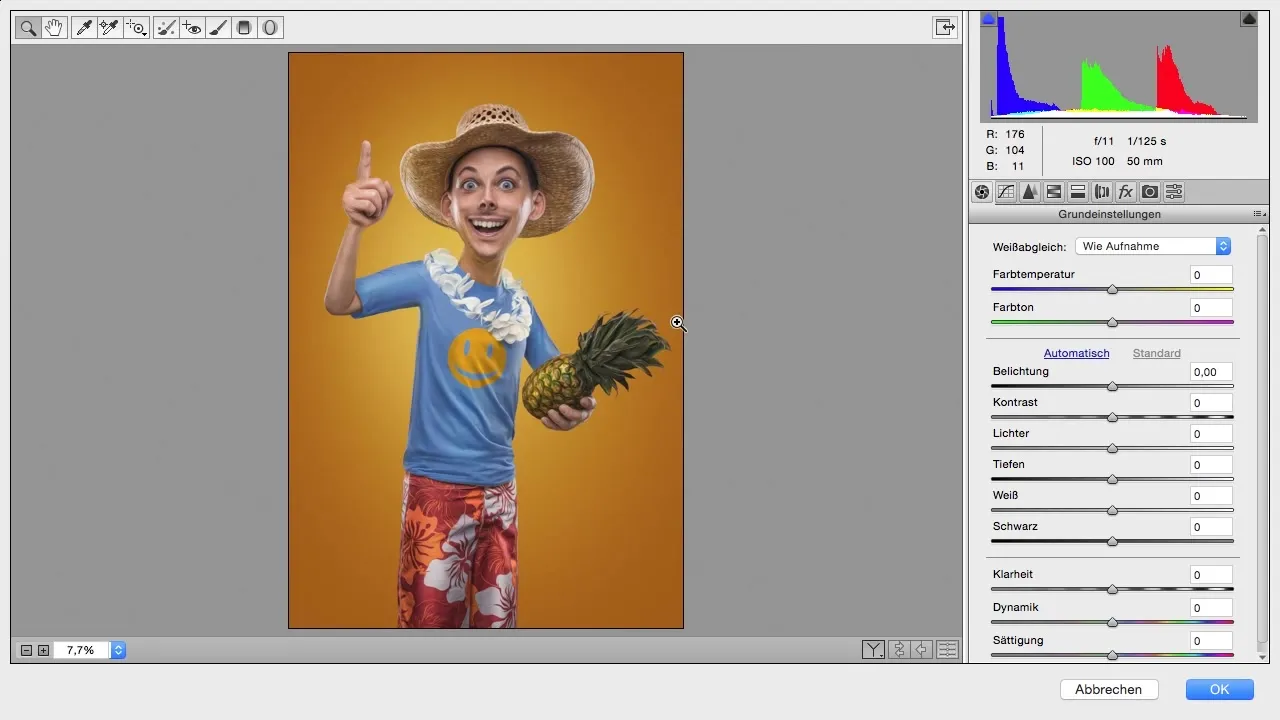
Start by opening your image in Photoshop. Make sure you have the layer you want to adjust. To begin with the adjustments, navigate to the menu and select the Camera Raw Filter. The Camera Raw mode will open, where all adjustments can be made.

Once the Camera Raw Filter is open, you find yourself in one of the most powerful environments for image editing. Here, you can return at any time if you want to make changes to your image. This makes this feature so valuable, especially when you want to make adjustments to the image later.

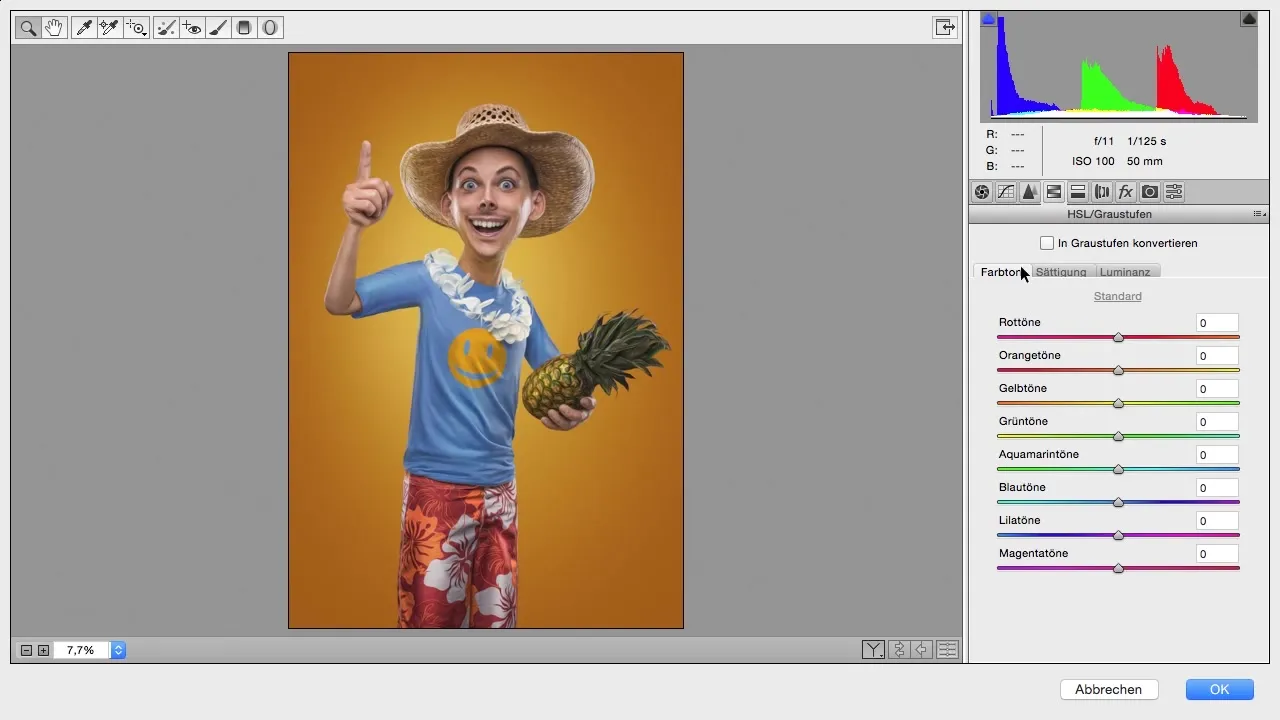
To specifically change colors and brightness, click on the fourth tab in the top menu bar, labeled "HSL/Grayscale". Here, you can adjust the brightness, saturation, and hue of each individual color in the image. Let’s start focusing on luminance, a useful tool for changing the brightness of hues.

Suppose you want to adjust the brightness of a T-shirt that is in blue or aquamarine. You can easily use the corresponding sliders for blue or turquoise tones to brighten or darken the T-shirt. This specific adjustment can be helpful in giving your image the desired look.
If the change does not have the desired effect, do not hesitate to edit the brightness of other hues in the image at the same time. However, it doesn’t stop here; you should also focus on the saturation of the colors. By decreasing or increasing the saturation for the T-shirt, you can achieve even more interesting and eye-catching results.
If you prefer a deeper color for the T-shirt, you can increase the saturation and turn the color into a more vibrant hue. There are various ways to transform or adjust the reds, yellows, or blues at your leisure. A creative approach to these adjustments can give your image that final touch.
Using luminance is, for me, the most effective method of color and brightness adjustment in Photoshop. It allows for thorough manipulation of the brightness of individual hues, which is particularly significant in comic style. Experiment with different settings to see which look suits your artwork.
Summary – Guide to Color and Brightness Adjustment in Comic Style with the Camera Raw Filter
In this guide, you learned how to use the Camera Raw Filter for adjusting colors, brightness, and saturation in your images. This technique allows you to manipulate color nuances precisely and give your image a fresh and appealing look. Experiment with the different tools and find the combinations that work best for your project.
Frequently Asked Questions
How do I open the Camera Raw Filter in Photoshop?Go to "Filter" and select "Camera Raw Filter" from the dropdown menu.
Can I change the settings in the Camera Raw Filter later?Yes, you can return to the Camera Raw Filter at any time and change your adjustments.
What is the difference between luminance and saturation?Luminance affects the brightness of a hue, while saturation controls the intensity and vibrancy of the color.
Can I adjust multiple colors at the same time?Yes, you can change the brightness and saturation of different colors simultaneously to create a harmonious overall image.


