The eyes are the window to the soul. In digital art, the targeted coloring of the eyes is crucial for the overall impression of a portrait, especially in the comic style. Here you'll learn how to make a person's eyes surprisingly more intense, ensuring they stand out in your artwork.
Key insights:
- The selection of the iris is an important step in coloring the eyes.
- By applying adjustment layers, you can effectively control the color intensity and brightness.
- With selective color correction, you give the eyes the desired tone.
Step-by-step guide
To color the eyes intensively in comic style, follow these steps:
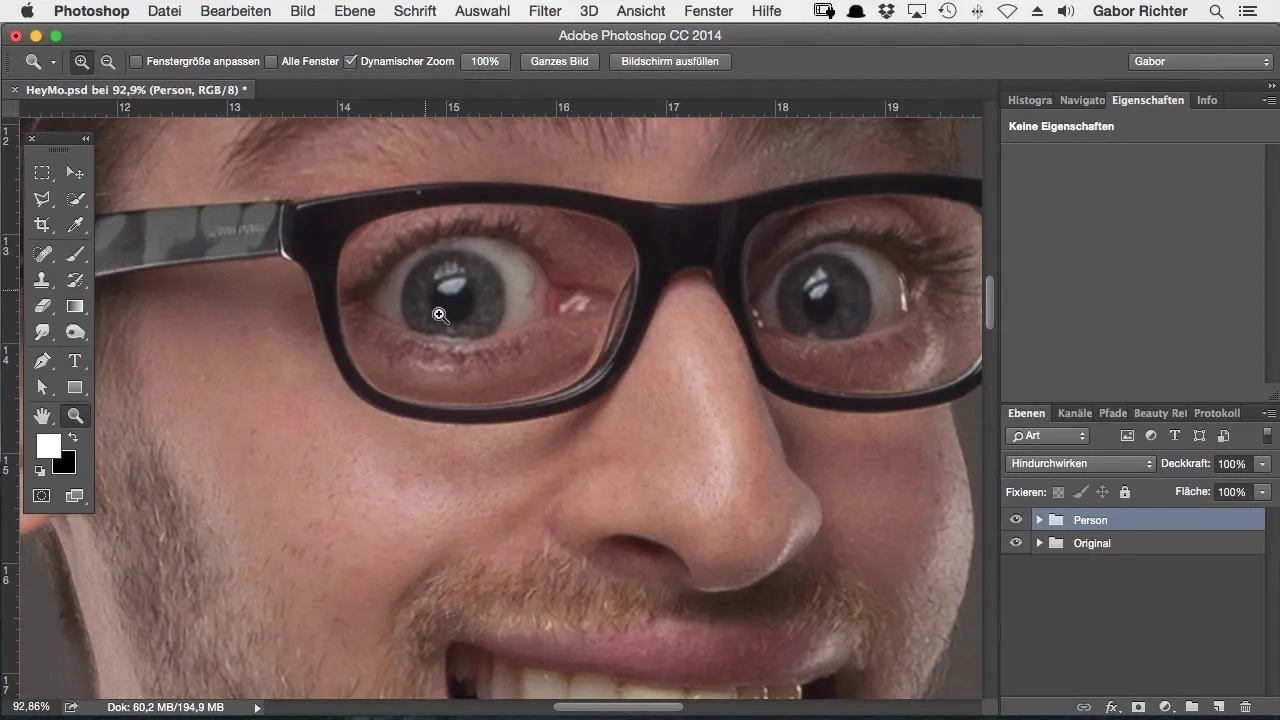
First, zoom in on your character's eyes to display the iris more clearly. Focusing on this is important, as it is the main emphasis of your visualization. To create a precise color, you need to make a selection of just the iris.
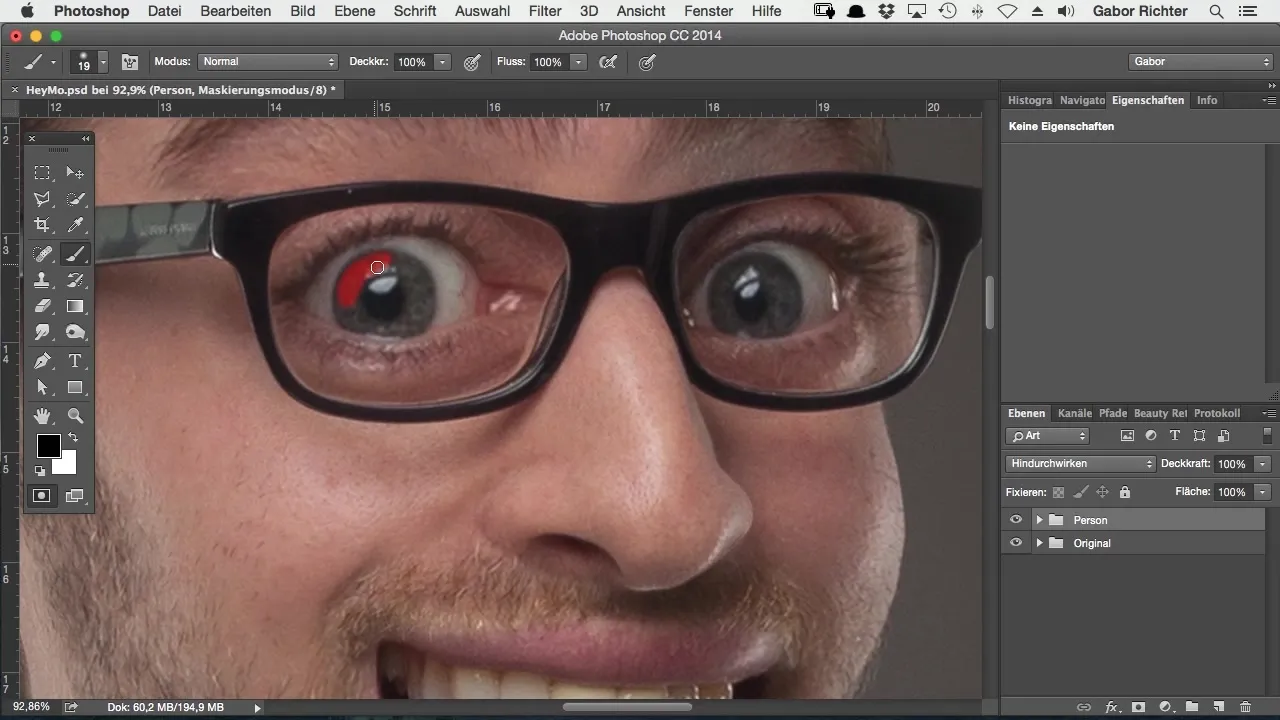
To make the selection, choose the brush tool and set the opacity to 100%. It is advisable to work with a small brush to create the most precise selection possible. It is not necessary to capture the contour perfectly; a rough outline of the iris is perfectly sufficient.
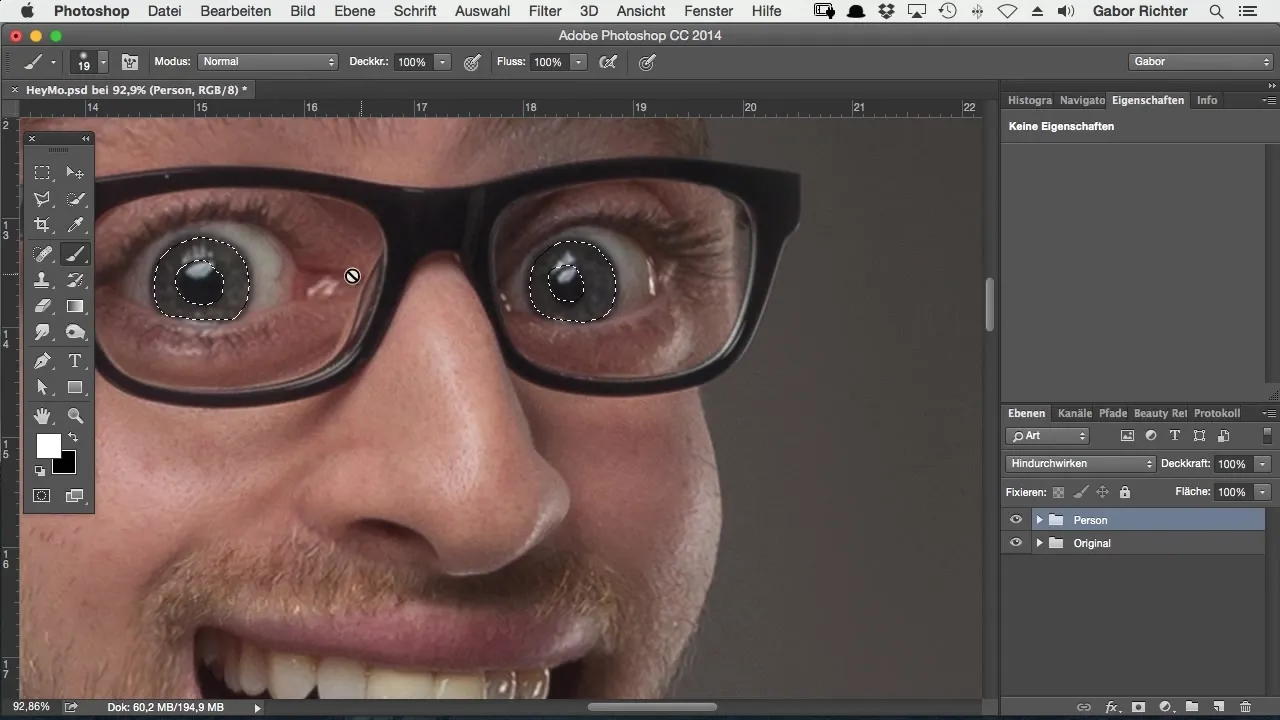
Once you have made a selection of the iris, go back to the mask options icon. There you can confirm your selection so that only the iris of the person is selected. This step is crucial to be able to work with colors selectively without affecting the rest of the image.
Now it's time to make the color changes. To do this, add an adjustment layer for “Selective Color Correction.” Leave the first principle of this layer unchanged to have a clear starting point for your modifications. The next step is to change the fill method to “Linear Dodge” as well. This will provide a more intense result.
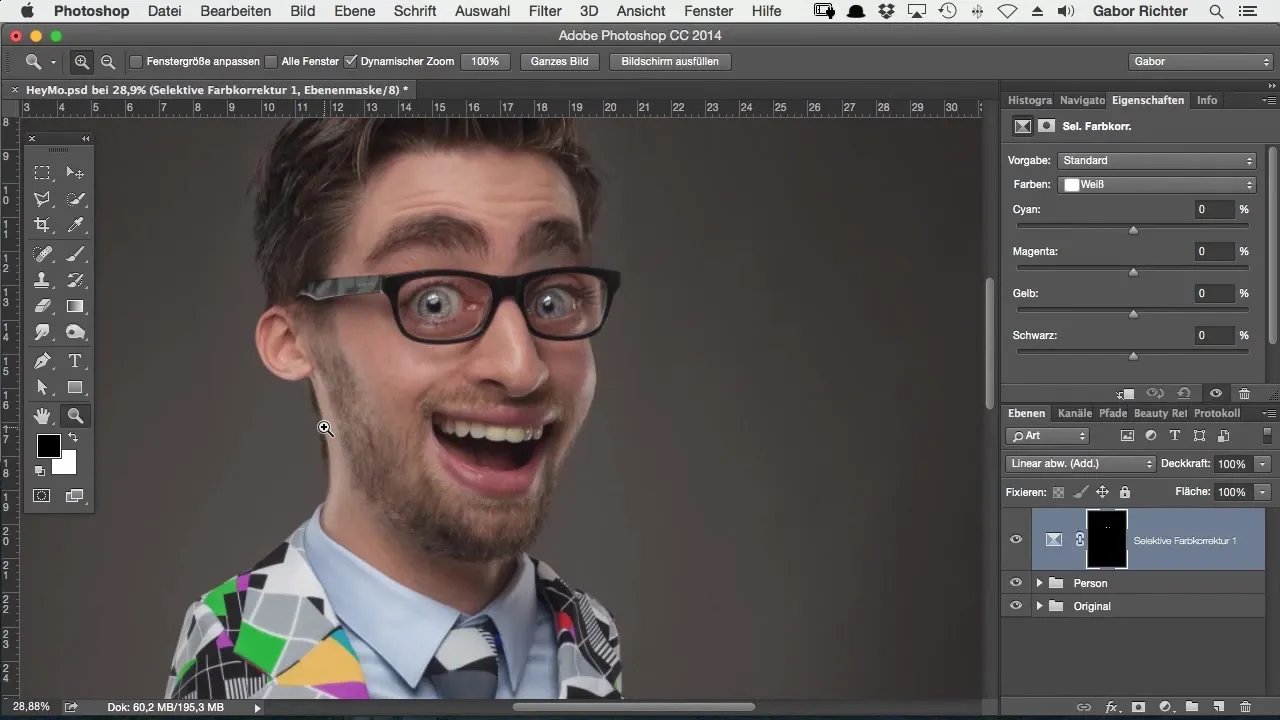
After you have done this step, you will notice that the eyes suddenly begin to glow intensely. However, to achieve a harmonious look, you should reduce the opacity of this adjustment layer. Start at 100% and test as desired. A good starting point would be about 40%, for example.
Take your time to toggle between values until you like the result. It is worth being patient here to achieve the perfect effect. You will notice that the eyes now shine and the brightness sets excellent accents.
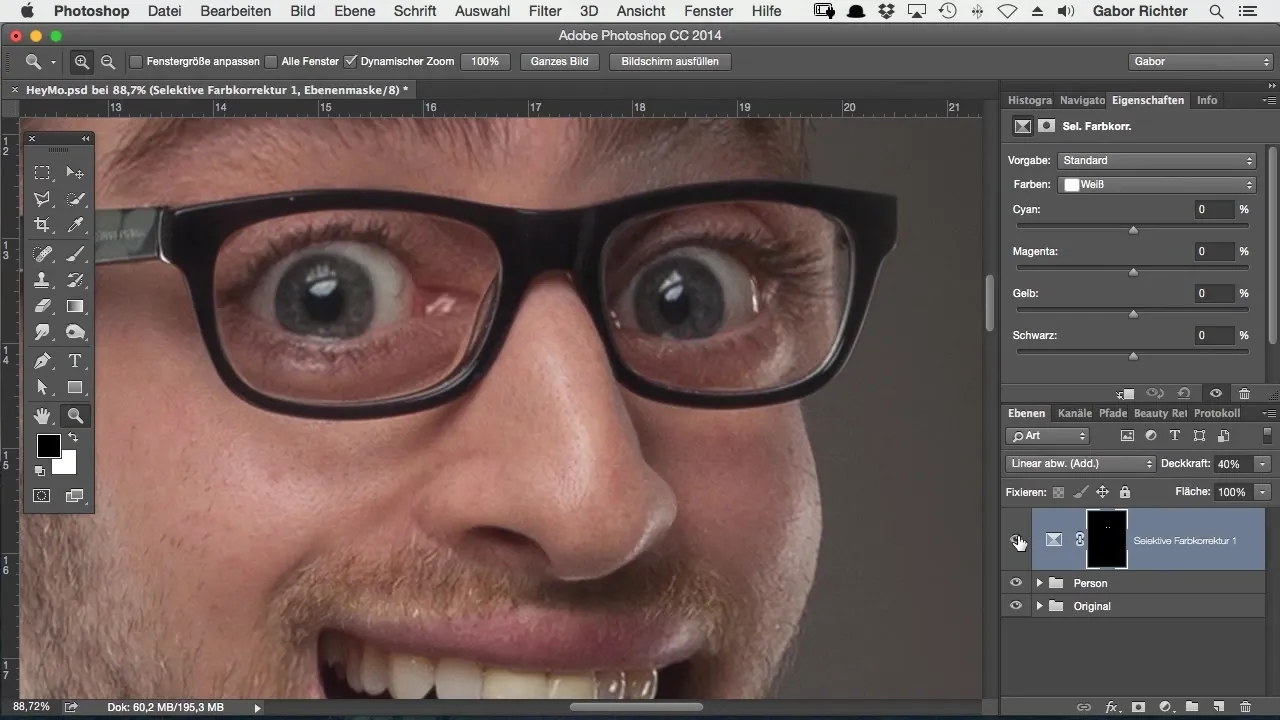
Now it's time to change the eye color. Choose a color that suits the person well. In this case, I choose a beautiful blue. Go back to selective color correction and select the grays. Slide the slider to bring the eyes into the desired blue hue.
If you move the gray values to the right, you'll already see a change. The blue becomes more intense, but you must ensure that the color looks really appealing. Make sure that the yellow color is complementary to blue, which means you should move the yellow slider to the left.
Although Photoshop does not provide the best user interface for color editing, you can achieve the desired blue tone with patience and skillfully adjusting the sliders.
With the right settings, you can make your character's eyes not only glowing but also appear in a fascinating color. If you want to experiment, try other colors or combinations as well. Especially with brown eyes, a bit of red can create a great effect.
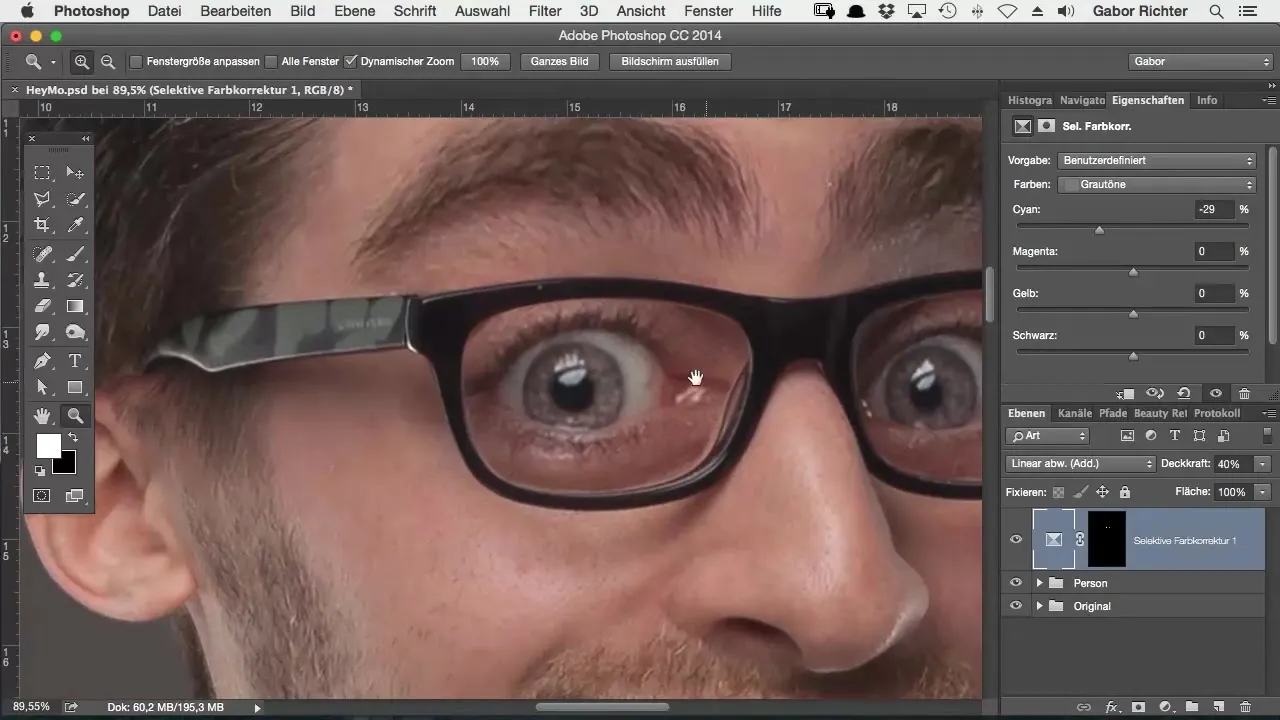
The eyes now appear bright blue and impress throughout the image. You have effectively created the effect you were striving for.
Summary – How to intensively color eyes in Photoshop in comic style
This detailed guide shows you how to intensively color your characters' eyes in comic style. By selectively choosing the iris and experimenting with color corrections, you create impressive, radiant results that give the entire artwork more expression.
Frequently Asked Questions
How can I improve the selection of the iris?Use a smaller brush and work slowly to create precise outlines.
Can I use any color for the eyes?Yes, you can color the eyes in any shade that fits the character.
How can I control the brightness of the eyes?Use the opacity of the adjustment layer to adjust the brightness until the result you like is achieved.


