Comic characters are defined by their unique colors and appearances. What if you want to transform your own comic character into a famous character like the Hulk or a Smurf? In this guide, I'll show you how to easily change the skin color of your comic figure in Photoshop – and it all works effortlessly and smoothly. Let's dive into the details right away.
Key takeaways
- You will learn how to selectively choose and change skin tones in Photoshop.
- The method is quick and allows for the creation of various color variations for your comic character.
- With hue adjustment, you can achieve different results at any time, depending on your preference for different comic characters.
Step-by-step guide
First, you need to open what you want to edit. Load your image of your comic figure into Photoshop.

Selecting the skin tones
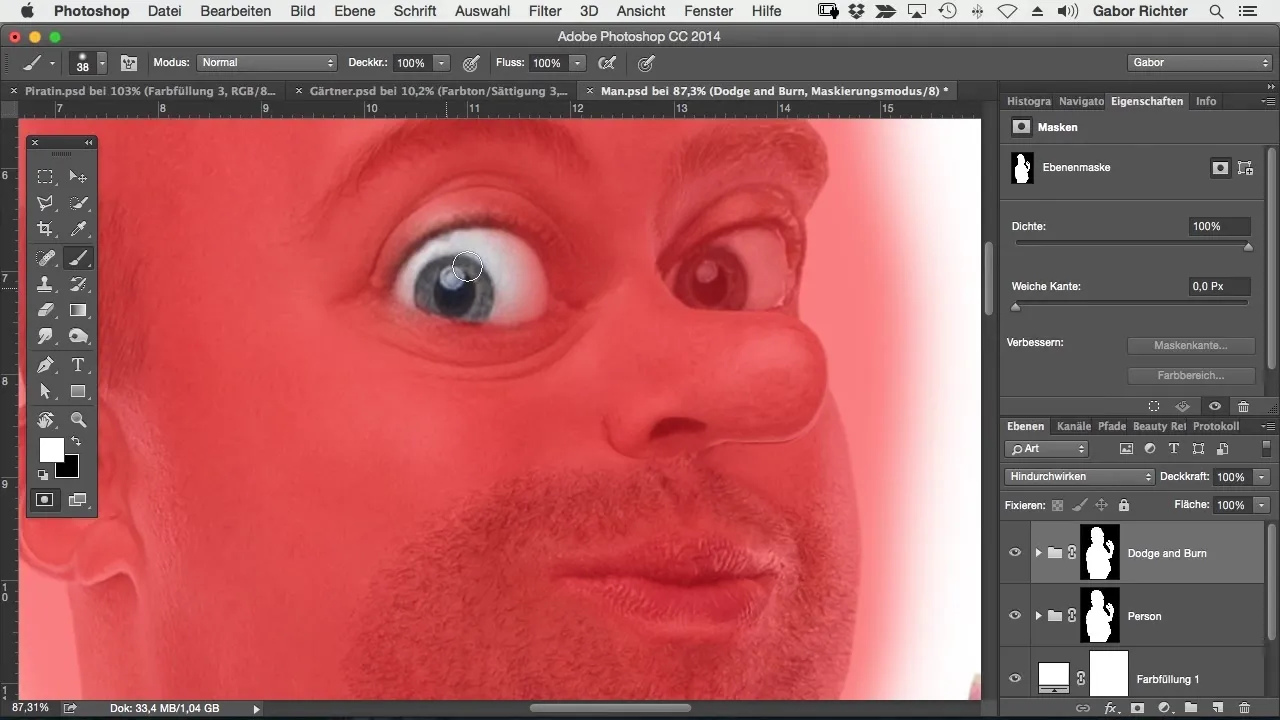
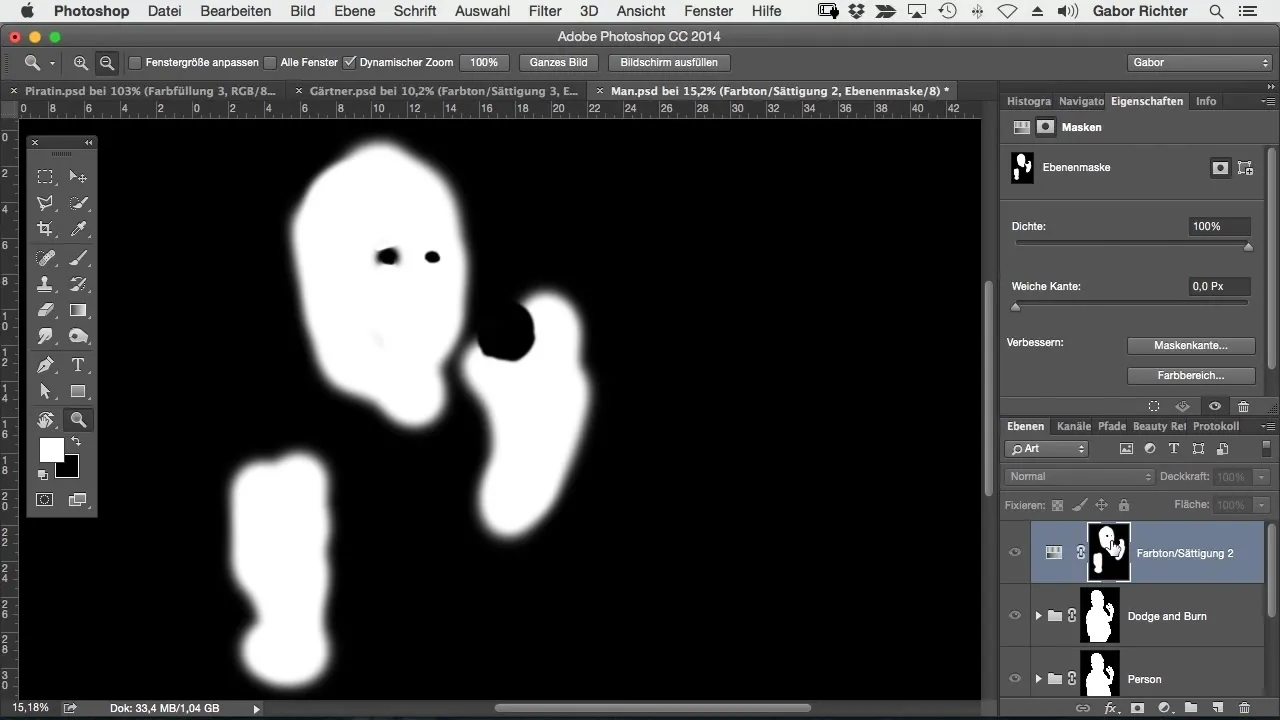
Next, focus on the skin areas of your figure. Use the masking option to precisely select the skin tones. Make sure you choose only the skin tones and no other elements like eyes or backgrounds.

Your selection should be as accurate as possible to achieve the best possible result. Make sure no unnecessary areas and details are included. For example, if you accidentally select parts of the eyes, it would obviously affect the final image.

Activate the masking option
Once you have made your selection, activate the masking option again to apply your changes only to the selected skin tones. This ensures that the rest of the image remains untouched while you can adjust the hues of your figure.

Create a Hue Adjustment Layer
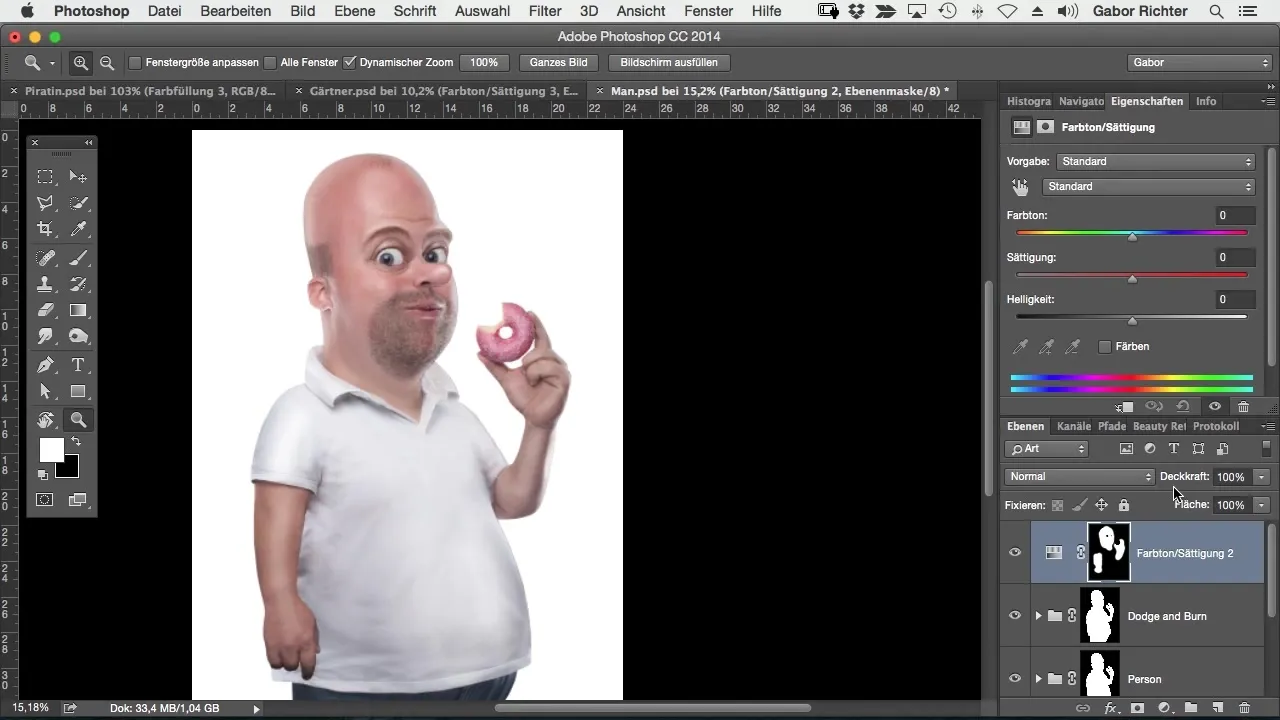
Now it's time to create an adjustment layer. Click on the adjustment icon and select "Hue/Saturation". This will open various options for adjusting the colors.

Select new color
At the top of the window, you are now in the hue palette. Here you can select a new hue that fits your vision of your figure. Test different colors and find the one that you think works best. For example, if you choose a green color for the Hulk, move the slider in the appropriate direction.
Adjust saturation
Now it's time to adjust the saturation. A higher saturation enhances the colors more. This way, you can give your character the desired vibrant look. Experiment with the sliders and find the perfect balance.

Review your selection
After making the color adjustments, take a look at your overall result. If you are not completely satisfied with the appearance of the skin color, go back and see if you may have overlooked other areas or if you need to adjust your selection again.

Summary – Changing skin color in your comic style: A step-by-step guide
In this guide, you learned how to adjust the skin color of your comic figure in Photoshop. With a combination of selection tools, masking options, and hue changes, you can quickly and easily transform any figure into a new, colorful variant. With precise work and adjusting saturation and hue, your creativity knows no bounds.
Frequently Asked Questions
What is the masking option in Photoshop?The masking option allows you to select specific areas of an image and apply adjustments to them.
How can I best select skin tones?Use the masking option and make sure to select only the skin tones to ensure a clean result.
Can I reset the colors if I'm not satisfied?Yes, you can adjust or delete the adjustment layers at any time to return to your previous selection.
Do I have the option to save multiple color variations?Yes, you can save multiple adjustment layers and try different looks for your comic figure.


