
Imagine you have two subjects side by side on different layers and want to give only one of them a black-and-white look. You would normally place an adjustment layer above the entire layer stack, and then it affects everything below it. That is exactly what the clipping mask is for. With it, you bind a correction to exactly one layer, and Photoshop applies it only there.
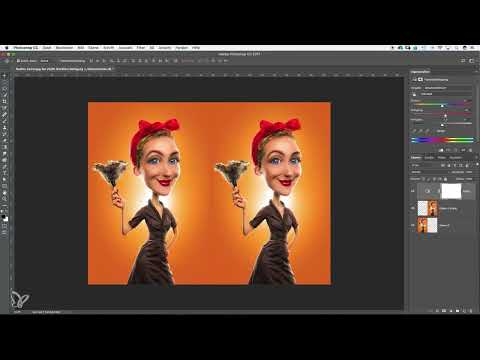
The video is only loaded from YouTube when you play it – data (including your IP address) is then transmitted to YouTube/Google. More in the privacy policy
In this tutorial, I will show you step by step how to create, release, and stack clipping masks. The example is a comic portrait that I duplicate onto two layers. That way you can see the effect right away in the image.
Key Takeaways
- By default, an adjustment layer affects all layers below it.
- With a clipping mask, you limit the effect to the layer directly below.
- You create a clipping mask by right-clicking or by holding down the Alt key (on a Mac: Option key) at the boundary between the layers.
- Multiple clipping masks can be stacked on top of each other so that all corrections affect the same image.
- You release a clipping mask by clicking it again with the Alt key held down or by removing the main subject from the chain.
Step-by-Step Guide
Step 1: Preparing the Canvas
Open your subject and first expand the canvas. Extend the width to roughly double, because you need space for two images side by side. Then duplicate the image layer with the keyboard shortcut Ctrl+J (Windows) or Cmd+J (Mac) or via the Layer menu. Move the duplicate to the right so that both subjects sit next to each other.

Step 2: Understanding the Layer Order
You now have two identical subjects on two layers. The lower layer is the left image, the upper one is the right. For the following steps, the order of the two subjects does not matter at first. The only important thing is that you know which layer is where, because in a moment you will bind one layer specifically to the other.

Step 3: Creating a Black-and-White Adjustment Layer
At the bottom of the Layers panel, click the icon for adjustment layers, the half-filled circle, and choose Black & White. You will notice that the entire image turns black and white. This is because the adjustment layer sits above both subjects and therefore affects everything below it.

Step 4: Arranging the Layers for the Clipping Mask
To make the clipping mask easy to follow, drag the two colored image layers downward so that the adjustment layer lies between them. Now you have one subject in black and white and one in color, and that is only because the colored subject lies on top. This gives you the overview you need for working with clipping masks.
Step 5: Setting the First Clipping Mask
Right-click the Black & White adjustment layer and choose "Create Clipping Mask". You will see immediately that only the right image is still black and white. Even though the adjustment layer is at the very top, it only affects the layer directly below. So the setting is now truly a correction for just this one image.

Step 6: Releasing the Clipping Mask Again
If you want to remove the connection again, hold down the Alt key (Mac: Option) and click the dividing line between the adjustment layer and the image layer. A symbol appears there with a downward-pointing arrow that is crossed out. Another click with the Alt key held down brings the clipping mask back. Alternatively, you can create it again by right-clicking the adjustment layer. The effect is the same.
Step 7: Creating a Second Adjustment Layer with a Color Effect
Now delete the Black & White layer again and create a new adjustment layer with which you tint the image differently. In the example, I use a color adjustment that makes the image more reddish. If you don't like a setting, simply use the Undo command (Ctrl+Z or Cmd+Z) and try a different color. It is worth looking at different variations before you commit.

Step 8: Limiting the Color Correction with a Clipping Mask
To make the reddish effect appear only on the right image, hold down the Alt key and click between the adjustment layer and the image layer below it. The adjustment layer is now linked to the right image. The clipping mask therefore works exactly as it does with the black-and-white adjustment.

Step 9: Stacking Multiple Clipping Masks on Top of Each Other
The great thing about clipping masks is that you can stack them as often as you like. To do this, create a contrast or brightness layer, for example via the "Brightness/Contrast" adjustment. At first, it again sits above both images and changes both of them. Then set it as a clipping mask by holding down the Alt key and clicking between the layers, or by using the right-click. Now this correction also affects only the right image. In this way, you can place as many corrections on top of each other as you like, and all of them continue to affect the same image.


Step 10: Releasing the Chain of Clipping Masks
If you want to remove all clipping masks at once, you don't have to edit each one individually. It is enough to release the main image from the chain. To do this, drag the image layer downward so that the corrections are no longer bound to it. The clipping masks are then released automatically.

Step 11: Applying the Clipping Masks to the Left Image
Finally, you can also apply the clipping masks to the other image. To do this, position the adjustment layers so that they sit directly above the desired image layer, and bind them with a clipping mask. In the example, both adjustment layers ultimately affect the left image, even though they sit above the images. The order of the layers therefore determines which image receives the correction.

Summary – Clipping Masks in Photoshop: Applying Corrections to Individual Layers
With clipping masks, you control precisely which layer a correction affects. An adjustment layer doesn't have to be deleted or created twice. You simply bind it to the layer below and release the connection again when needed. Clipping masks can be stacked as often as you like, which gives you a lot of flexibility for image looks and color corrections. Practice the steps on an image of your own, and they will quickly become second nature.
FAQ
What is a clipping mask in Photoshop?A clipping mask limits the effect of a layer, such as an adjustment layer, to the layer directly below it.
How do I create a clipping mask?Right-click the layer and choose "Create Clipping Mask", or hold down the Alt key (Mac: Option) and click on the dividing line between the layers.
How do I release a clipping mask?Hold down the Alt key (Mac: Option) and click on the dividing line again until the crossed-out icon disappears.
Can I stack multiple clipping masks on top of each other?Yes, you can place as many clipping masks on top of clipping masks as you like, and all of them continue to affect the same image.
Why does my adjustment layer still affect all images?Probably the clipping mask is not set or the layer is in the wrong order. Check whether the adjustment layer sits directly above the desired layer and whether the connection is displayed.
How do I remove all clipping masks at once?Drag the main image layer downward out of the chain, and the clipping masks will be released automatically.


