

Fur only looks alive when structure, light and hair direction work together. That is exactly what the ninth part of the series on the elf amazon is about. You work out the dark two-piece fur from the rough coloring down to the finest hairs, relying on staggered clipping masks so that each layer only affects the area you are currently working on. Before you get started, you also adjust the hairstyle, because its lighting forms the basis for everything that follows.
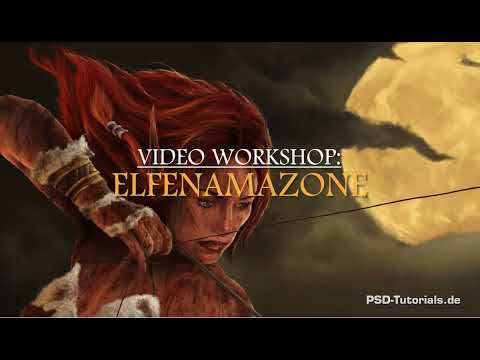
The video is only loaded from YouTube when you play it – data (including your IP address) is then transmitted to YouTube/Google. More in the privacy policy
Key Takeaways
- Work in stages: first the rough structure, then details, fine work and finally the moon glow.
- Staggered clipping masks allow you to correct layers independently of each other without jeopardizing the overall picture.
- Brush size, hardness and opacity are only guidelines. What matters is what looks right in your image.
- Light and dark tones must alternate so that the fur gets depth and strong contrasts.
- The moon glow is painted outside the clipping masks so that the hairs extend beyond the contours.
Step-by-Step Guide
Readjusting the Hairstyle
Before the fur is created, it is worth taking a look at the hairstyle. The roundness of the head should stand out more, so you remove the affected areas on the Hair layer with the eraser and redraw them by hand. Afterwards, you also have to reset the lighter areas on the moon glow layer so that everything fits together. In the working file you will not see these changes, because the layers and masks are kept as a group. Feel free to try it yourself: collapse the group, erase the areas and rebuild them. This is a good exercise for understanding light direction.

Creating a Gradient Clipping Mask for the Dark Fur
The foundation consists of a simple brown layer, with the clipping mask containing the gradients above it. On this, you create another layer as a clipping mask in order to trace the color gradient, which you have so far only laid out roughly, in more detail. Zoom in closer on your subject so that you can see the details.

Setting Up the Brush and Tracing the Gradient
The brush is still set to two pixels, which is far too fine for this task. Change it to about 25 pixels and reduce the opacity. In the brush settings, you deactivate the shape properties, while the opacity jitter stays active. The preview at the bottom of the window shows you how this affects the result. Make sure the strokes look soft and even.

Pushing Back the Shine and Matching the Hue
The light reflections are currently so shiny that the fur looks like plastic. To tone them down, you work with a very dark brown. At the same time, you use a lighter color so that the dark fur does not look too heavy. Use hues that you pick up from other areas of the image and overlay the surfaces with them. You already know this approach from skin and hair, and it works reliably here as well.

Rough Structure with the 13-Pixel Brush
Now comes the Details 1 layer. Here you build up the rough structure of the fur. Take a brush with 13 pixels, 0 percent hardness and 45 percent opacity. With a very dark, almost black brown, you place the darker areas. For the remaining areas, you use a light brown. The strokes should be short and choppy and follow the growth direction in which the fur is later supposed to lie.

Inner Lining and Shadows on the Bikini
At the places where the dark fur meets the lighter fur, you manually lower the color value significantly. The light fur should later look like the inner lining of the bikini, which bulges outward at these spots. Therefore, draw in now the shadow that will later be covered by the lighter strands. The dark fur peeking out between the strokes subsequently gives the image more depth.

Shadow of the Leg Warmer
The same principle applies to the leg warmer. Where the leather straps extend a little into the fur areas, a slight shadow is created. For this, you have reduced the size of the brush once more. Keep in mind that the right size often only becomes apparent after a few strokes. So don't rely on fixed measurements, but rather go by what looks right to you.

Details 2 with Clipping Mask and Fine Structures
You call the next layer Details 2 and also turn it into a clipping mask. To do this, hold down the Alt key and click on the line between the two layers. The hardness stays at zero, and the brush starts at two pixels. The color is significantly darker, but at first the effect is not sufficient. The jump from 13 to 2 pixels is apparently too big. So you switch to four pixels. Then a structure emerges that puts you on the right track.

Working Layer by Layer
The finished result rarely emerges in a single pass. While you work, the color relationships shift: darker areas become lighter and vice versa. So apply several layers, sometimes with lighter tones over the whole surface, then again with darker ones. Give yourself time, because with a practice image there is no deadline, and it is precisely this patience that deepens your understanding of color design.

Fine Details and Hard Contrasts
Once you are satisfied with the fur, you create a layer named Fine Details in the fur group and attach it to the stacked clipping masks. With the four-pixel brush, you add more highlights. Then you work in very dark spots with black, because the fur still lacks contrast so far. In combination with the flames, the fur looks significantly better when it has hard contrasts.

Fine Strokes at 200 Percent
For the finest work, you switch to the two-pixel brush and increase the opacity to 85 percent. Zoom in to 200 percent. At this magnification, you can see the brush tips well, and you don't lose track of the overall picture. The slight stair-step effect on the contours is not a problem here. As long as the clipping mask is active, the strokes stay within the area, which is exactly right at this stage.

Moon Glow without a Clipping Mask
The Moon Glow layer is at the very top, and it doesn't need a clipping mask. That way you can draw the little hairs beyond the contours. In the brush presets, deactivate the opacity jitter, since the shape should vary with the little hairs. The shape properties with the Cheeter, on the other hand, you activate. With a light color, you add the lighting effects that the moon casts from the right. Distribute the strokes not only along the right contour but also in the middle of the area, so that the fur doesn't look too uniform.

Finishing Work for the Last Little Hairs
For the fire, which also leaves a glow, you create another layer in the Fur group. Since the name Fine Details is already taken, you call it Finishing Work. This layer also does not become a clipping mask, because the little hairs should extend beyond the edge. With the finer brush, you bring out the structure within the areas even more clearly. The Moon Glow must stay on the top layer so that it later blends with the remaining lights.

Preserving the Flow in the Fur and Fraying the Edges
The goal with this fur is an even flow: the hairs should be brushed largely in one direction. Only at the edges do you vary the strokes a little so that they look slightly frayed. In this way, continue working alternately on Moon Glow and Finishing Work until the fur looks like it was made in one piece.

Checking from a Distance and Saving an Interim Version
Now zoom out again. From a distance, the fine details are no longer recognizable, but the structure of the material and the lighting become apparent. It is precisely here that you notice whether the overall impression is right. Save the file at this point as an interim version before you continue working.

Dabbing for More Variety
To break up the monotony of the brown fur, you create a layer named Tupfen (dots), without a clipping mask. The brush is enlarged to about 16 pixels. You first place the dots with too much opacity, which looks like painted-on spots. Therefore, adjust the brush settings so that only the opacity jitter remains active, and reduce the opacity. Then you touch up individual areas with a finer brush. Black with low opacity allows you numerous gradations.

Finishing the Dark Fur
Finally, you can experiment a bit with the opacity and the layer mode of the Tupfen layer if the result looks too harsh. At about 69 percent opacity, you often find the right balance. Then you collapse the layer group, right-click on the group and choose Merge Group. With that, the dark fur is finished.

Preview of the White Fur Areas
The next part is about the white fur areas. In principle, they follow the same logic as the dark fur, but differ in a few details. After that, you devote yourself to the fine work on the leather straps and the remaining clothing details.

Summary ??? Painting Fur with Clipping Masks: Step-by-Step Guide
The dark fur of the elf amazon is created in many layers. You begin with the hairstyle and the rough gradient, work your way through structures and shadows to the fine details, and finally add the moon gleam. The staggered clipping masks keep each stage separate, so you can make corrections at any time. If you bring patience and work layer by layer, you will get fur that shows depth, structure and light equally.
FAQ
How large should the brush be for the rough fur structure?For the rough structure, a brush with about 13 pixels, 0 percent hardness and 45 percent opacity is suitable. However, the exact values are only guidelines.
Why do you work with several clipping masks in succession?The staggered clipping masks separate the individual work steps. This way you can adjust structure, details and moon gleam independently of one another without damaging the other layers.
When should the moon gleam not be set as a clipping mask?The moon gleam sits at the very top without a clipping mask so that the fine hairs extend beyond the contours and reinforce the impression of light on individual hairs.
How do you know that the fur is finished?The fur is finished when it looks coherent from a distance, the structure is recognizable and the lighting matches the rest of the image. To check this, zoom out repeatedly and assess the overall impression.

