

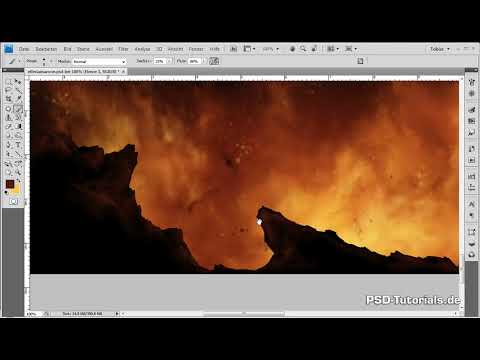
The fire in your image currently looks balanced, but still flat. This is exactly where this part comes in: you refine the finishing of the fire, create a clear spatial layering with foreground layers and rocks, and use light and darkness to deliberately draw the eye to the flames. In the end, you have an environment that is complete enough to tackle the Amazon afterwards.
The video is only loaded from YouTube when you play it – data (including your IP address) is then transmitted to YouTube/Google. More in the privacy policy
Key Takeaways
Depth is created through overlapping. Several layers with different opacity and size make the fire step out of the image.
Cropped shapes appear spatial. A flame or a rock that is cut off at the edge of the image immediately creates distance from the rest of the scene.
Erasers and clipping masks are your most important tools. With soft edges, reduced opacity, and clipping masks, rocks can be embedded harmoniously into the fire.
The direction of the strokes is more important than the exact shape. If you control the flow of the flames, you achieve dynamism, even if the individual shapes are not perfect.
Light and shadow in the background determine the effect. A dark ground, red reflected light, and moonlight on the mountains make the fire stand out more strongly.
Step-by-Step Guide
Checking the Current State of the Fire
Before you add new elements, you should get a clear overview. Your fire already has light and dark areas, fine details, and rough features. What is missing is depth. Colors alone are not enough for that, so the drawing should get more dimension in individual places. Pay particular attention to areas that currently look boring, such as the lower right corner.

Creating a Jet of Flame in the Foreground
For the first addition, you choose a brush with a diameter of about 12 pixels and use the eyedropper to pick up a lighter tone from the fire. Use it to draw a jet of flame that lies further forward in the image, and let it end cropped at the bottom edge of the image. This trick is known from cartoons: an object that protrudes from the edge of the image into the visible area immediately appears moved forward and creates optical distance from the rest of the image.

Refining the Contours of the Jet of Flame
The rough shape is still vague, so you rework the contours with a finer brush of about five pixels. Here it is worth taking a look at the brush settings: Airbrush and Smoothing are activated, plus the Shape Dynamics option with the strength slider, which is controlled via pen pressure. This creates soft, flowing gradations. The opacity is at about 43 percent, so that the flame stands out from the background a bit more than the flames from the previous part.

Adding Darker Tones with the Eyedropper
To paint over the bright flame in places and distort its outlines, you repeatedly pick up darker tones from the surroundings. A look at the color preview in the tool palette shows you how the values change in the process. Make sure not to smudge the outlines with the remaining shapes. Clear delineations are intended here; they provide contrast and structure.

Expanding the Flame and Aligning the Brushwork
Next, you take a larger brush and expand the flame outward. Finer tips follow again afterwards. The direction of your strokes is important here. In this case the flame extends to the right, so you align the finer strokes accordingly. A steady flow of movement draws the eye through the image.

Adding Fine Details and Bright Accents
Now you deliberately add finer details in several places. With scattered bright strokes, the fire looks more massive and powerful. Don't think too much about individual shapes, but rather about the flow of direction. Together with the changing color tones, the overall picture comes together so that the desired impression is created.

Adding Flying Sparks and Particles
With small dabs, you place particles in the image. They also create distance. You rework the dots that are already there with the finer brush so that they look like real flying sparks. They should have a recognizable direction and not hang in the air like static dots. Save your progress regularly in between.

Securing the Result of the Fire
After a good three quarters of an hour of work, the fire has a much denser appearance. Before you continue, save the file to be on the safe side.

Creating the Rocks in the Foreground
For the silhouettes of smaller rocks, you create a new layer at the very top within the fire group. You need a hard brush with full opacity and full flow, since the rocks should be solid areas. The color is deep black at first. Texture comes later. Start at the bottom edge of the image to visually frame the subject.

Finding the Right Amount of Rocks
The most difficult question is which parts of the fire you cover. Too many rocks take power away from the subject, too few look patchy. There is no fixed recipe for this. Orient yourself by which flame areas you have not yet worked out in detail, and cover mainly these with rocks. Areas that have turned out especially well, you leave free.

Deliberately Setting the Horizon at an Angle
You do not need a true horizon line. A slightly slanted line feels more uncomfortable and fits the mood better. The contours are often messy afterwards, so you trace over them with the finer brush of about five pixels. Activate the size jitter so that you get tapering strokes. These jagged points make the landscape rougher. Make sure that the ground in front matches the nature of the mountains in the background, because otherwise the scene looks illogical.

Flipping the Rock Layer Horizontally
When looking at it, you notice that the angle is not convincing because it runs counter to the direction of the mountains in the background. Via the menu Edit, then Transform and Flip Horizontal, you turn the layer around. The lower right corner in particular benefits from this, because its curvature follows the arc of the right mountain.

Carefully Erasing Rocks
If the rock covers too much of the fire, you pick up the eraser. Set hardness, opacity, and flow to 100 percent each and activate the size jitter in the shape properties. Then erase, in various sizes, the parts of the rocks that cover the flames. Afterwards you have to redraw some areas so that the rocks still look coherent.

Giving the Rocks Structure
Black rocks look lifeless. That is why you switch to a clipping mask and choose a soft brush with low opacity and flow. With the opacity jitter, you apply subtle gradations in a dark brown tone. The strokes follow the directions of the outlines. This makes it look as though the stones are only lit by the fire.

Adding Bright Highlights to the Stones
For the light edges, you place another clipping mask on top and work with a lighter tone. The brush gets smaller, and the hardness increases to 100 percent. Work out the finer parts and repeat the process with a slightly lighter color and a finer brush. The structures are refined in this way until the hollow silhouettes become a three-dimensional rock form.

Adding a Dark Ground
At the very bottom, you create a new layer with deep black. It darkens everything, including the mountains in the background, and makes the fire stand out more strongly from the image. You correct small gaps in the areas on this layer. Afterwards, you add a bit more brown to the rocks with a soft, large brush at low opacity, so that the glow of the fire dominates everything.

Drawing highlights beyond the edges
A new layer with a hard brush brings the final flashes of light into the motif. This time you do without a clipping mask, because you want to draw beyond the edges. The effect may seem inconspicuous at first glance, but it is precisely such details that make the difference.

Copying and mirroring the fire layer
To achieve even more depth, you copy the fire layer, move the copy to the very top of the group and flip it horizontally. Then you move it freely until you find a position in which the two rocks on the left are enclosed by the flames. At the same time, quite a few unwanted elements are now fluttering in the fire, which you remove in the next step.

Gently removing unwanted elements
With the eraser, you remove disturbing parts. Set the hardness to 0 percent and reduce the flow so that you only work gently. Switch from the size slider to the opacity slider. This way you erase bit by bit what doesn't belong in the fire, without punching rough holes. The result is an interplay of rocks that are more or less enclosed by the fire.

Embedding rocks with soft edges
So that the rocks don't stand out harshly from the background, you select the rock layer, invert the selection while holding the Alt key, and modify it with a feather of one pixel. Then you delete with the Delete key on the rock layer. You repeat the same with the mountains in the background, using the layer with the base color as a guide.

Wrapping the lower edges of the rocks in flames
For the lower edge of the rocks, you copy the fire layer again and place it on top. Beforehand, you reduce the rocks to one layer, copy it and distort parts with various transformation functions until new rock shapes emerge. Another copy of the rocks lies at the very top and is erased so far that only pale shapes remain. As a result, the rocks look as if they have been swallowed by the flames.

Red glow behind the mountains
Behind the flames, you add a new layer for the glow. With a large, soft brush in dark red, you draw a few strokes in front of the mountains. This way, the mountains reflect some of the light from the fire.

Enhancing the mountain in the background
The mountain in the background now looks too pale. You increase its opacity and place another layer above it, in which you draw the light areas in white for the moonlight. Then you reduce the opacity of this combination and subtract it from the base layer. The result is a coherent mountain with soft light.

Darkening the mountains in the foreground
Finally, you create a clipping mask on the layer of the mountains in the foreground and apply a downward gradient with very faint black. This creates distance from the mountain in the background, and the flames in the foreground look even more powerful on the darker ground.

Completing the background
With that, the environment is complete. The background is done, and in the next step you can turn to the Amazon. Don't forget to save in between.

Summary ??? Digital Painting: Creating Fire with Depth, Rocks, and Post-Processing
In this part, you further developed the fire with jets of flame, flying sparks, and fine contours. Afterwards, you created a clear spatial layering with rocks in the foreground. Clipping masks, an eraser with reduced opacity, and overlaid layers ensured that the rocks are embedded in the fire. Finally, with red reflected light, moonlight, and a darkened ground, you emphasized the mountains in the background and made the fire stand out more strongly.
FAQ
How do you make an object in the foreground look three-dimensional?Let the object end cropped at the edge of the image. This makes it appear closer to the viewer than the rest of the scene.
Why should you set the hardness to 100 percent when erasing?For large areas that are to be removed completely, full hardness ensures clean edges. For soft transitions, on the other hand, you reduce the opacity or the hardness.
What is the eyedropper used for when drawing the fire?With the eyedropper, you pick up colors directly from the image. This keeps the tones consistent, and you can deliberately pick up light or dark values.
Why is the direction of the strokes so important?The stroke direction determines the movement of the flames. If it's right, the fire looks dynamic, even if the individual shapes aren't perfect.

