
The figure is standing, but between the upper arm and forearm, at the knee or at the ankle, it still looks as if it were just stuck together. This is exactly where this tutorial comes in. You will learn how to design the areas between the individual joints so that they look like an elastic rubber hose that bends, compresses and shines in the light.
The video is only loaded from YouTube when you play it – data (including your IP address) is then transmitted to YouTube/Google. More in the privacy policy
The key lies in the interplay of masks, clipping masks and carefully placed light and shadow layers. You work your way forward step by step: from the rough sketch through the isolation and coloring to shimmer, inner sides and corrections. If you think in advance about where the rubber gets squeezed, every single step becomes much easier.
Key Takeaways
- A sketch in an empty layer with red strokes determines where the rubber is compressed and where it is stretched.
- Masks allow you to undo areas at any time. With a black-and-white switch via the X key, you can correct quickly.
- Clipping masks limit color and light layers to the respective pair and prevent unwanted overpainting.
- Hard and soft shadows as well as highlights with texture brushes create the plasticity and the rough surface of rubber.
- Inner sides that become visible beneath the rubber and corrections with the clone stamp make the effect believable.
Step-by-Step Guide
Step 1: Plan the Course of the Hose with a Sketch
Before you even pick up the brush, a sketch is worthwhile. To do this, create an empty layer above your figure and use a red brush to roughly draw how you imagine the rubber hose. The sketch doesn't have to be pretty, it only serves as orientation. Keep in mind that the rubber gets squeezed where a body part bends sharply. In a person bent forward, the spot on the torso is compressed much more strongly than, for example, on the arms. The same applies to the knee, which compresses more material on the inside of the bend angle than on the extended outside.

Step 2: Understand the Compression at the Bending Points
With the sketch in mind, think about how the rubber should look at each joint. Where the body curves sharply, the hose is compressed more and looks wider or more wrinkled. Where the joint is extended, the rubber can run smooth and even. This logic is the foundation for all the following steps, because every mask and every shadow follows this principle.

Step 3: Isolate the Joint Areas with a Mask
Now select the pair group that contains all the individual parts of the pair, and create a new layer mask. Set the foreground color to black and paint over the areas that do not belong to the hose. This creates the silhouette of a kinked, flexible hose. You don't have to work perfectly from the start. If you have removed too much, simply press the X key to swap the color, and paint back with white. Hide the sketch briefly in between to check whether the shape already looks believable. Often the result already looks surprisingly good at that point.

Step 4: Hide the Background at the Ankle
At the ankle, you quickly notice that the bright background shines through the hose, which destroys the impression of rubber. The reason is simple: the mask has released an area through which the white background is now visible. The problem does not occur because the skin of the other leg would be visible. Remove the gaps in a targeted way by correcting the affected area in the mask. Complete perfection is not yet necessary at this point, because the later steps will correct a lot.

Step 5: Color the Rubber via a Clipping Mask
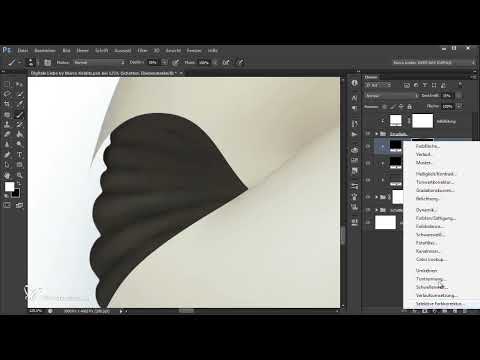
Now the areas get their color. Activate the pair group and create a new color fill layer in a darker gray. Convert it into a clipping mask via the context menu, so that the color affects only the pair. Name the layer clearly, for example "Rubber". Then invert the layer mask of the color fill so that everything is initially hidden. With a white brush, you now paint exactly the joint areas. The advantage of this approach: since the individual parts already exist, they cover the transitions, so you don't have to work overly carefully.

Step 6: Setting Hard Shadows for Depth
Once the base color is in place, the first shadow layer follows. Create another color fill layer, this time in a slightly darker tone, and turn it into a clipping mask. Invert the mask and, with a white, slightly softer brush, paint into the image the areas where the rubber lies in shadow. You can definitely apply these shadows decisively, because they define where the tubes run. If necessary, reduce the opacity of the layer so that the effect doesn't look too cartoonish. At the moment the result is still somewhat graphic, and that is exactly fine at this stage.

Step 7: Adding Soft Shadows with Reduced Hardness
Now you need softer transitions so that the rubber gains volume. To do this, create a new black color fill layer and paint gentle shadow areas with a brush whose hardness you have greatly reduced. You can use the hard lines from the previous step as a guide. The combination of sharp and soft shadows brings the desired plasticity into the image. Make sure that the shadows always lie where the light of the scene does not reach.

Step 8: Applying Highlights with a Texture Brush
The highlights are still missing, and this is where a texture brush makes the difference. Create a white color fill layer as a clipping mask, invert the mask, and choose a texture brush. Such brushes are available on the internet for free or for a fee, or you can create them yourself. Significantly lower the opacity and carefully dab along the light edges. You can also switch between foreground and background color to selectively remove areas again. Through repeated dabbing, a rough, rubbery surface gradually emerges. This is manual work that takes some time. If you have to hurry, a reduced level of detail will also suffice, but with more patience the effect becomes much more convincing.

Step 9: Adding a Soft Shimmer
An additional shimmer rounds off the rubber. Again create a white layer as a clipping mask, invert the mask, and use a very soft, normal brush. With it, make short, gentle strokes in the places where the tube shines the most. The shimmer makes the shape rounder and more three-dimensional. However, you have to be careful not to overdo it, because too much gloss quickly looks artificial. Alternatively, you can also omit this step entirely, depending on which style you are aiming for.

Step 10: Drawing the Insides of the Rubber
Now it gets interesting, because the insides are visible at the joints when the rubber is pulled apart. Create a new, empty layer below the pair group and name it, for example, "Innenseite". Choose a hard brush, take a skin tone, and darken it considerably. With this tone, paint the inside into the relevant areas. If necessary, correct edges with the eraser or with a mask. Make sure that the shape of the inside matches the course of the tube so that it doesn't look pasted on.

Step 11: Shading the Insides
The insides are rarely a single color, so they additionally need shadows. For each area, create a clipping mask with a darker color tone and paint along the shape with a softer brush. Consider in each case where there is more shadow and where there is less. At joints that lie deep in shadow, it can be darker, while areas in the light must remain brighter. This gradation gives the inside depth and makes it appear as a real part of the body.

Step 12: Correcting White Areas with the Clone Stamp
In the end, bright areas and visible lines that come from the individual parts often stand out. To fix this, create a new empty layer below the other layers and choose the Clone Stamp tool. In the options, activate "Sample: All Layers". Then hold down the Alt key, click on a suitable skin area, and then paint over the distracting area. This way you take over color and structure from the surroundings. For the visible line, you can create an additional layer and also sample color. Pay attention to brightness and hue, because in some places the transition to the shadow is still too bright or too purple. Repeat the process for all bright areas until the overall picture looks coherent.

Summary ??? Rubber Hose Effect in Photoshop: Modeling Joints with Masks, Light and Shadow
You have now learned how to turn the joint areas of your figure into elastic rubber hoses. The process begins with a sketch and the question of where the material is compressed. This is followed by masks for isolating, clipping masks for coloring, hard and soft shadows, highlights with texture brushes, as well as shimmer and inner sides. Finally, you correct distracting bright areas with the Clone Stamp tool. The next part covers the fine-tuning of the edges and the glowing line on the woman.
FAQ
How important is the sketch before masking?The sketch is very helpful because it defines the course of the hose and shows you where the rubber is compressed or stretched. You don't have to draw it perfectly; it only serves as orientation.
What do I do if I removed too much while masking?You switch to white with the X key and paint the areas back in. Masks exist precisely to allow corrections at any time.
Why should I use clipping masks?Clipping masks limit the effect of a color or light layer to the layer beneath it. This way you avoid color or shadows spilling over unintentionally onto other parts of the image.
How do I create the rough rubber surface?With a texture brush whose opacity you set low. Through repeated, careful dabbing, fine details and a rougher structure gradually emerge.
Do I absolutely have to add the shimmer?No, the shimmer is optional. It makes the rubber rounder and more three-dimensional, but it can look artificial if used too heavily. Decide depending on the desired style.
How can I tell whether the inner sides look credible?The inner sides should match the course of the hose and not look tacked on. Additional shadows with varying intensity help create depth.


