
Your composite is basically finished, but between a good image and an atmospheric one there are often only a few small steps. That is exactly what the final steps are about, which trainer Marco Kolditz shows for his composite "Der Sportsgeist". You will learn how to control the brightness in a targeted way, make bright areas look like a light bloom, soften the image, and finally add a fine grain.
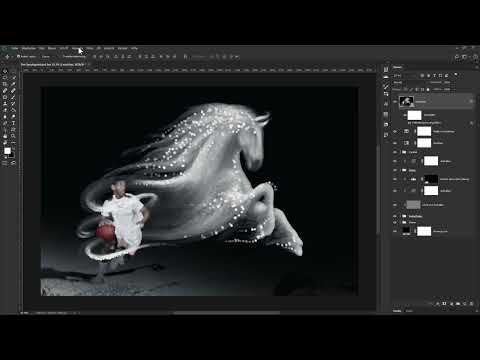
The video is only loaded from YouTube when you play it – data (including your IP address) is then transmitted to YouTube/Google. More in the privacy policy
The tutorial is structured so that you can follow each step directly in your own project. The work is based on non-destructive techniques, namely smart objects and layer styles. This way, you can correct every value at any time later on.
Key Takeaways
- You merge all previous changes into one visible layer before continuing to work.
- With the "Maximum" filter ("Helle Bereiche vergrößern"), you create a soft glow when you choose the "Roundness" option.
- A slight Gaussian Blur, combined with the "Screen" blend mode ("Negativ multiplizieren"), brings light and details into a good balance.
- With the black slider in the layer styles, you bring back the dark areas of the layers underneath.
- A noise layer in "Soft Light" mode with a mid-gray fill gives the image an organic grain without distorting the colors.
Step-by-Step Guide
Step 1: Merge All Previous Changes onto One Layer
Before you begin the fine-tuning, you should secure the current state of your composite without losing the individual layers. To do this, click the top layer in the Layers panel so that it is active. Then press the key combination Ctrl + Shift + Alt + E (on a Mac Cmd + Shift + Option + E). Photoshop then creates a new layer that merges all visible layers into a single image. Your original layers remain unchanged. This is a good safeguard, because you can fall back on the original state at any time.

Step 2: Name the Layer and Convert It into a Smart Object
Double-click the name of the new layer and give it a meaningful name, for example "Glow". This helps you keep an overview even in extensive projects. Then convert the layer into a smart object via the context menu. This is the crucial step for everything that follows, because filters that you apply to a smart object remain editable. You can adjust them at any time later with a double-click.
Step 3: Enlarge Bright Areas with the Filter
Now comes the effect that gives the image radiance. With the layer active, select the menu item Filter, then Other, and then Maximum (Helle Bereiche vergrößern). Be sure to activate the preview so that you can see the result directly in the image.
By default, the option is set to Squareness. This creates angular, rectangular areas that quickly look artificial. Therefore, switch to Roundness. The light areas are thereby enlarged softly and organically, which in most cases feels significantly more natural. You should then adjust the radius to your subject. In the example, a value of about 10.5 pixels proved suitable. Confirm with OK.

Since you are working with a smart object, you can reopen the filter later by double-clicking the filter entry and fine-tune the values.
Step 4: Soften the Image with the Gaussian Blur
The light effect is now very present, but still looks harsh. To tone it down, you next apply a Gaussian Blur. To do this, with the layer active, select Filter, then Blur, and finally Gaussian Blur. Here too, the active preview is worthwhile.
Pay attention to moderation. A value that is too strong makes the entire image blurry. In the example, the radius is between 4 and 5 pixels. This range is enough to make the edges of the lights look softer without losing the sharpness of the subject. Confirm with OK here as well.

If you now look at the before-and-after comparison, the image looks significantly brighter. At the same time, however, it is blurry, so you have to counteract this in the next phase.
Step 5: Set the Blend Mode to Screen
The brightness can now be elegantly tamed. To do this, set the layer blend mode of the glow layer to Screen (Negativ multiplizieren). This mode first inverts the brightness values and then multiplies them with the image underneath. The result: the image stays bright, but the details return. You can again recognize structures in the subject that previously got lost in the light.

Even so, the overall image is still too bright and in places too blurry. This is exactly what the layer styles are used for in the next step.
Step 6: Bring back dark areas using the black slider
Open the layer styles by double-clicking on an empty area in the Layers panel. Since this time you don't want to edit the glow layer itself but the layers underneath, you work with the black slider in the "This Layer" or "Underlying Layer" section (depending on your selection). Move the slider to the right. The dark areas of the layers below will become visible again.
To make the transition soft, hold down the Alt key while dragging and split the slider handle. This way you can move the threshold between the halves separately. Drag the right half of the handle all the way to the right and adjust the left half until the result looks harmonious. Confirm with OK.

There is no fixed number for this process. Rely on your eye and judge the result in full-screen view.
Step 7: Create a noise layer in Soft Light mode
The fine-tuning is almost complete, but your image still looks very smooth. Many composings gain atmosphere through a slight grain. To add it, hold down the Alt key while clicking the icon for a new, empty layer. This directly opens a dialog in which you can name the layer. Call it "Noise", for example, and set the mode to Soft Light.
Then fill the layer with a medium gray. To do this, click the corresponding option at the bottom of the Layers menu, choose the fill with 50% gray, and confirm with OK. At first glance you won't see any difference, because in Soft Light mode a medium gray is completely transparent. Only lighter and darker areas will affect the image later.

Step 8: Apply the noise filter to the noise layer
Now convert the noise layer into a Smart Object as well, so that you can readjust the filter at any time. Then choose Filter, then Noise, and Add Noise. With the preview active, you immediately see how the grain settles over the image.
In the dialog you set the amount. In the example, a value of about 10 proved to be a good starting point. Activate the Gaussian Distribution option so that the grain is distributed evenly and naturally. You should also select the Monochromatic option so that no colored pixels appear and the colors of your composing are preserved. Confirm with OK.

Step 9: Adjust the opacity of the noise
In the last step you determine how strongly the grain remains visible in the overall image. To do this, reduce the opacity of the noise layer to about 80 percent. This way the grain remains noticeable but does not dominate the image. Finally, zoom into the subject once and check details such as skin, fabrics, and backgrounds. If the noise seems too strong to you, reduce the opacity further.

With that, your composing is complete. You have brought light, depth, and texture into a balanced relationship.
Summary – Composing Finale in Photoshop: Creating Glowing Lights and Fine Noise
The final steps for your composing build logically on one another. You merge your current state into one visible layer and convert it into a Smart Object. Then you strengthen light areas with the "Maximum" filter and choose Roundness instead of Squareness. A Gaussian Blur with a moderate radius takes the hardness out of the effect. The Color Dodge blend mode brings the details back, while the black slider in the layer styles makes the dark areas visible again. Finally, a noise layer in Soft Light mode with a medium gray fill provides the desired grain. With opacity, amount, and distribution, you can adapt every value to your own subject, and thanks to the Smart Objects, this flexibility remains available to you later as well.
FAQ
Do I absolutely have to merge the visible layers?No, that is not strictly necessary. However, merging makes the work easier because you bundle the effects on a single layer and the original layers remain untouched.
Why should I work with Smart Objects?Smart Objects save filters as editable properties. You can open and adjust values at any time without having to rebuild the image.
What does the Roundness option do in the Maximum filter?Roundness enlarges bright areas with soft, rounded contours. Squareness produces angular shapes that quickly look artificial in the image.
Can I use the Gaussian Blur with a different value as well?Yes. The values in the video serve as orientation. What matters is that the image looks soft but the main subjects remain sharp. The appropriate strength depends on resolution and subject.
What is the Color Dodge blend mode used for?It first inverts the brightness and then multiplies it with the image below. This way the light is retained while details and structures become visible again.
How does splitting the black slider with the Alt key work?Hold down the Alt key while dragging the handle. This splits the slider, and you can move the two halves separately. This gives you a softer transition between dark and bright areas.
Why do I fill the noise layer with medium gray?In Soft Light mode, medium gray is transparent. As a result, the layer only has an effect where the noise filter creates brightness differences, and the image remains unchanged in color.
Why should the noise be monochromatic?Monochromatic noise creates brightness fluctuations without colored pixels. This looks like analog film grain and does not distort the colors of your composing.


