
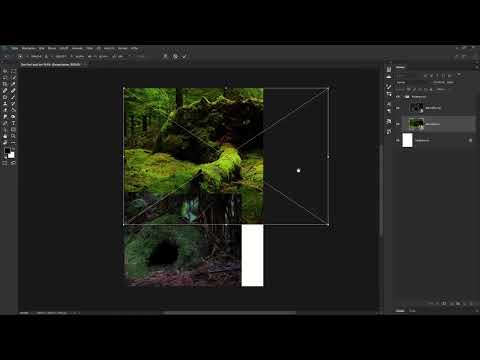
A fallen, moss-covered tree whose dark hollow becomes the entrance to a hidden world: this is how the background for the village composite begins. In this tutorial, you'll see how two individual photos become a coherent background that will later hold mushroom houses, clotheslines, and shoes. You'll learn how to set up a document correctly, place images as Smart Objects, arrange layers, and refine the transitions cleanly with a layer mask and a texture brush.
The video is only loaded from YouTube when you play it – data (including your IP address) is then transmitted to YouTube/Google. More in the privacy policy
Key Takeaways
Key Takeaways
- A document with 2800 × 4000 pixels, 300 ppi, and RGB color mode forms a solid foundation for the entire composite.
- Placed images are created as Smart Objects and can be scaled without loss of quality.
- Soft brushes create semi-transparencies that wash out details. Coarse texture brushes deliver better transitions.
- The layer mask is non-destructive: you can reveal and correct areas again at any time.
Step-by-Step Guide
1. Create a new document with a white canvas
Start Photoshop and click "Create New". Alternatively, go to "File" and "New". Set the width to 2800 pixels and the height to 4000 pixels. This gives you a portrait format. The resolution stays at 300 pixels per inch, and you choose RGB as the color mode. The background color is already set to white. Confirm with "Create", and the empty document appears with the white background in the Layers panel.

2. Select the suitable background images
Before you place anything, look for the images in Windows Explorer. For the background, you need exactly two files: an old, fallen tree with visible roots and moss, and a tiny, moss-covered cave with a dark entrance. In this project you used a total of 13 images, but only these two for the background. Make sure that the cave entrance should later appear exactly at the location of the tree trunk.

3. Drag both images into Photoshop at the same time
Click the first image, hold down the Ctrl key, and click the second image. Both files are now selected. Then drag them via drag & drop into the open Photoshop document. The first image is now placed, but not yet finally accepted.

4. Confirm placement and scale proportionally
Confirm the placement with the Enter key or the small checkmark in the options bar. Then position the image roughly where you want it. To scale, hold down the Shift key, click one of the corner anchors, and drag. This keeps the proportions intact. Confirm again with Enter. The second image automatically adjusts to the width of the document.

5. Keep an eye on the Smart Objects
In the Layers panel, you can see that both images were created as Smart Objects. This detail is important, because you can later shrink or enlarge the images as you like without any loss of quality. So you are working non-destructively. Deliberately make use of this advantage in the next steps.

6. Enlarge the tree and place it at the top
After placement, the tree still looks too small. Hold down the Shift key, select the image, and enlarge it proportionally. Move it into the upper area of the document as you do so. You can readjust fine details at any time later.

7. Set the layer order
So that the lower image lies above the image on top of it, activate the "Auto-Select: Layer" option in the toolbar. After that, a click on the desired image in the document is enough, and the correct layer is highlighted in the Layers panel. Then drag the cave image's layer all the way to the top so that it lies above the tree trunk.

8. Rename the layers clearly
To keep track of things in larger projects, rename the layers. To do this, double-click on the layer name, for example "Bild 4", and assign a fitting name such as "Baumöffnung". You name the other layer "Baumstamm".

9. Combine the layers into a group
Click on the top layer, hold down the Shift key, and click on the bottom layer so that both are selected. Then press Ctrl + G to group them. Double-click on the group name and rename the group, for example, to "Hintergrund". You can open the group again as needed with the arrow icon.

10. Zoom with the scroll wheel
To see details better, you zoom into or out of the image with the scroll wheel of your mouse. By default, this function is not activated. You can find the option under "Bearbeiten", "Voreinstellungen" and then "Werkzeuge". There you activate "Mit Scrollrad zoomen". This is highly recommended because it significantly speeds up your workflow.

11. Transform the tree trunk
Select the tree trunk layer and activate the transform frame with Ctrl + T. Hold down the spacebar until the mouse pointer turns into a hand. This way you can move the view without changing the image. Then enlarge the image proportionally by holding down the Shift key until the arrangement looks harmonious. Confirm with Enter.

12. Place the opening in the right area
Look at how large the opening in the tree should be and where it needs to appear. Resize the cave image so that the dark entrance becomes visible exactly at the spot on the tree trunk. Once the position is right, confirm with Enter.

13. Add a layer mask
So that only the mossy area with the entrance remains visible, select the cave image layer and click the layer mask icon at the bottom of the Layers panel. The mask is initially completely white, so everything remains visible. With black as the foreground color, you can paint on the mask and hide areas.

14. Why the soft brush is not ideal
You could paint along the edge with a soft brush. However, the result quickly looks washed out because soft brushes create semi-transparencies. As a result, both layers blend together, and details are lost. Undo this step and choose a different approach instead.

15. Work with a texture brush
Download Photoshop brushes with rough, irregular tips from the internet, for example a paint splatter. You install them in Photoshop and choose black as the foreground color. If you now click on the layer mask, rough dabs are created instead of soft transitions. The edges remain clear, and the layer underneath remains more recognizable.

16. Activate the angle jitter
So that the brush tip rotates with each click and the dabs do not look uniform, open the brush settings via "Fenster" and "Pinseleinstellungen". Under "Formeigenschaften" you set the angle jitter. This rotates the tip randomly. In the preview window you can see the result, and then you close the window again.

17. Edit the edge of the mossy area
Now place individual dabs along the edge of the mossy area. This creates rougher edges that do not blend unattractively with the layer underneath. You can change the size of the brush tip in between and repeat the process several times. For the remaining area, you switch back to a hard brush and roughly paint over the spots.

18. Check the mask
Hold down the Alt key and click on the layer mask. This displays the mask as a grayscale image and lets you quickly see where you have missed something. Areas that should remain visible are white, areas that should disappear are black. Then hide the mask again by clicking once more while holding down the Alt key.

19. Readjust the layer
If no moss is visible in a certain spot, select the Move tool and carefully move the layer. With Ctrl + T you can then scale the layer slightly. Position it until the arrangement looks convincing, and confirm with Enter. Dark areas that are still distracting afterwards can be touched up later with more moss.

20. Touch up remaining gaps
Finally, look at the entire image and check whether any unsightly dark spots or gaps are left. These can be touched up with additional moss images later in the composing process. With that, your background is ready for the next elements.

Summary – Background for Photoshop Composing: Combining Two Images into a Village Scene
You created a new document with suitable dimensions, placed two background images as Smart Objects and scaled them sensibly. Then you arranged, named and grouped the layers. With a layer mask and a texture brush with angle jitter, you designed the transitions without blurring the details. This lays the foundation for all further elements of the village scene.
FAQ
Why should I create my document at 300 ppi and in RGB mode?300 ppi ensures sufficient resolution in case you want to print the image later, and RGB mode is the standard for digital composings.
What is the benefit of placing images as Smart Objects?You can scale the images multiple times without losing quality, which means you are working non-destructively.
Why does the soft brush look bad at the edges?Soft brushes create semi-transparencies, so two layers blend together and fine details become blurred.
How do I find the right layer when several images overlap?Enable the "Auto-Select: Layer" option in the toolbar, and the corresponding layer will be highlighted directly in the Layers panel when you click in the image.
Can I still change the layer mask later?Yes, the mask is non-destructive. You can reveal areas again with white and hide them again with black.

