
A composite stands or falls with the quality of the individual image elements. A mushroom with frayed edges or a lantern with remnants of the old background immediately reveals that this was assembled. That is exactly why it is worth not leaving the cutout to chance, but choosing the right method for each subject.
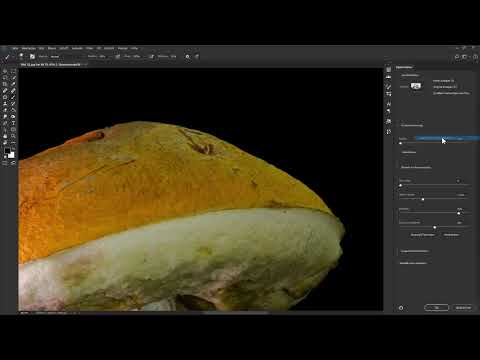
The video is only loaded from YouTube when you play it – data (including your IP address) is then transmitted to YouTube/Google. More in the privacy policy
This tutorial shows you several ways to separate image elements from the background. You will get to know automatic subject detection, work with layer masks and Quick Selection, use repair tools, and build paths with which you can precisely cut out straight edges and clear shapes. In the end, you will have prepared all the elements that you can then place on your background.
Key Takeaways
- With blurry backgrounds, the "Subject" function often already delivers a usable selection, which you then refine.
- A selection is converted into a layer mask via the mask icon. The mask remains editable and is therefore non-destructive.
- A black color fill beneath the cutout layer makes flaws immediately visible.
- With the X key you quickly switch between black and white; by holding down the Alt key you invert the effect of the Quick Selection tool.
- The Pen tool is particularly well suited for straight edges, rectangles, and curves such as those on lanterns or doors.
- With the Patch tool and the Spot Healing Brush you remove disturbing areas directly on the image layer.
Step-by-Step Guide
Step 1: Let "Subject" detect the mushroom
Start with the mushroom in the foreground, because its background is nicely blurred and the main subject stands out clearly. Open the image so that it is available as a background layer. Then choose the "Subject" entry in the "Select" menu. Photoshop analyzes the image and suggests the presumed main subject. This takes a short moment.
The result is usually good, but not perfect. In the area where the mushroom merges into the blur, it is difficult for Photoshop to clearly detect the contour. This is not a fault of the program, but is related to the soft gradient. You will correct these spots later.

Step 2: Convert the selection into a layer mask
Once the selection is in place, the background layer remains active. Click the layer mask icon at the bottom of the Layers panel. Photoshop adopts the selection as a mask, and the background visibly disappears. Then give the layer a meaningful name, for example "Mushroom". This helps you keep track later when you have many elements.
The mask is the decisive advantage of this method: you can go back to the mask at any time and make improvements without irrevocably deleting pixels.

Step 3: Use a black color fill as a check
To check the cutout, you create a color fill. To do so, click the icon for fill or adjustment layers in the Layers panel and choose "Solid Color". Set black as the color, confirm with OK, and drag the layer all the way down, beneath the mushroom layer.
A dark background shows you ruthlessly where remnants of the old image are still hanging on. You do not have to rename the layer; it only serves as a check. Later you can simply hide or delete it.

Step 4: Refine edges with "Select and Mask"
You remove frayed edges fastest via the "Select and Mask" workspace. To do so, right-click the mask in the mask's Properties panel and choose the command. The interface then switches to the edge mode.
If the edges seem too rough to you, activate the "Feather" option. The edge is then smoothed, but at first looks unnatural. If you then increase the contrast, the area becomes more opaque and more rounded again. Compare the view regularly with the original image before confirming with OK, so that you do not lose too much substance.

Step 5: Refine the mask with the brush
For fine work, you zoom in on the problematic spots and choose the Brush tool. For hard edges, you use a brush tip with high hardness; for soft transitions, a medium hardness. Set black as the foreground color and, with the mask active, paint over the areas that should disappear. Whatever you paint over with black becomes transparent.
You can feel free to paint a little into the mushroom. A slightly irregular edge looks more natural than a perfectly smooth line.

Step 6: Switch between black and white with the X key
In the blurry transition area, switching the brush color often helps. Press the X key to swap between the foreground and background color. When white is active, you bring lost areas back. With a soft brush tip and low opacity, you work your way in carefully.
To check, hold down the Shift key and click on the mask. This hides the mask, and you see the result without the mask. This way you can quickly tell whether the transition looks right.

Step 7: Remove the green cast with the Patch tool
You correct distracting areas on the image layer with the Patch tool. Select it and activate the "Source" option. Mark the area you want to fix, and drag the selection onto a spot with the texture you want. Photoshop blends the new texture with the old one.
A slight color gradient may appear in the process. Repeat the procedure at different spots using different areas so that no repetitions become noticeable. Pay particular attention to the area at the bottom of the image, which stands out in color from the background.

Step 8: Cut out the second mushroom with the Quick Selection tool
For the second mushroom, you choose a different method. Open the image, select the background layer, and activate the Quick Selection tool. Zoom in a bit and paint with the round cursor inside the object. Photoshop detects contours and edges and expands the selection automatically.
Make sure you always paint inside the object. Areas where the subject and background blend into each other are more difficult. There you have to be more patient and build up the selection step by step.

Step 9: Refine the selection with the Alt key
If Photoshop selects too much, press the Alt key. The plus sign in the cursor turns into a minus, and you can subtract areas again. When you release the Alt key, you are back in plus-sign mode. This way Photoshop learns step by step what you actually want to select.
For fine details such as small blades of grass or twigs, reduce the brush tip size. Hold down the space bar to move the image while working, without switching tools.

Step 10: Remove remaining traces with the Healing Brush
Once the mask is in place, you click on the mask icon. Afterwards, you can refine it with another mask or the brush. If green remnants are still clinging to the edges, you switch to the image layer and choose the Healing Brush. Activate the "Aligned" option so that the source moves along as you paint.
With the Alt key held down, you define the source, then you paint over the distracting spot. It is important that you choose the source anew regularly so that no visible copies appear. By switching between different areas, the result looks more natural.

Step 11: Prepare the lantern with the Pen tool
The lantern has straight lines and curves, so the Pen tool is ideally suited. It is hidden in the toolbar behind the icon for selection tools. Zoom into the image and place the first anchor point at a corner. If you click on a second point along a straight edge, a line is created between the two anchors.
For curved areas, you don't just click, but drag the mouse. This creates handles with which you control the curvature. Don't place the points too close together, otherwise the curve becomes uneven.

Step 12: Adjust curves and anchor points
With the Ctrl key held down, you can move handles and anchor points afterwards. Hold down the Alt key if you want to move a single handle independently of the opposite side. This also creates sharp corners where the curve abruptly changes direction.
Work your way through the entire subject piece by piece. With the Anchor Point tool, you add extra points as needed, and with the Alt key you correct individual segments. Especially with lanterns, this precision is noticeably better than the Quick Selection tool.

Step 13: Close the path and convert it into a mask
Close the path by clicking back on the starting point. With the Path Selection tool, you select the path and choose the command that converts it into a selection. Confirm the selection and click the mask icon. The lantern is now cut out.
If you need transparent areas on the inside, such as glass surfaces, you create a second path within the first one. If you select both paths and choose to subtract from the selection, the inner area is left out. When the mask is created, this area then becomes transparent.

Step 14: Cut out a window as a rectangular path
The window can be cut out with just a few clicks. With the Path tool, place an anchor point at each corner and close the path at the end. Then convert it into a selection and from that into a mask. Thanks to the straight lines of the subject, the cut is clean and quick.
One detail is bothersome, however: leaves often hang at the edges. You can paint over them in white with a hard brush on the mask so that they remain visible, or remove them with black. You decide for yourself which leaves should belong to the element.

Step 15: Selectively preserve leaves with a hard brush
For leaves, choose a hard brush tip and set white as the foreground color. Paint roughly along the leaf shape so that the leaves become visible in the mask. Then switch to black and trace the edges of the leaves to make the transitions clean.
Take your time for this fine work. Small details only look convincing in the finished composite if their edges are clean. Occasionally hide the mask by holding down the Shift key to check your result.

Step 16: Cut out the door with the Path tool
With the door, you decide whether to cut out just the door or include the frame. With the Path tool, you place the points along the contour and close the path. The edges of an old door are often frayed, so you then refine the mask with a soft brush. This way the edge looks coherent and fits the subject.

Step 17: Edit the mushroom village in Quick Mask mode
The mushroom village is more challenging because many small mushrooms stand close together. In this case, the Object Selection tool usually doesn't detect them reliably. Therefore, switch to Quick Mask mode by clicking the corresponding icon in the toolbar. The background layer then appears with a red overlay.
With a small brush, you paint in black over the mushrooms that you want to keep later. The marked areas do not appear red in the overlay. When you exit Quick Mask mode, exactly what you did not color before is selected. With the X key, you switch the color if needed to correct mistakes. This method takes some time, but delivers the best result for cluttered subjects.

Summary ??? Cutting out in Photoshop: Cleanly cut out mushroom, lantern and window
You have now cut out all the elements for your composite. The main mushroom was created with the "Subject" function, the second mushroom with the Quick Selection tool. You build the lantern, the window and the door with the Path tool, while the mushroom village was selected piece by piece in Quick Mask mode. The shoes and the rails in the foreground can be prepared following the same principle. With a black check layer, you verify each step, and thanks to the masks, everything remains editable. In the next step, you place the elements on your prepared background and adjust colors and light.
FAQ
Which method is best suited for blurry backgrounds?The "Subject" function usually delivers good results quickly for clearly delineated main subjects, which you then refine with a mask and brush.
Why should I use a mask instead of an eraser?A layer mask can be corrected at any time because no pixels are irrevocably deleted. With black and white, you can make improvements as often as you like.
What is the black color fill for?It makes remnants of the original background visible. This way you immediately spot gaps and can correct them specifically.
What does the Alt key do with the Quick Selection tool?With the Alt key held down, the plus sign becomes a minus. This way you remove areas from the selection that do not belong to the subject.
When is the Path tool the better choice?For straight edges, rectangles and clean curves, for example with lanterns, windows or doors, the path delivers more precise results than automatic methods.
How do I remove distracting areas directly in the image?With the Patch tool or the Healing Brush on the image layer. Make sure to use different sources so that no conspicuous repetitions occur.


