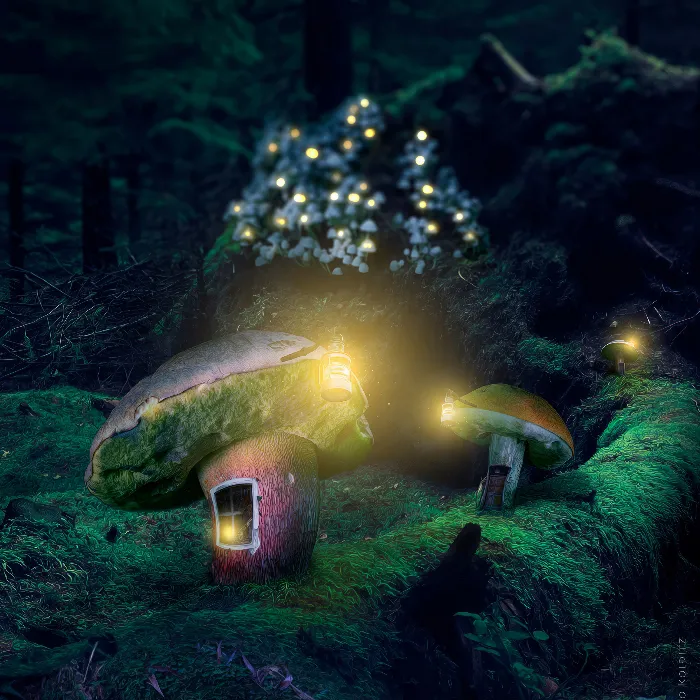
Color looks are crucial for the mood and depth of an image. In this tutorial, I will show you how to specifically optimize the color look of your compositing in Photoshop to create a nighttime atmosphere that contrasts with warm lantern light. Additionally, you will learn how to add a blur gradient and a painterly oil paint effect to round out your image.
Key insights
- Use adjustment layers to interactively adjust color looks.
- Combine different effects such as blur and oil painting for a coherent overall image.
- Work non-destructively by using Smart Objects so that you can optimize your adjustments at any time.
Define and adjust the color look
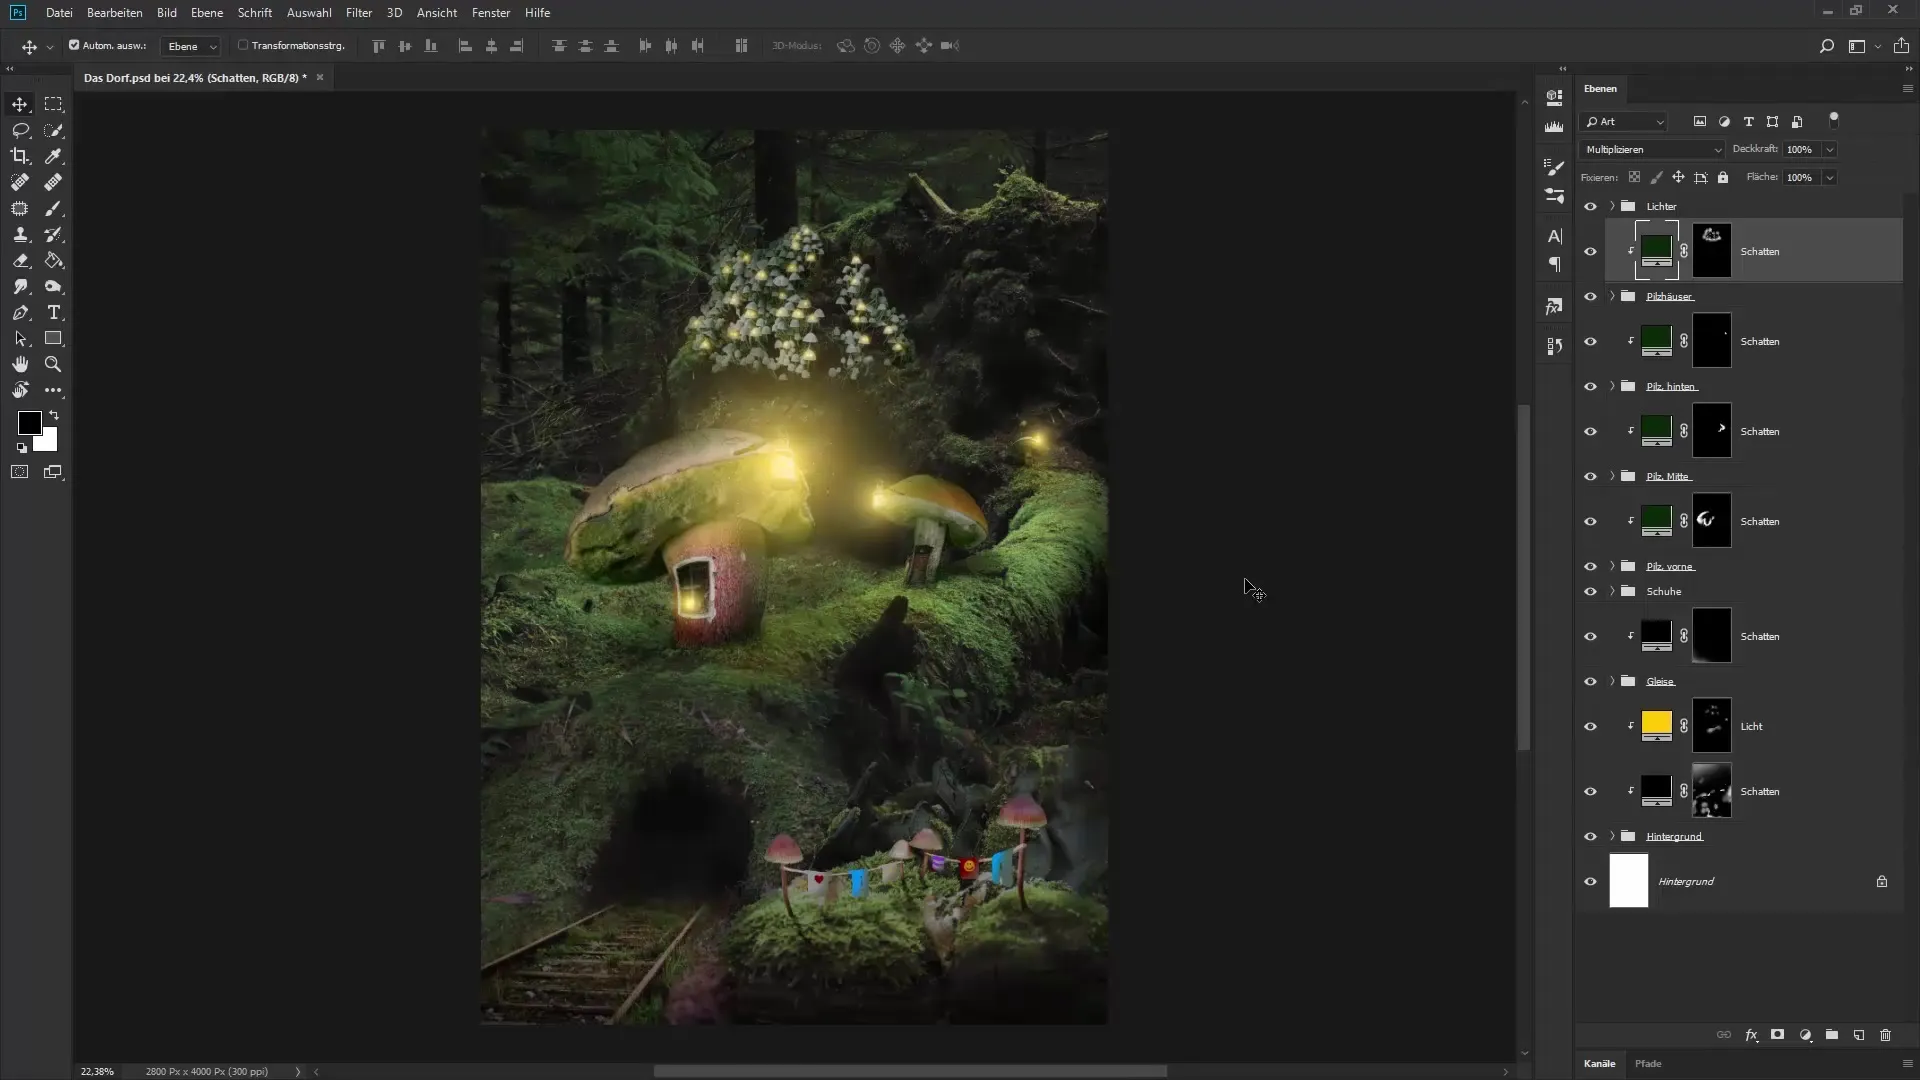
To define the general color look of your image, aim for a bluish night atmosphere that contrasts with the warm tones of the lanterns. Follow these steps:
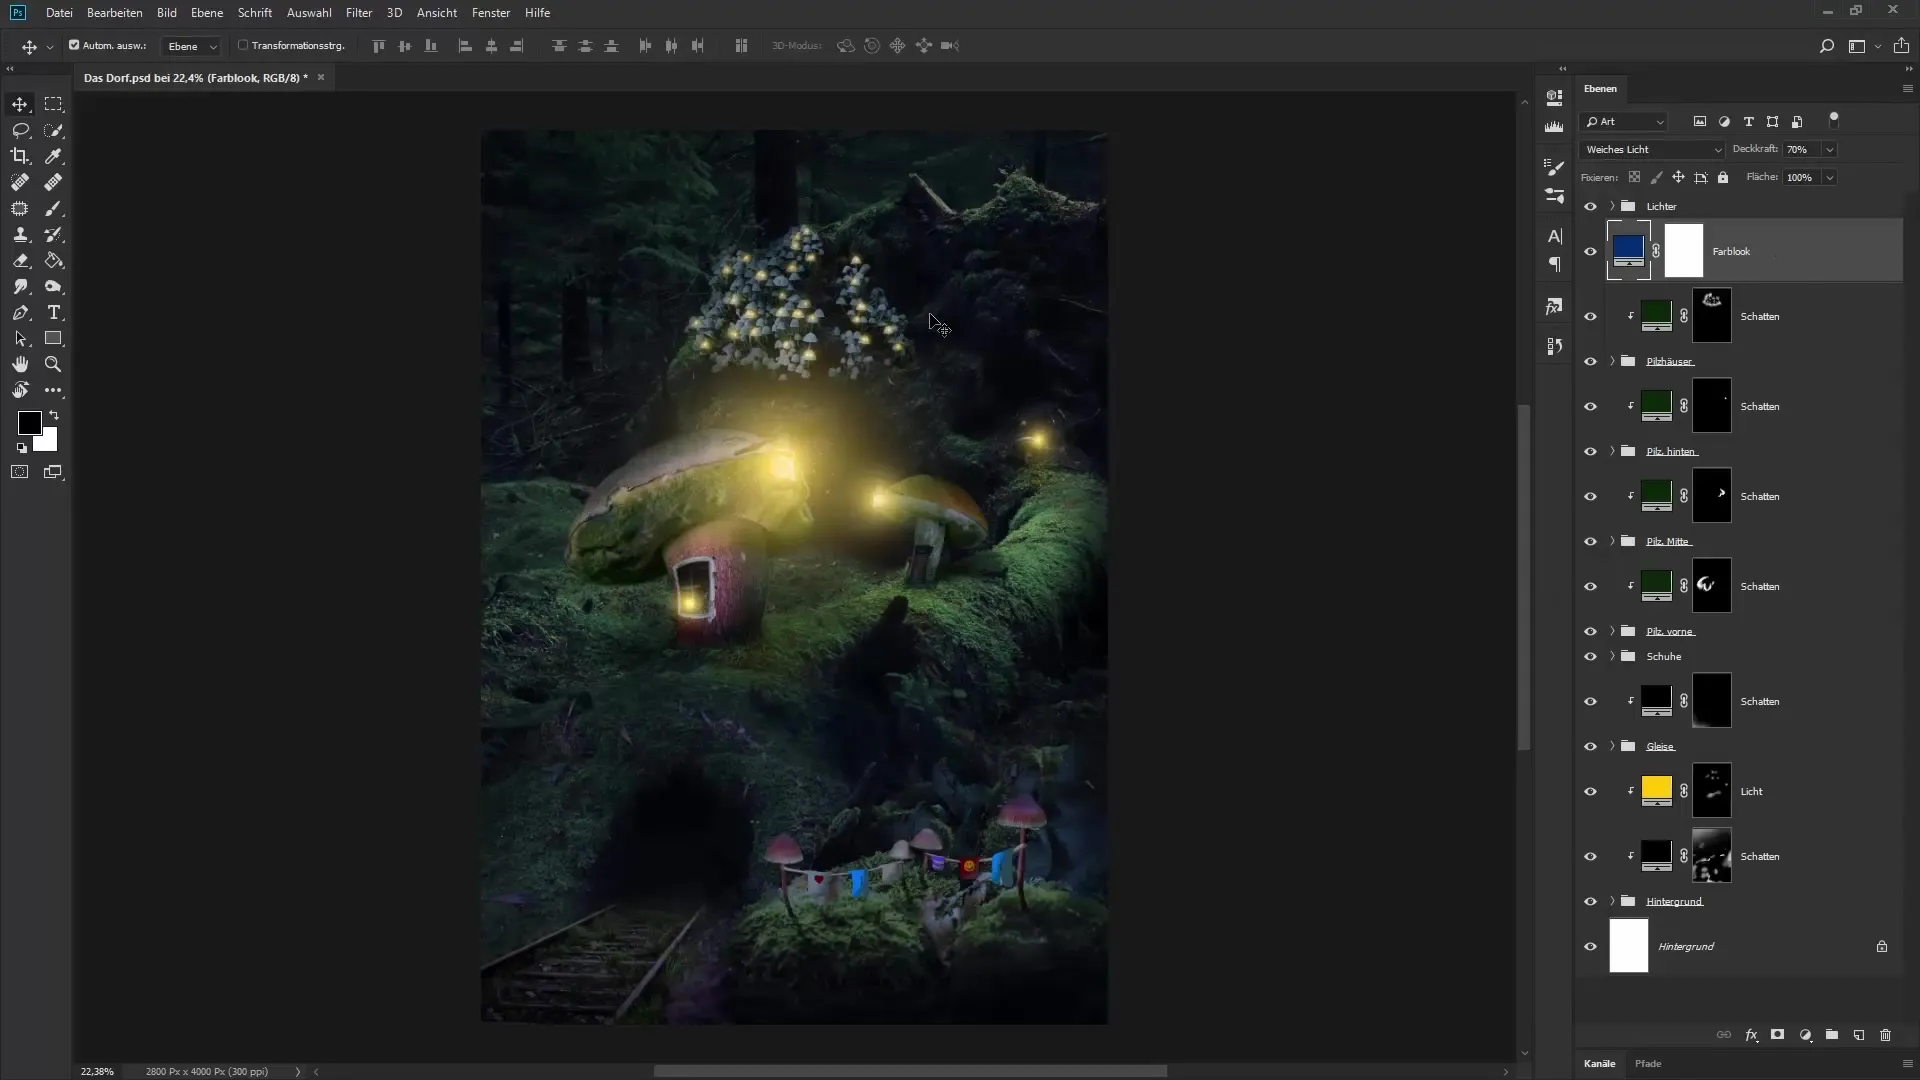
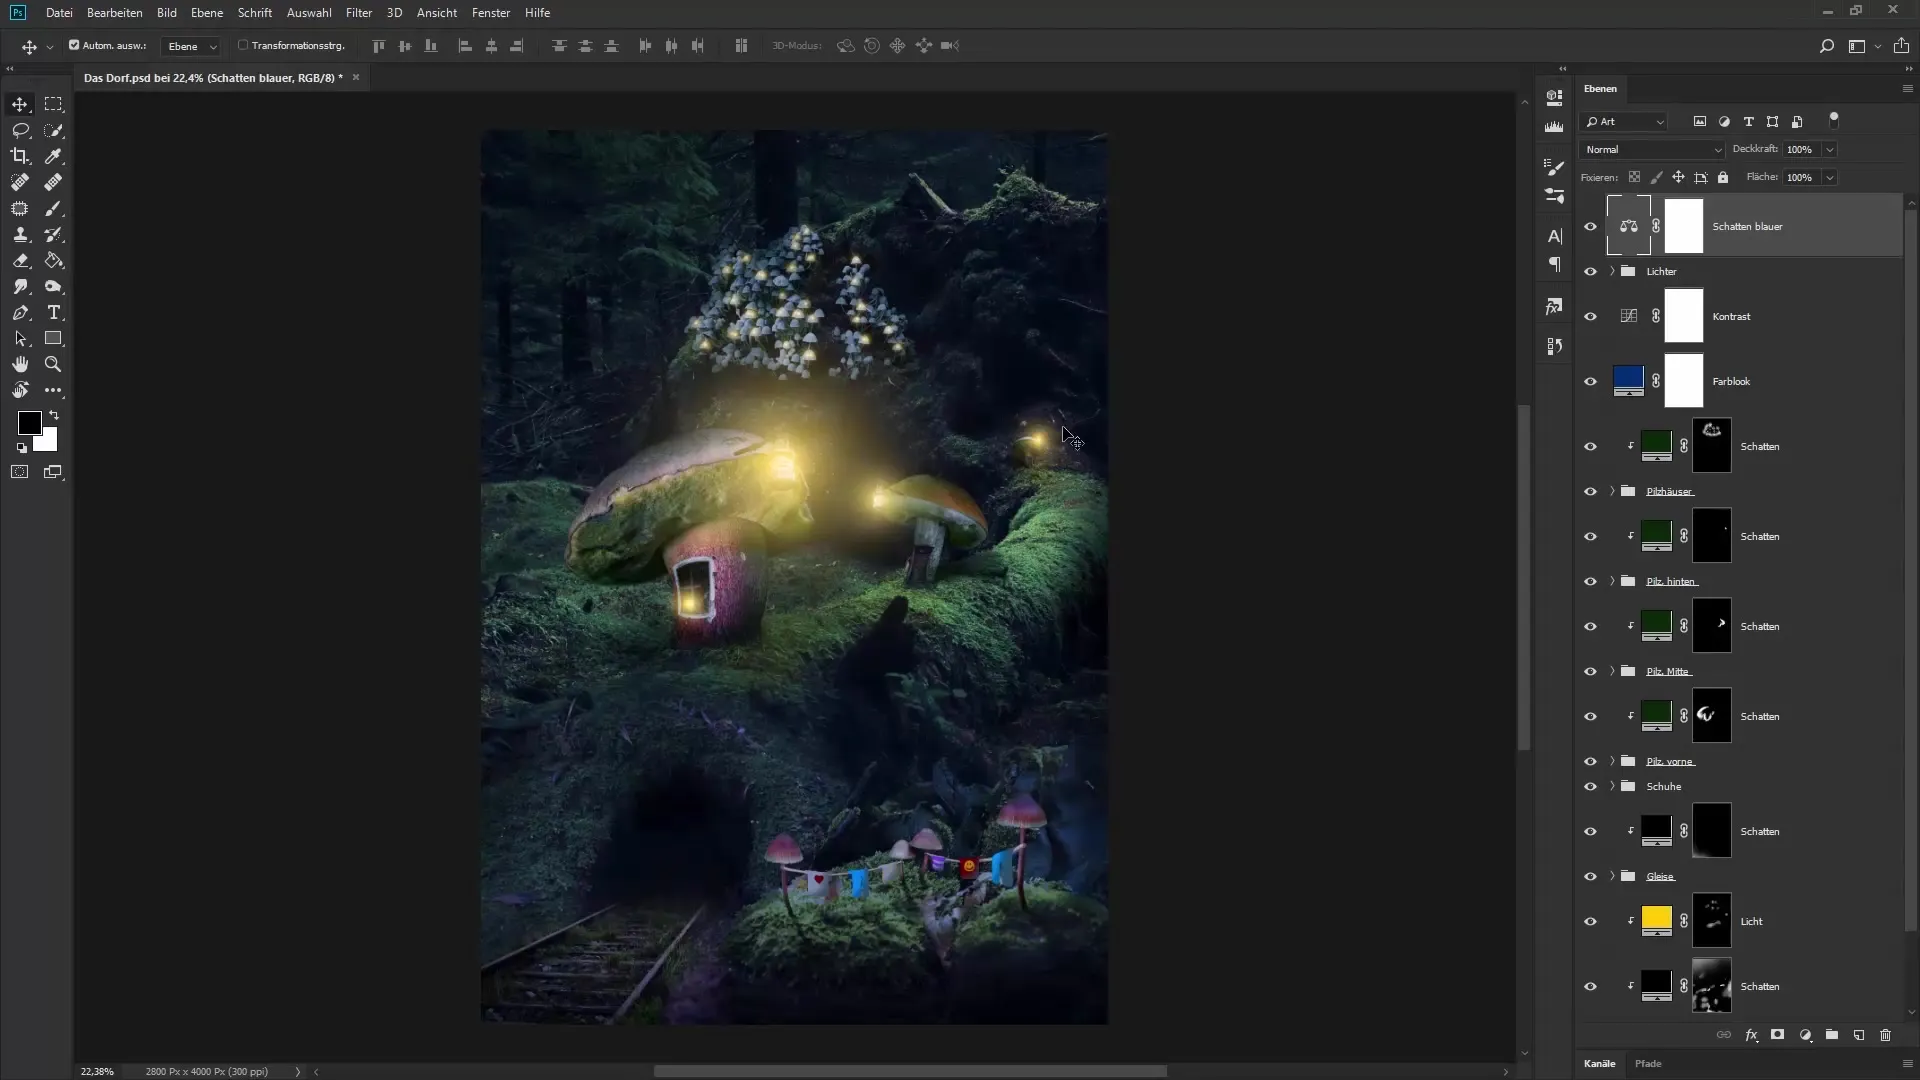
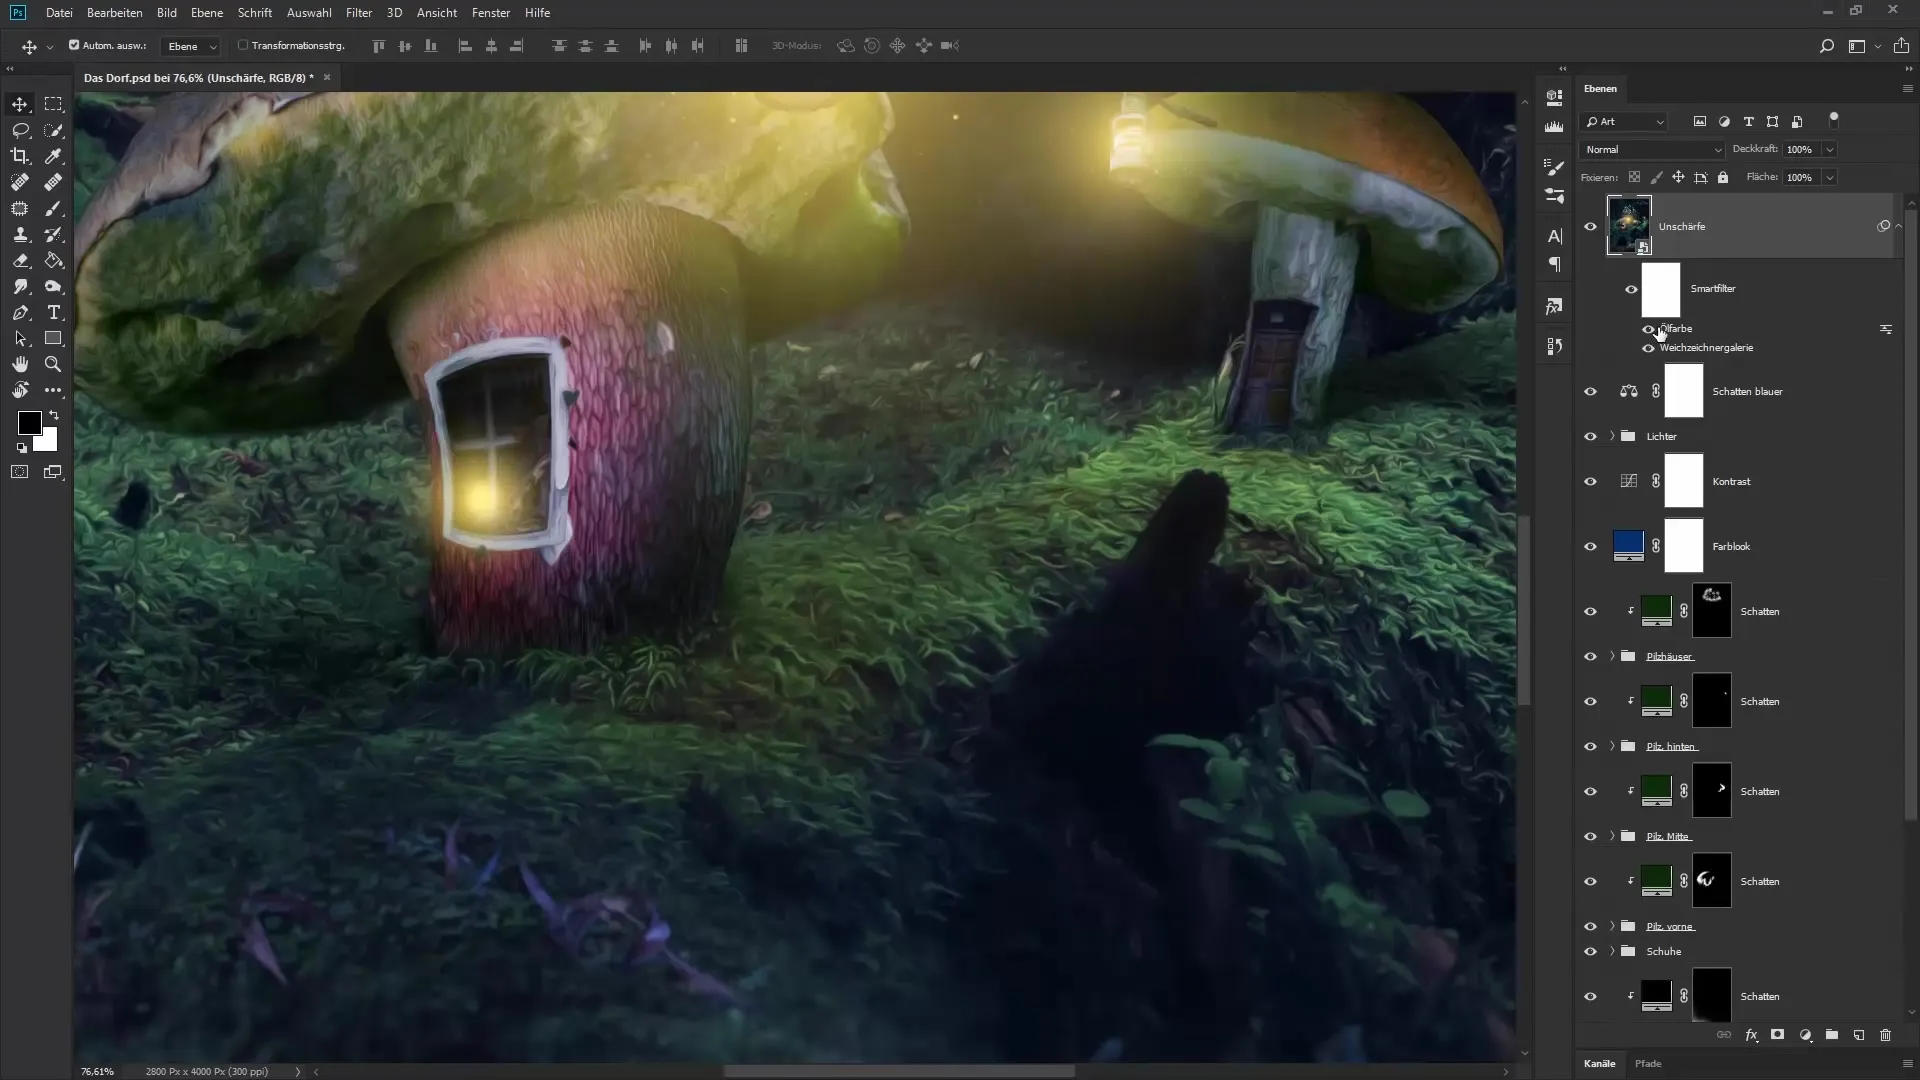
First, select the shadow layer and add a new adjustment layer. Click on the color field and set the mode to "Soft Light". Set the opacity to 70% to achieve a subtle effect. You can change the color at any time by double-clicking on the color field and selecting the desired shade of blue.
Now the focus is on the contrast in the image. Increase the brightness of the light areas while keeping the dark areas deep. To do this, add a curves adjustment layer above the color look layer. Raise the midtones to achieve the desired effect. Don't forget to also check the lanterns and bright mushrooms to see how they have developed.
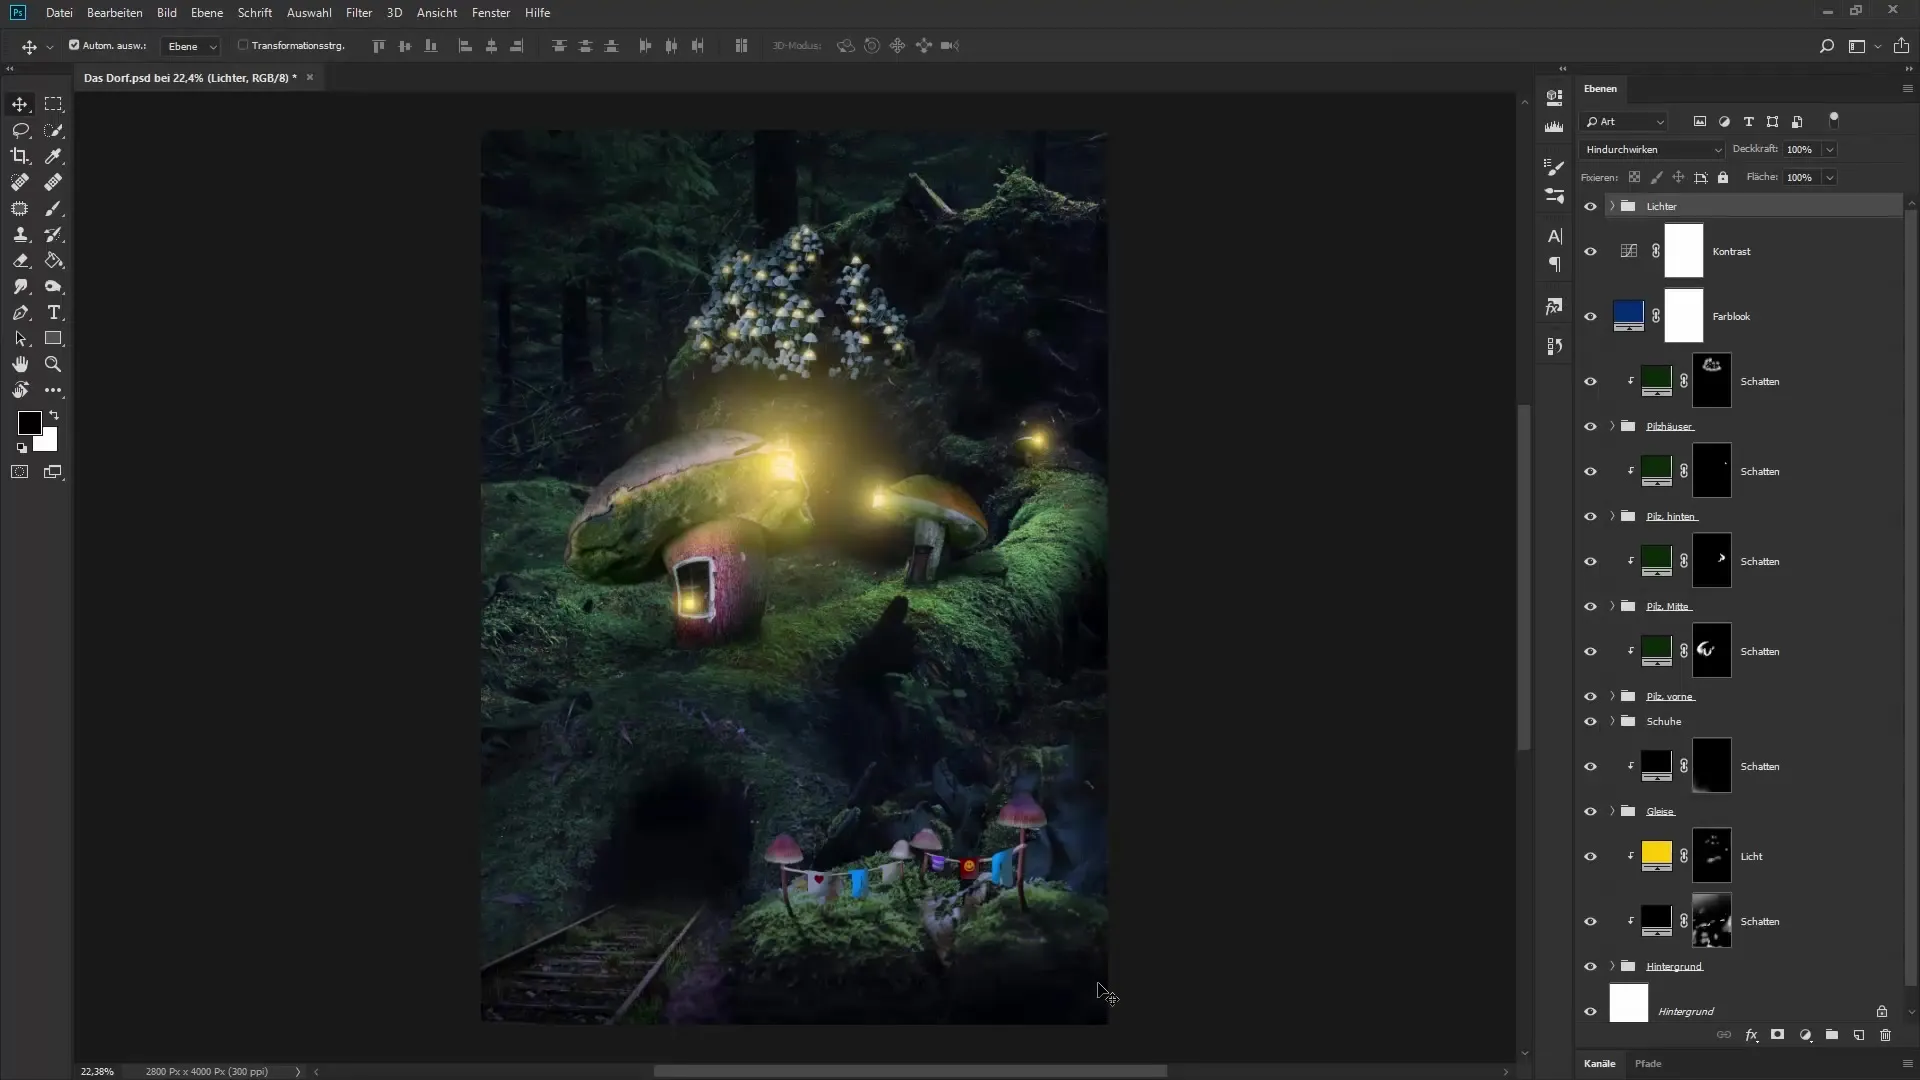
To make the depths of the image a bit bluer, add a new color balance adjustment layer. Make sure that only the shadows are affected. Move the hue of the shadows to the right until you are satisfied with the look of the image.
Creating blur in the image
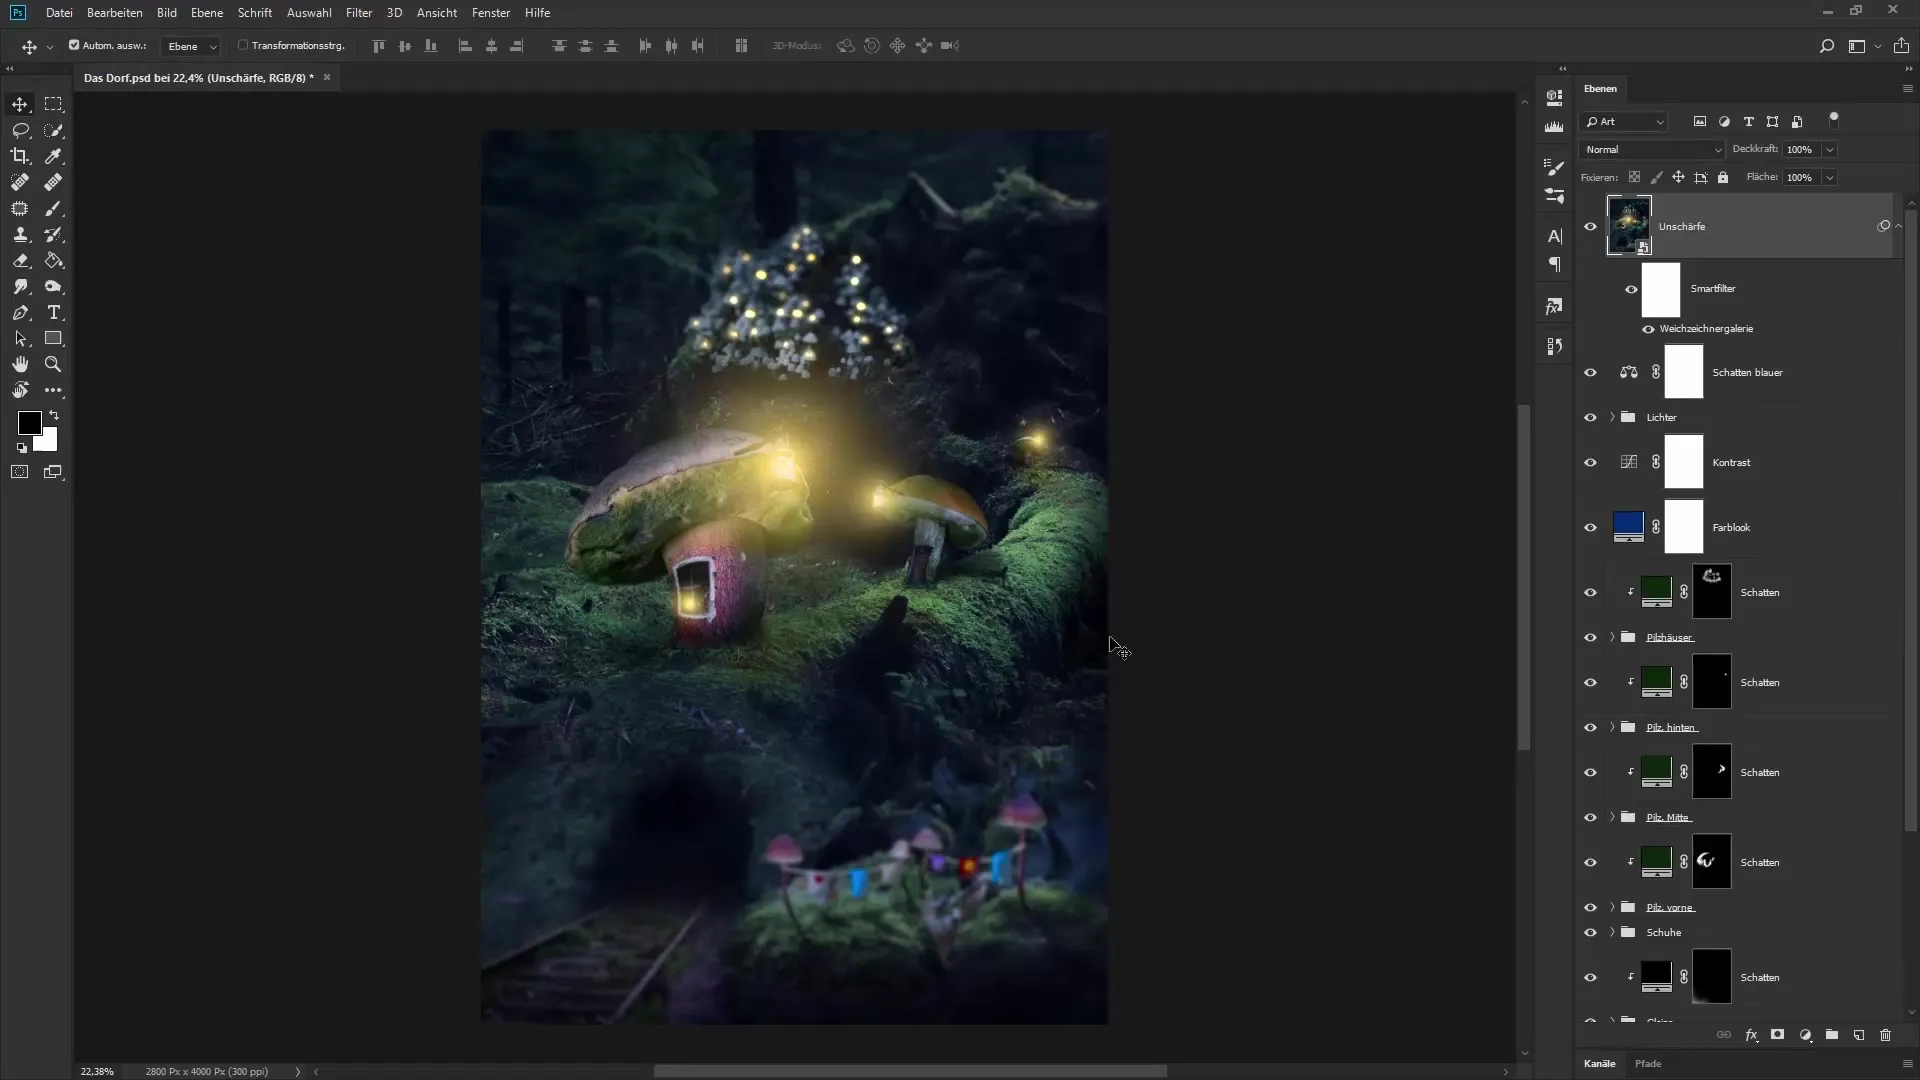
For a harmonious blur gradient, select the option to merge all layers into a single one without deleting them. Press Control + Shift + Alt + E, and a new merged layer will be created.
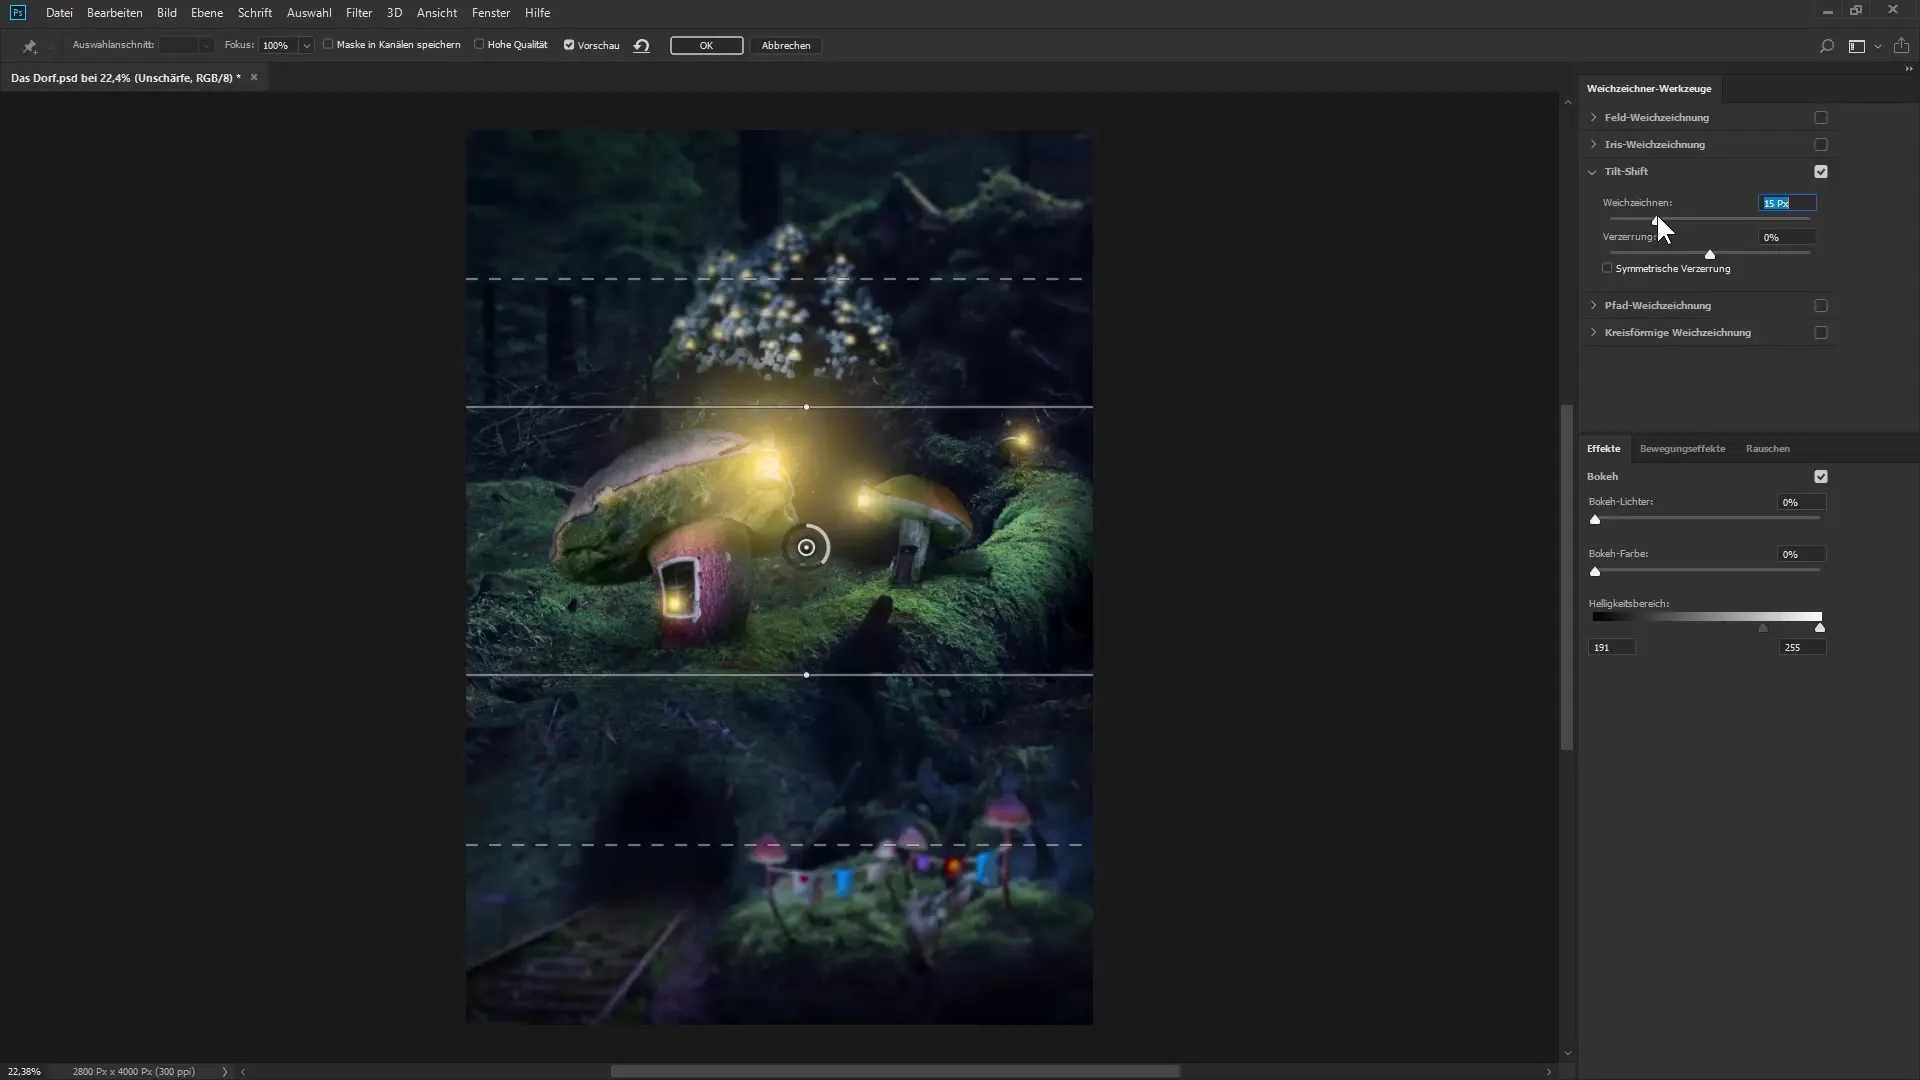
Right-click on this layer and select "Convert to Smart Object". Now, under "Filter", choose "Blur Gallery" and go to "Tilt Shift". Here, you can define the sharp area and the blur between the lines.
Move the lines to a position that you like. Make sure that the middle area remains sharp while the edges gradually become blurred. Adjust the strength values to achieve a realistic and appealing look.
Applying the Bokeh effect
The Bokeh effect can give your compositing a special touch. Activate the Bokeh lights and adjust the corresponding sliders until the background lights appear as desired. Make sure to optimize the brightness and hues to achieve a harmonious image.
If you are satisfied with the settings, confirm your selection. This effect can easily be toggled on and off using the eye icon, allowing you to make adjustments at any time.
Adding an oil paint effect
To give your image a painterly look, apply the oil paint filter. Make sure to work on your blur layer to achieve a seamless effect. Under "Filter," select "Stylize" and then "Oil Paint".
Adjust the values for stylization and cleanliness accordingly. A value of 2.2 for stylization and about 3 for cleanliness creates an aesthetic look that appears painted.
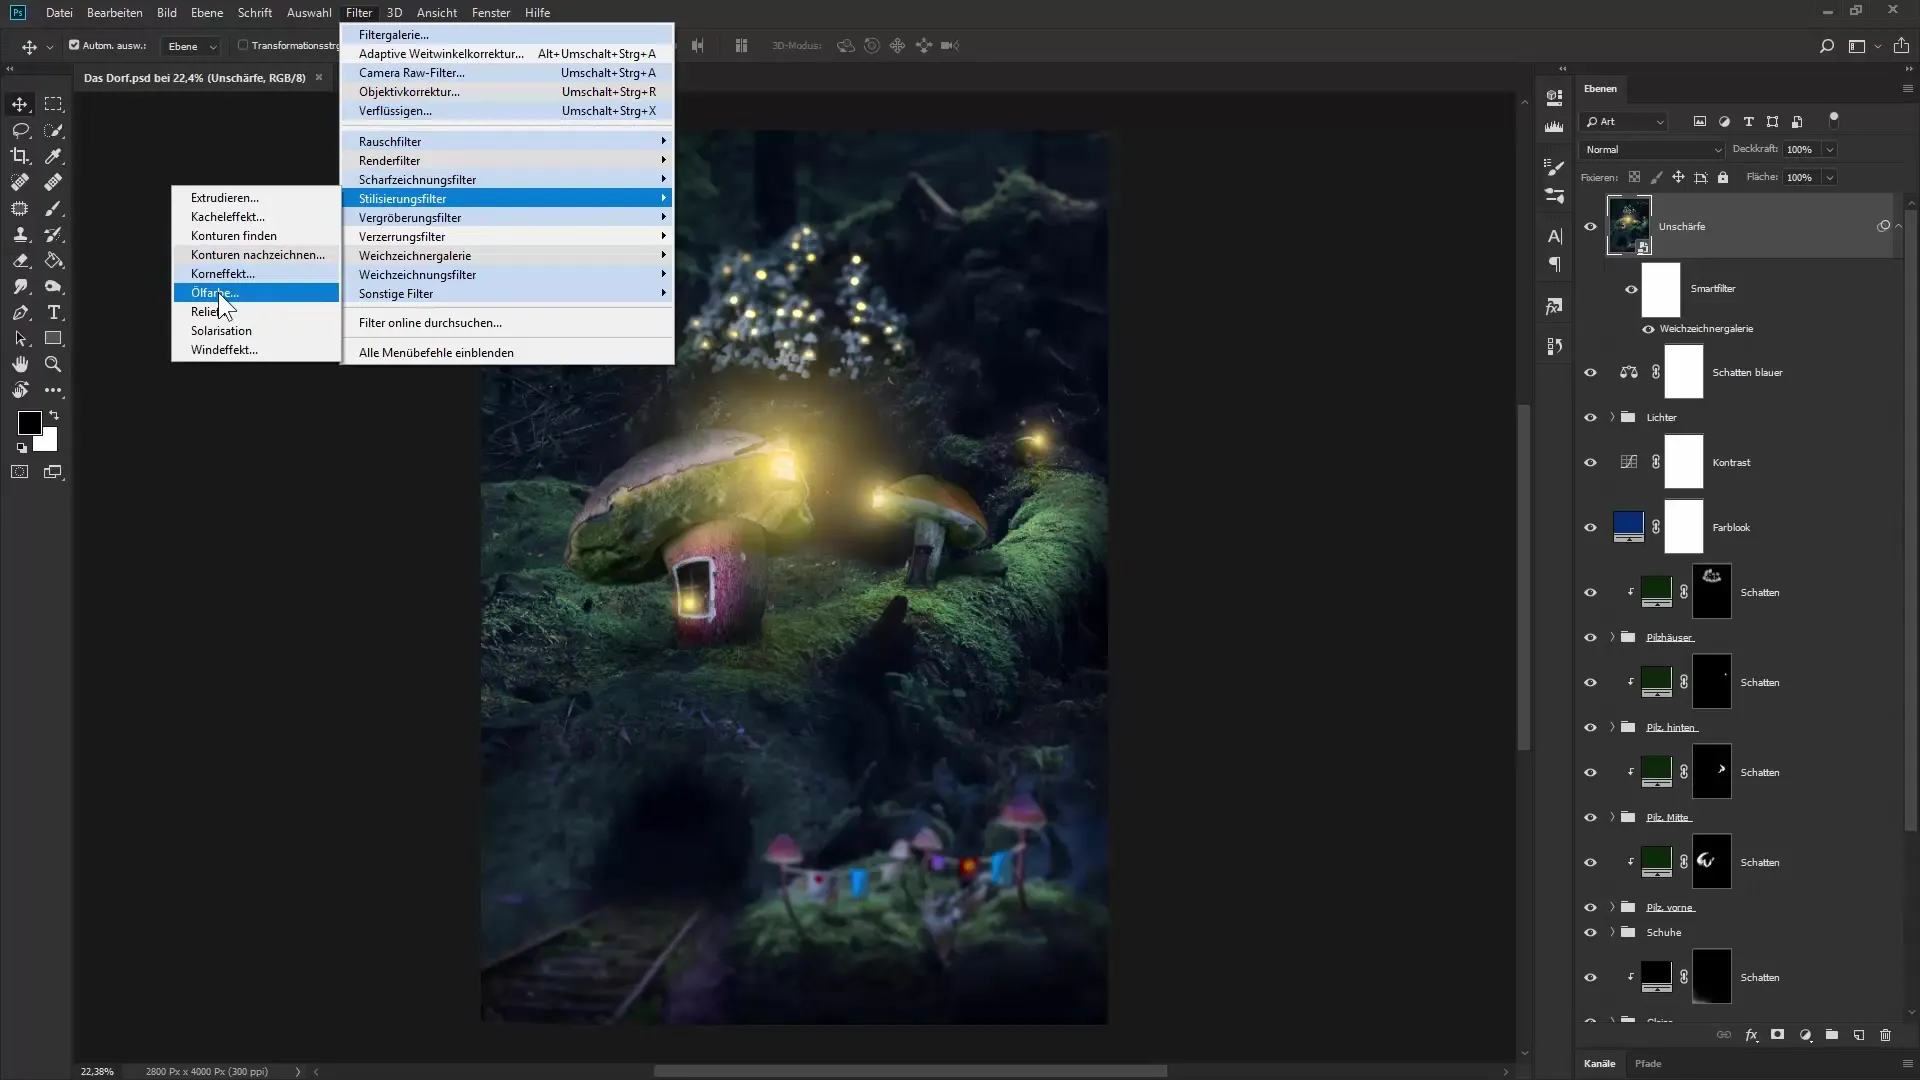
Preview the results while playing with the sliders to ensure that the image looks harmonious and that the individual elements are well combined.
Summary – Optimize color look and final steps in Photoshop
You have now learned a variety of techniques to optimize the color look of your compositing in Photoshop. From adjusting colors to adding blur and a painterly effect, you have all the tools to make your images more engaging.
Frequently Asked Questions
How can I change the color in the adjustment layer?Simply double-click on the color field and select the desired color.
What is the advantage of using Smart Objects?Smart Objects allow you to work non-destructively, so you can change adjustments at any time.
How can I adjust the blur gradient?In the Blur Gallery, you can move the lines for the sharp and blurred areas.
