Imagine you open an unedited RAW file that looks flat, dark, and colorless, and you transform it step by step into an image with a cinematic mood. That is exactly what you will learn in this course. The introduction shows you the entire path you will take in Affinity Pixel and gives you a clear overview before the actual work begins.
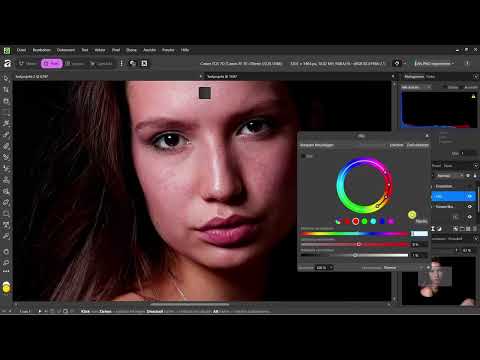
The video is only loaded from YouTube when you play it – data (including your IP address) is then transmitted to YouTube/Google. More in the privacy policy
You don't need any prior knowledge of photo editing for this. Everything is gone through together and at a calm pace. By the end, you will have mastered the complete workflow from raw photo to finished visual.
Key Takeaways
A RAW file is the unedited raw state of a photo and forms the foundation for the entire editing process. With the histogram and targeted exposure corrections, you bring out the brightness and depth in the image. Layers and masks allow you to cleanly isolate subjects, even fine hair, as well as invisibly retouch distracting elements. With color grading, you give the image a cinematic look with warm light and cool shadows. You also combine multiple images into a coherent overall picture. The most important principle is: work non-destructively. Your original image is preserved, and every step can be changed at any time.
Step 1: Opening and Developing the RAW File
The starting point of every edit is the RAW file. It contains significantly more image information than a compressed JPEG and thus gives you greater latitude in brightness, contrast, and color. Open your photo in Affinity Pixel and switch to the develop view. There you will see the settings with which you first bring the raw image into a usable starting state. Keep in mind that this step is not yet a creative decision, but the solid foundation for everything that follows.

Step 2: Reading the Histogram and Correcting Exposure
Before you move any sliders, you should understand the histogram. It shows you the distribution of brightness values from black on the left to white on the right. If many values lie at the left edge, the image is too dark; if the values crowd on the right, it is overexposed. A more even distribution indicates a balanced exposure. Use this display as a guide and correct the exposure deliberately, rather than adjusting by feel. This way you retain detail in bright and dark areas.

Step 3: Working with Layers and Masks
Layers are the backbone of a non-destructive workflow. Every adjustment ends up on its own layer, which you can later show, hide, move, or change in strength. Masks determine where a layer takes effect. Black areas of a mask hide the effect, white areas leave it visible. If you work cleanly with layers in this step, you can later fine-tune each correction in a targeted way without touching the original image.

Step 4: Cleanly Isolating Subjects
For a social media visual, you often have to separate a subject from the background. Fine hair is the biggest challenge here, because with a rough selection tool it quickly looks frayed. Instead, work with a mask and refine the edges carefully. Zoom in close to check the transitions. A clean cutout is the prerequisite for the subject to look believable later in a new environment.

Step 5: Retouching Distracting Elements
Not every detail belongs in the finished image. You remove distracting objects, spots, or skin blemishes with retouching tools. The goal is a correction that nobody notices. Work in small steps and regularly compare with the original by briefly hiding the layer. Make sure that structure and texture are preserved, because surfaces that are too smooth quickly look artificial.

Step 6: Color Grading for the Cinematic Look
Now comes the creative part. With color grading, you define the color mood of the image. A popular approach for a cinema look is warm light in the highlights combined with cool, slightly teal shadows. This contrast creates depth and a narrative atmosphere. Feel your way slowly through the color sliders and curves, and always judge the result in the overall image, not just on individual details.

Step 7: Combine multiple images into one overall image
Many visuals are created from several shots. To do this, combine the individual images as layers and match them to one another in size, position, and color. Make sure that light direction, contrast, and color temperature match, otherwise the composition will look patched together. A consistent color grading across all parts is the key to a coherent result here.

Step 8: Stay non-destructive
The principle that runs through all steps is this: Your original image is always preserved. Every change sits on its own layer or in an adjustment layer, so you can adjust or undo it at any time. Name your layers sensibly so you keep an overview, and save your project regularly as its own file. That way you can continue working on the edit even days later without having to start over.

Step 9: Go through the complete workflow
When you combine all the steps, you have a complete workflow: from developing the RAW file through exposure correction, layers, masks, cutouts, and retouching to color grading and merging multiple images. Go through this process with every new project until it becomes second nature. Over time, you will intuitively recognize which step makes sense next.

Summary – Mastering Affinity Pixel: From RAW Photo to Cinematic Social Media Visual
You have seen how an unremarkable RAW file becomes a professional cinematic visual. You develop the raw image, read the histogram, and correct the exposure in a targeted way. With layers and masks, you cut out subjects, even with fine hair, and retouch distracting elements. Color grading with warm light and cool shadows gives the image its cinematic effect, and you merge multiple shots into a coherent overall image. The common thread is always the non-destructive workflow, in which your original is preserved at all times.
FAQ
Do I need prior knowledge of photo editing?Answer: No, the course is designed for beginners and goes through all the steps together and at a relaxed pace.
What does non-destructive editing mean?Answer: Your original image is preserved, and every change sits on its own layer that you can adjust or remove at any time.
Why is the RAW file important?Answer: It contains more image information than a JPEG and therefore offers greater flexibility in brightness, contrast, and color.
How does the histogram help me?Answer: It shows the distribution of brightness values and helps you identify and correct overexposure or underexposure in a targeted way.
What is the difference between layers and masks?Answer: Layers carry individual edits, while masks determine where on a layer the effect is visible.
How do I successfully cut out fine hair?Answer: Work with a mask instead of a rough selection tool and refine the edges by zooming in close.
What is a typical color grading look?Answer: Warm light in the highlights combined with cool shadows creates cinematic contrast and more depth.
Can I combine multiple images into one visual?Answer: Yes, merge the shots as layers, adjust size, position, and color, and use a consistent color grading.

