The editing of photosis an art in itself, and contrastplays a crucial role in it. With AffinityPhoto, you can learn how to effectively adjust the contrast of an image – whether by increasing or consciously reducing it. Below, I will show you how to edit your images step by step to achieve an interesting image style.
Key Insights
- The contrast of an image can be both enhanced and diminished to achieve various visual effects.
- The use of adjustment layers allows for non-destructive editing, making it easier to adjust settings later on.
- The application of tone corrections and curves are two effective methods for contrast editing in Affinity Photo.
Step-by-Step Guide
Enhancing Contrast with Tone Correction
Let's start with the first example. You have an image where the contrast has been softened afterward. The goal here is to enhance that contrast again. First, open your image in Affinity Photo, which will appear as a background layer in the layers palette. Click on the adjustment layers icon at the bottom and select the tone correction option. Now you can see the histogram of the image. On the left side are the dark areas, and on the right side are the bright areas.
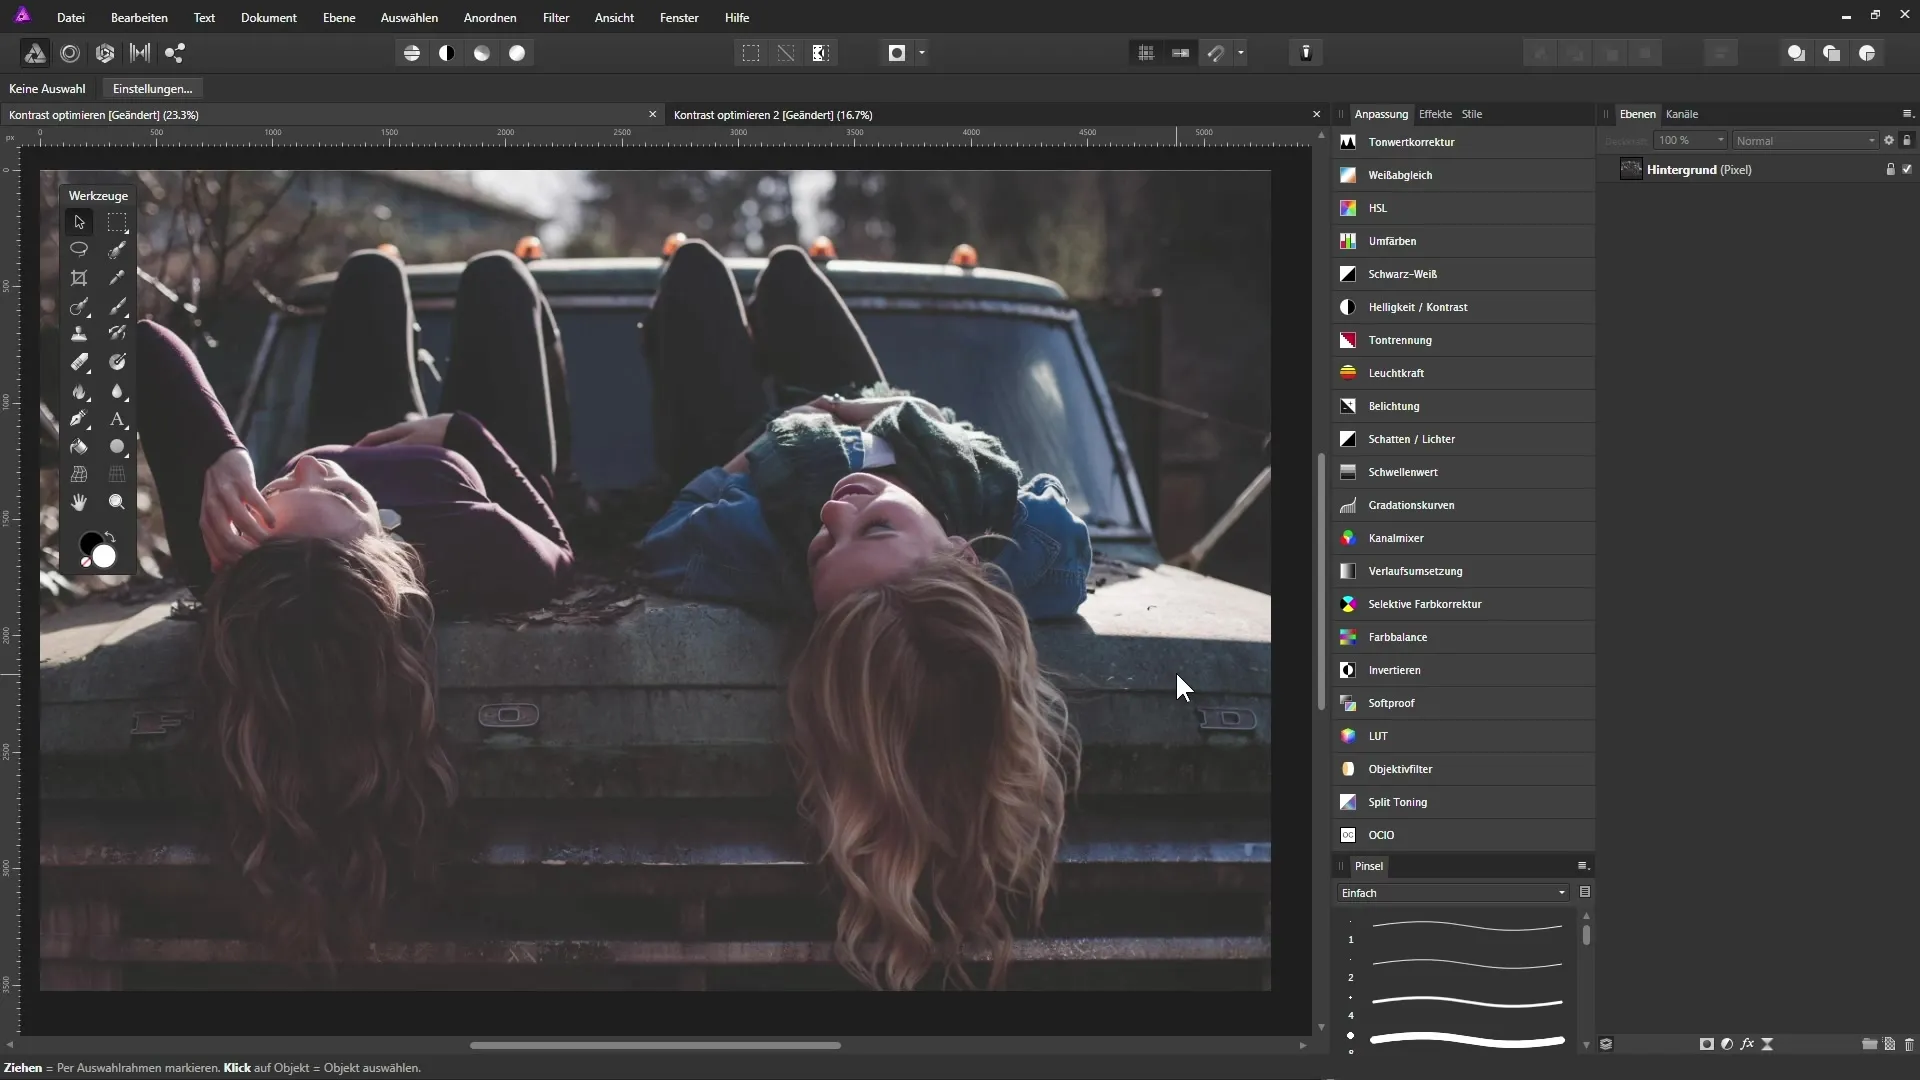
It is important to check if your image actually contains pure black or white. If you find that there is no image information in the dark areas, you can move the black slider to the right. As you move this slider, you'll see a fine white line moving along with it. This is the point where you define pure black in your image.
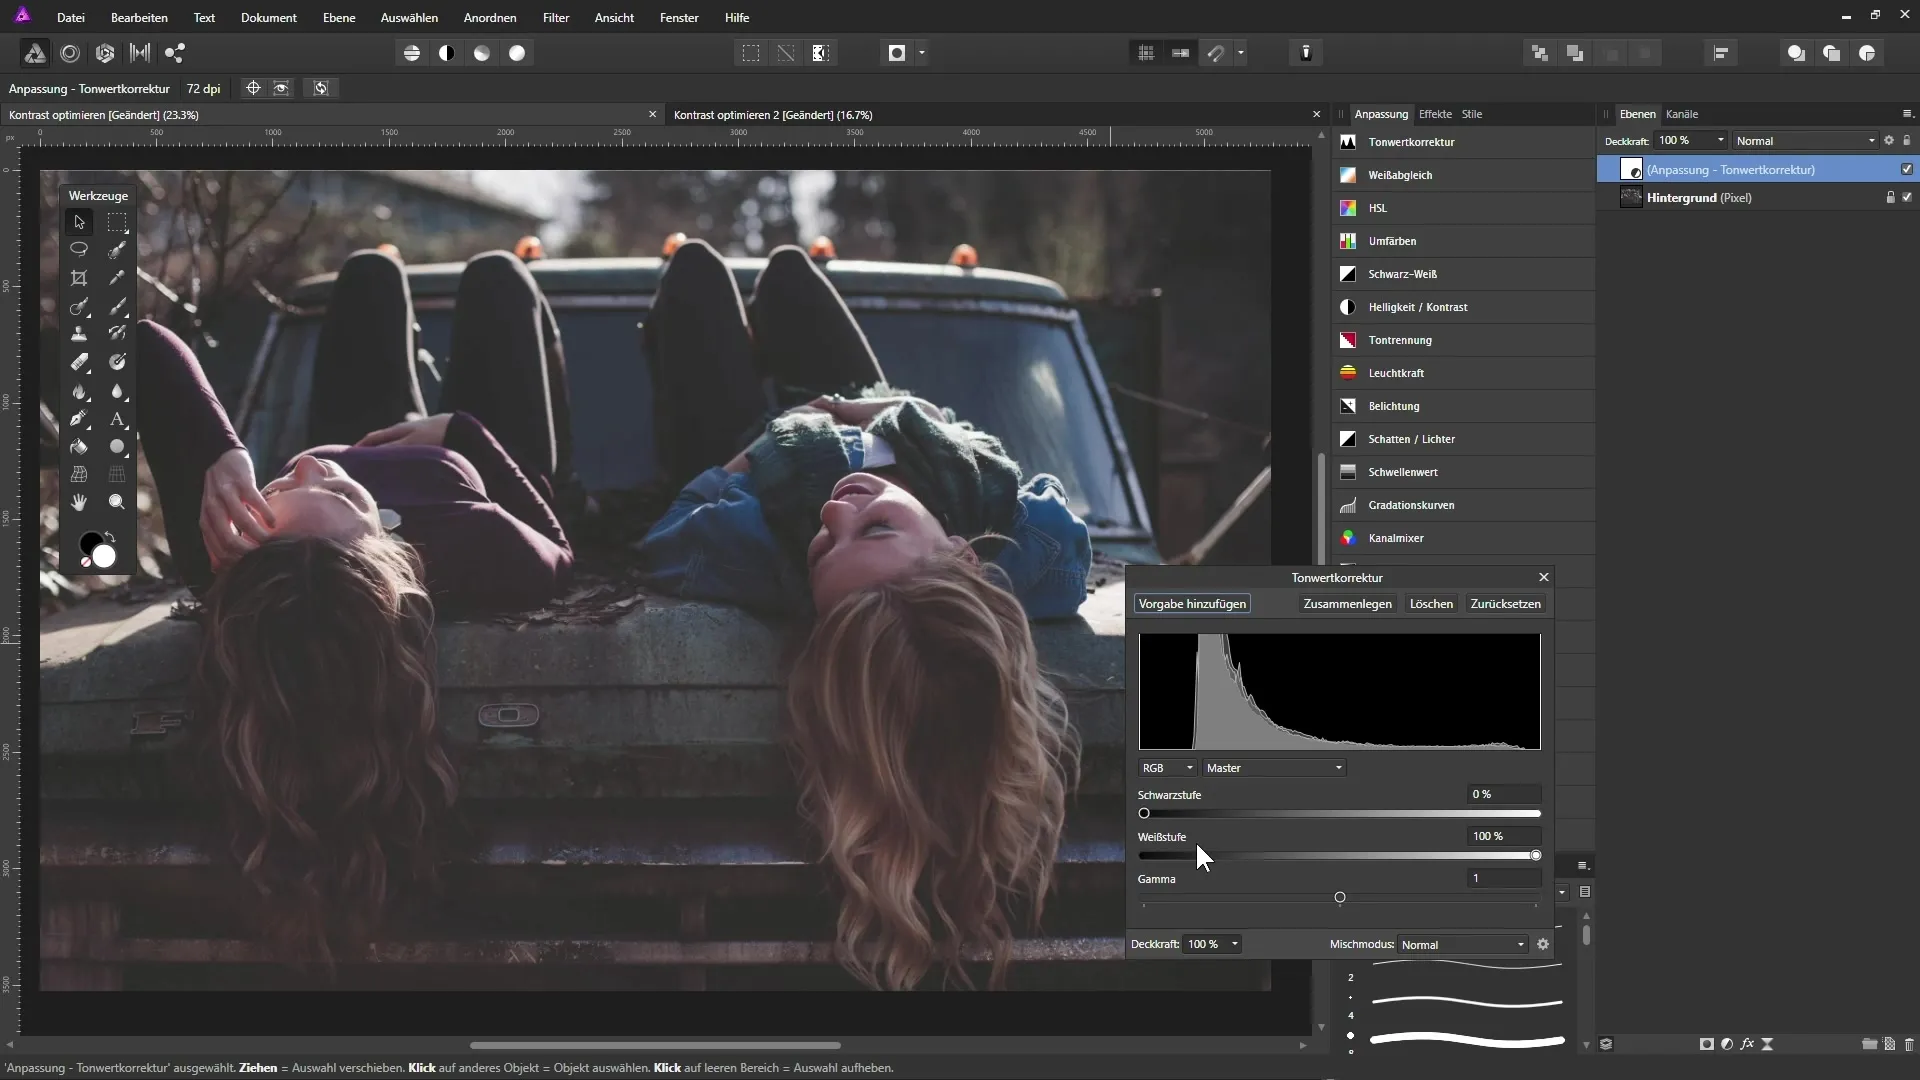
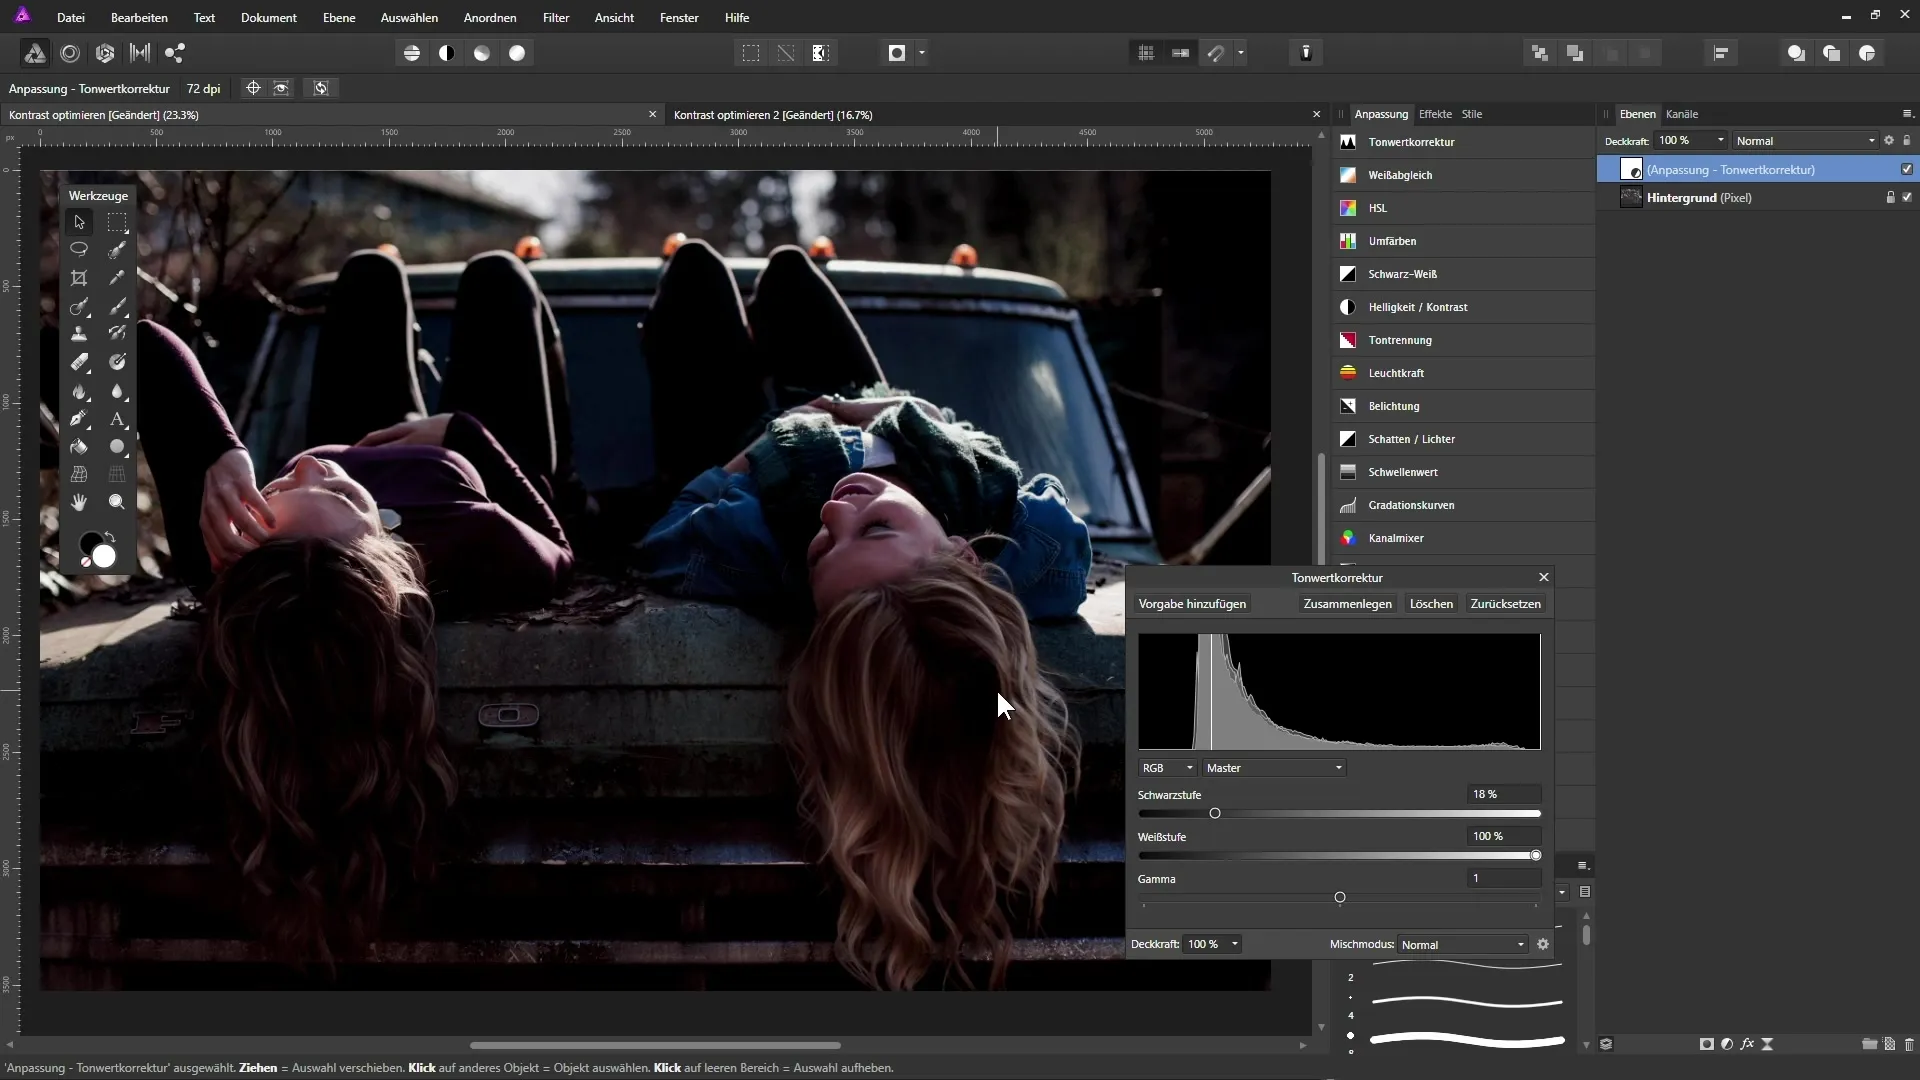
Experiment with the slider to achieve the best results. By holding down the Alt key while moving the slider, you can see and better position the darkest points in the image.
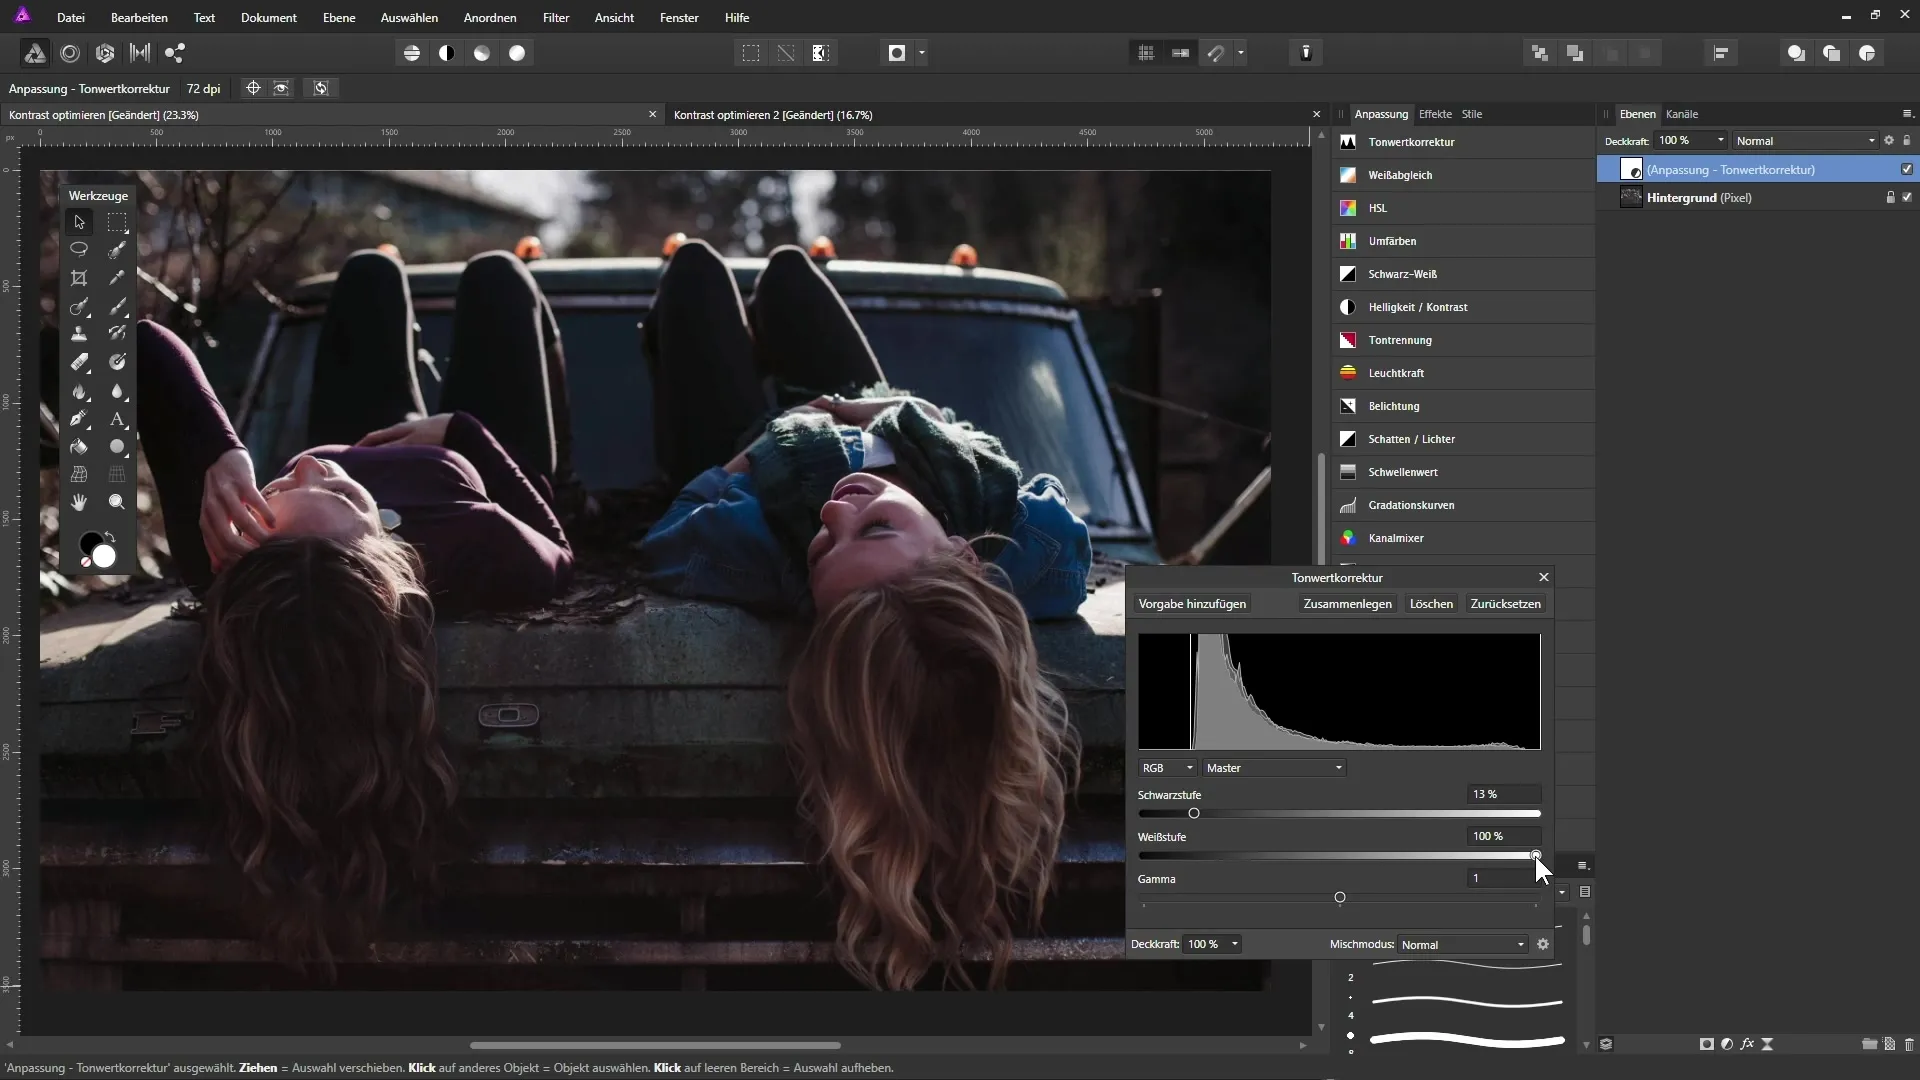
Repeat this step for the white point slider to identify and optimally set the brightest areas in the image. Move the white slider to the right and observe the brightest areas to achieve a balanced result.
Reducing Contrast with Curves
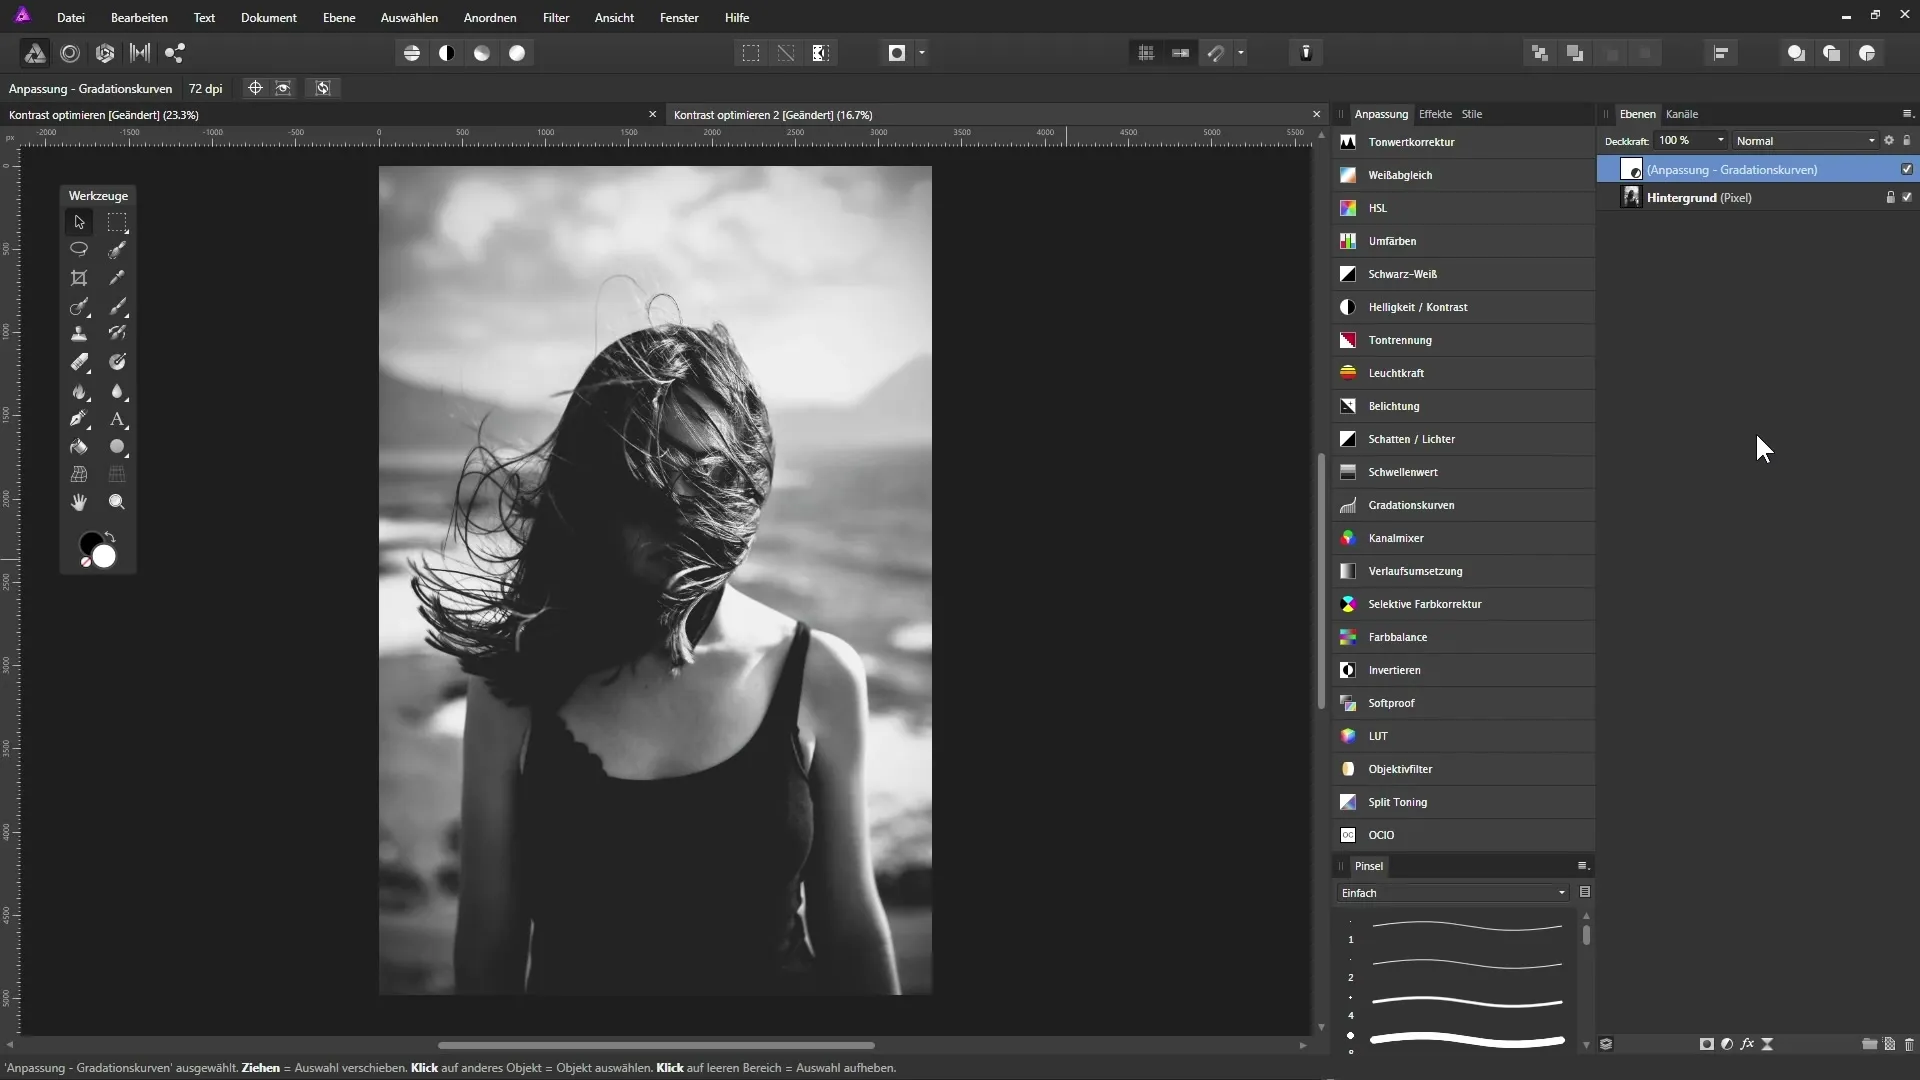
Now we will look at the second image, where the contrast is relatively high. Here, we intend to soften the dark and bright areas. Open the image again in the layers palette, and select curves instead of tone correction. Again, you will see a histogram that indicates the image does not contain pure black, and the bright areas may appear too bright.
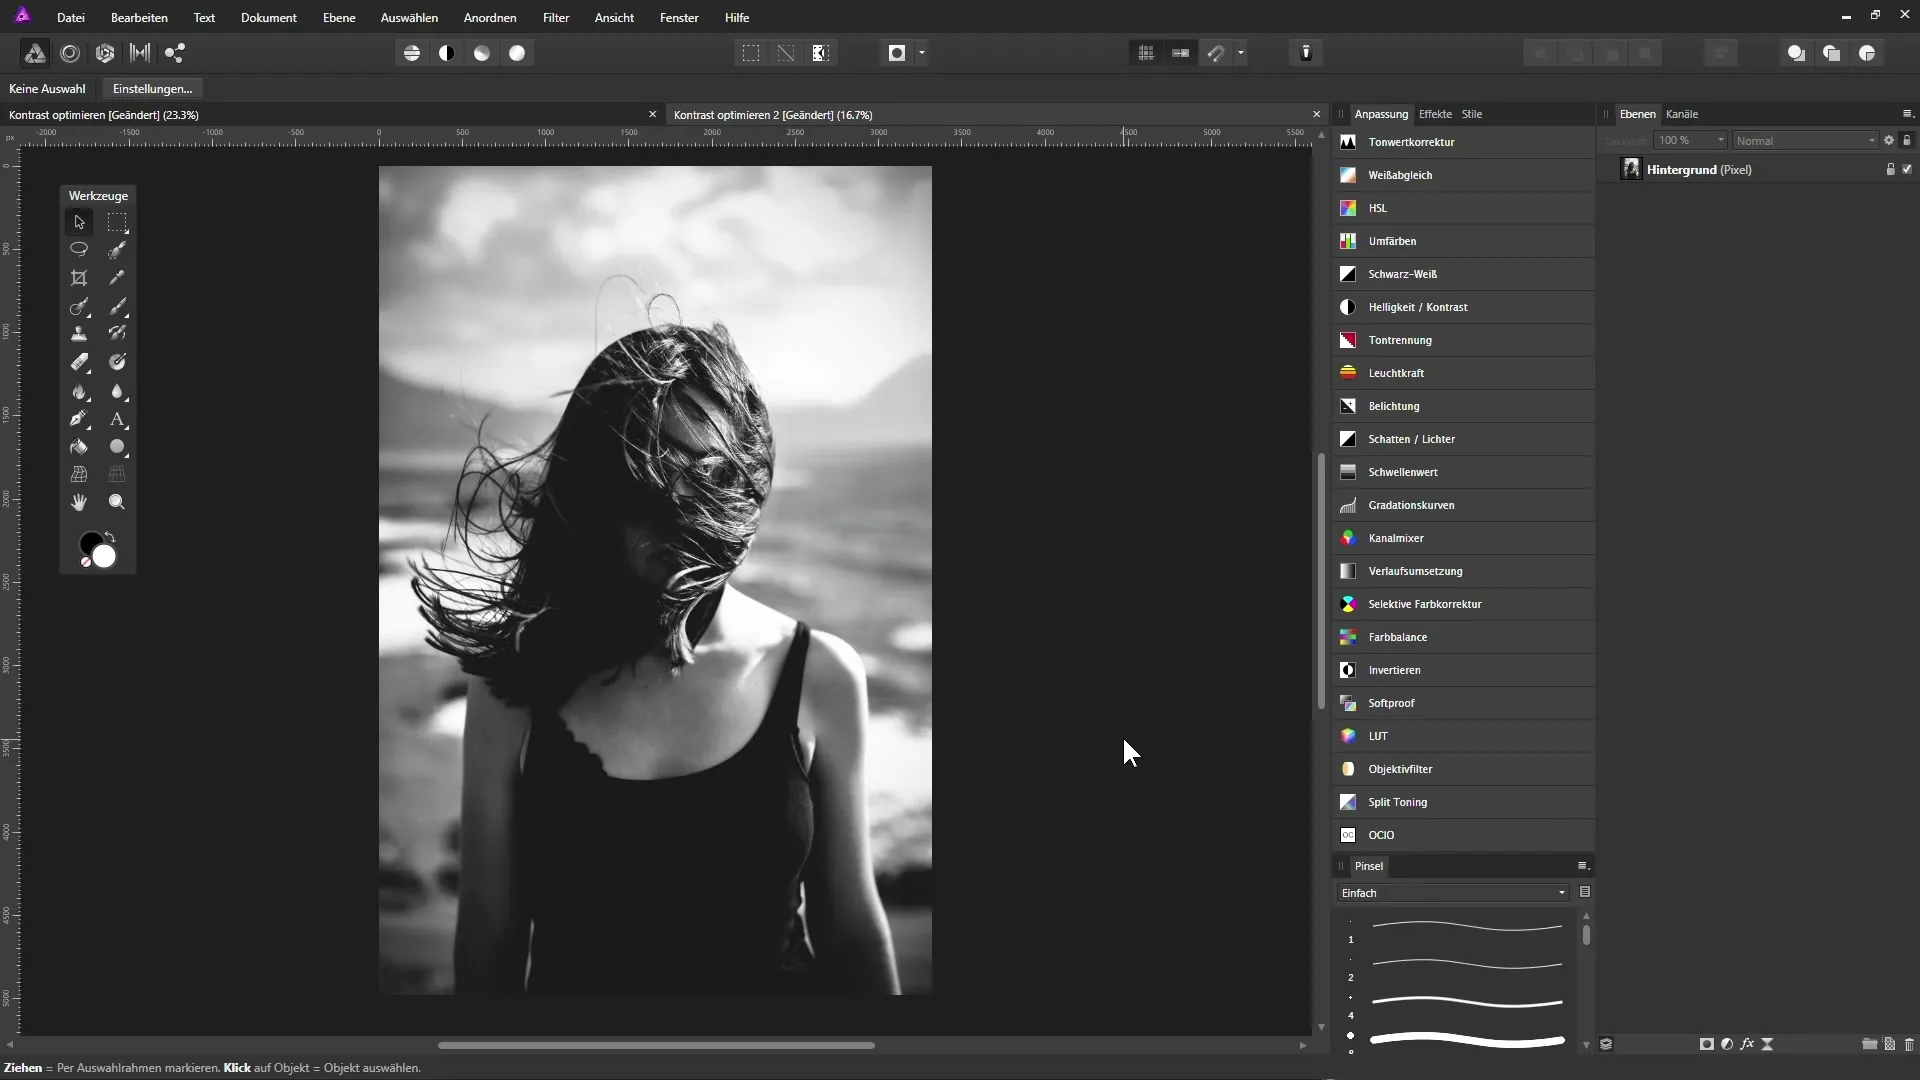
To soften the dark areas, move the dark tone slider to the right. Use the Alt key to see the changes more precisely.
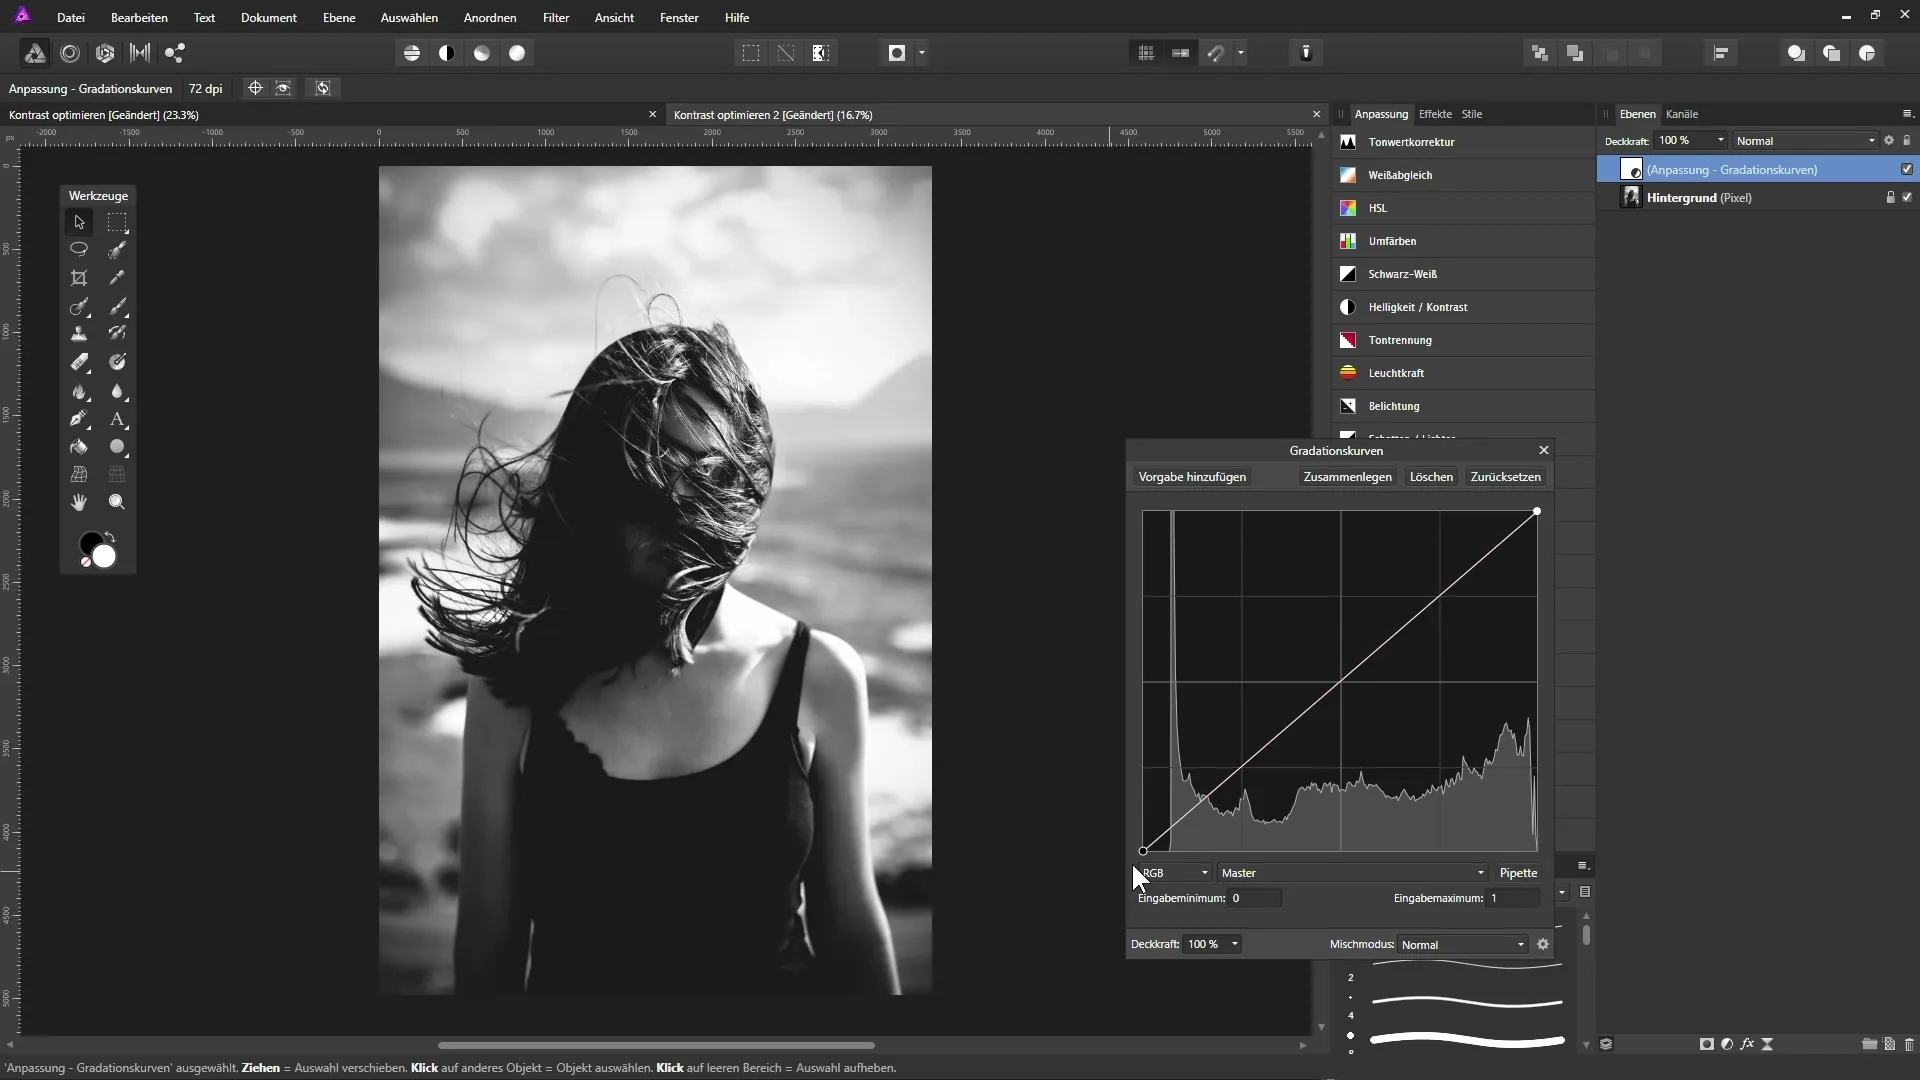
The goal is to slightly lighten the dark areas without turning them completely to pure black. Experiment with the mid-tones by adding an anchor point to adjust the brightness of these areas as well.
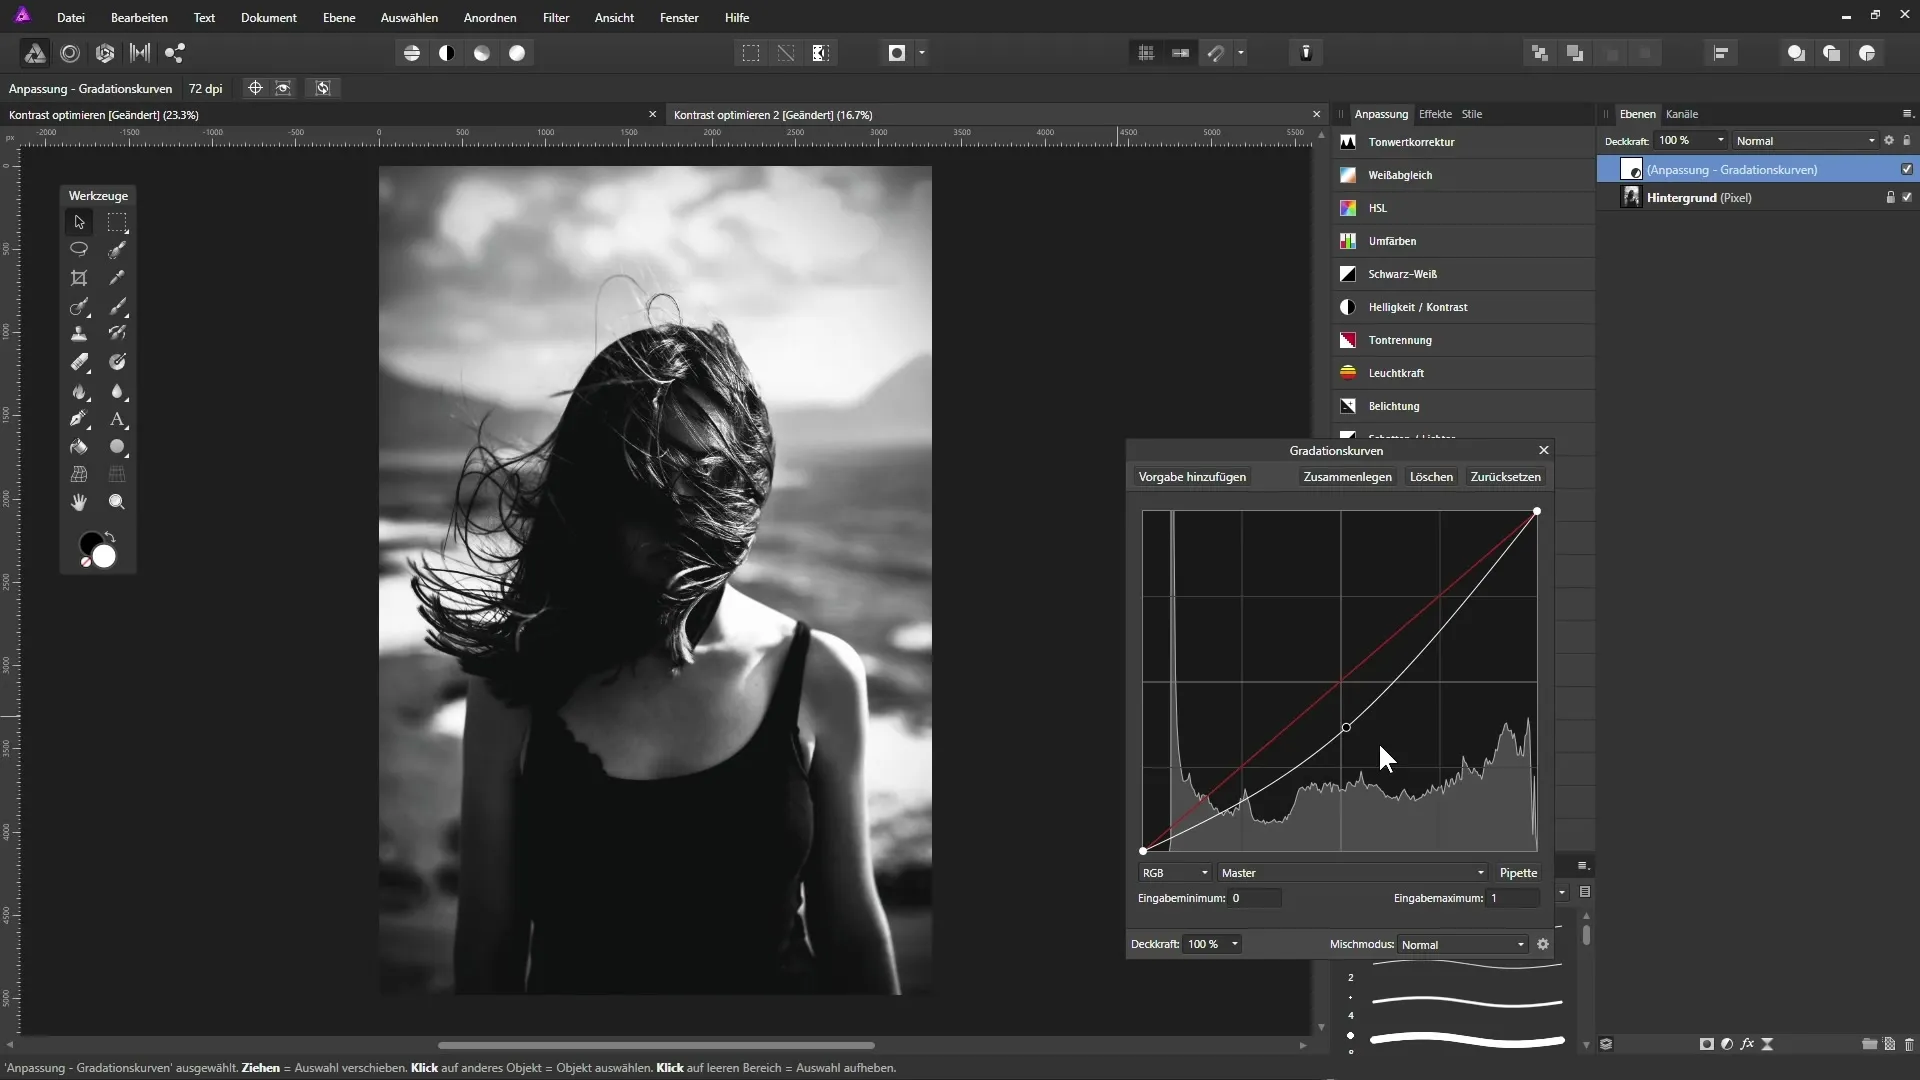
If you want to darken the bright areas, move the corresponding point downwards. By following these steps, you can deliberately reduce the contrast in the image to achieve a harmonious visual effect.
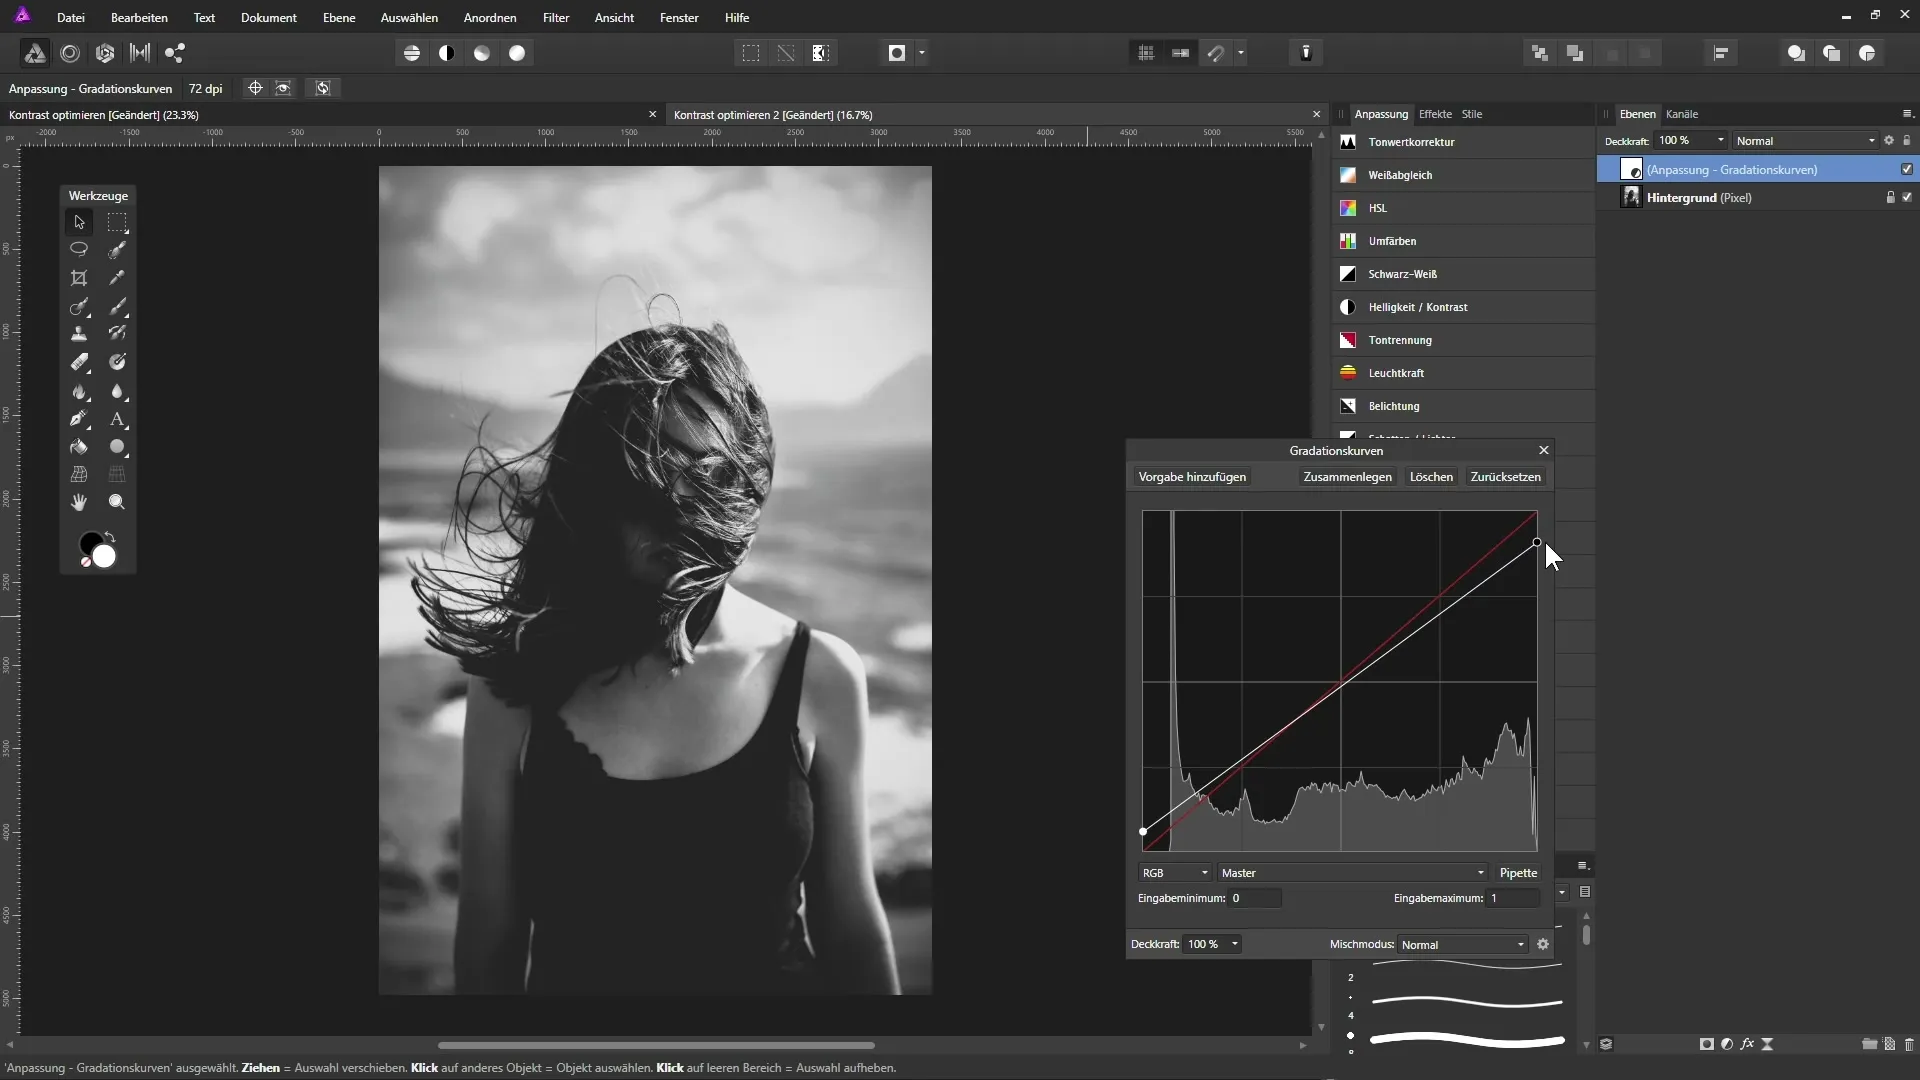
After making these adjustments, compare the result with the original image. You will quickly notice how the contrast has improved and how much more vibrant the image now appears.
Summary
Contrast Optimization in Affinity Photo: A Guide to Improving Your Photos
Adjusting contrast is a fundamental technique in photo editing that can give a new expression to your image design. With the tools of Affinity Photo, you have the opportunity to both enhance contrast and achieve muted effects, depending on your desired style. By using adjustment layers, you remain flexible and can make changes whenever you want.
FAQ
What is the difference between tone correction and curves?Tone correction offers a simple way to adjust black and white values, while curves allow for detailed control over the tonal values of the entire image.
How do I know if I should have pure black or white in my image?A histogram shows you where the image information lies. If there are no data in the extreme ranges, there is no pure black or white.
Can I change the adjustments later?Yes, since you are working with adjustment layers, you can adjust the sliders at any time and make changes whenever you want.
Does Affinity Photo support multiple adjustment layers?Yes, you can stack multiple adjustment layers to achieve complex effects and fine-tune the effects of each layer individually.
Which is better for beginners: tone correction or curves?Tone correction is easier to understand and therefore easier for beginners to use, while curves provide more control for advanced editors.


