
Before you draw in the first joint in a robot composing, you should know exactly where it belongs. This tutorial shows you how to start with a simple sketch, develop helper layers and paths from it, and finally create precise selections that you can later use to place light and shadow in the right spots.
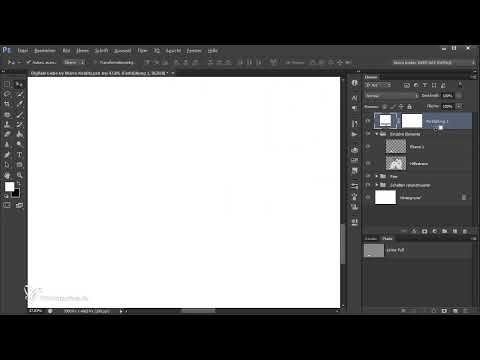
The video is only loaded from YouTube when you play it – data (including your IP address) is then transmitted to YouTube/Google. More in the privacy policy
Key Takeaways
A sketch saves you a lot of time later because you have a clear picture in mind while working. Joints always consist of an upper and a lower part, between which the actual movement takes place. Paths can be edited afterwards and saved permanently. From a path you create a selection, with which you generate a new layer only for the desired area. Helper layers serve only for orientation and are hidden again at the end.
Step-by-Step Guide
Step 1: Make a sketch for orientation
Planning comes first. Note where the joints should be located and how the figure is posed. You can take a printout of the image and mark the joints with a pen. Alternatively, place an empty layer over the image and draw rough lines there with a simple brush. Pay particular attention to the areas that are important for movement, such as knees, elbows or neck. You may neglect unimportant areas such as the transition at the ankle.

Step 2: Use the sketch as a memory aid and plan the elements
The sketch doesn't have to be perfect, and you don't have to keep displaying it while you work. Its real benefit is that while sketching you develop a more precise picture of what you want to achieve. Feel free to delete it afterwards and create a new group instead, for example named "individual elements". There you collect all the layers and paths you need for the joints.
Step 3: Create a helper layer from the visible layers
So that you have a clear reference point, you create a helper layer with your subject. To do this, first deactivate the background and the shadow so that only the relevant parts remain visible. Then press Ctrl + Shift + Alt + E. This merges all visible layers into a single one. Move this layer into your group and reactivate the background and shadow. Give the layer a clear name, such as "helper layer". It will be hidden at the end anyway and serves only as a template.

Step 4: Create the first path with the Pen tool
Now zoom into the area you want to edit. Select the Pen tool and set the first anchor point by clicking once. For a curved line, click at the next spot and drag while holding the mouse button until the curve matches the course of your sketch. Repeat this at the places where the shape changes. You close the path by returning to the starting point. Pay particular attention to the area that is decisive for the joint, because you can design the rest generously.

Step 5: Refine the path afterwards
A path is rarely perfect on the first try. Hold down the Ctrl key while the Pen tool is active, and click on the path. This way you can move individual anchor points and adjust the handles with which the curves can be changed. Always check whether the course fits the joint. At bends such as an ankle, you often set an additional point so that the shape looks natural. Take as much time as you need for this.
Step 6: Save the path in the Paths panel
Open the Paths panel via Window. Your path first appears there as a work path in italic text. A double-click on the name turns it into a permanent path, which you can call "left foot", for example. The advantage: the path is retained even after saving the file and is available to you at any time.

Step 7: Create a selection and a new layer from the path
Now activate the helper layer, hold down the Ctrl key and click on the thumbnail of the path in the Paths panel. This creates a selection exactly in the shape of your path. Then press Ctrl + J to copy the selected area as a new layer. In this way you get a separate element that contains only the piece of the subject that you need.
Step 8: Checking the Cut-Out Element
Hold down the Alt key and click the eye icon of the new layer. This hides all other layers and shows only the cut-out area. Repeat the process to show the remaining layers again. With this check, you can quickly see whether the cut-out came out cleanly.

Step 9: Making the Element Visible and Working with a Clipping Mask
To make the punched-out piece easier to see, create a solid color fill in white. Drag it within the group over the area and then create a clipping mask. To do this, hold down the Alt key and click between the adjustment layer and the layer beneath it. This way, the color fill only affects the content of the group. Briefly deactivate the helper layer, and you will see that only the joint is filled with white. Reduce the opacity so that some skin remains visible. You can use an additional mask to remove excess areas at full opacity. However, this mainly serves to give you a better overview and ensures that the elements do not overlap during editing.

Step 10: Creating the Second Element for the Upper Part of the Joint
Each joint consists of a lower and an upper part. Therefore, use the Pen tool to set the next path, this time for the upper part. Think carefully about how the joint must run depending on the body posture. A strongly extended leg requires a different shape than a bent one. The piece should fit precisely against the first element. Also give the path a clear name, such as "left foot 2," and create another layer from the helper layer using Ctrl + J.

Step 11: Creating the Joint Between the Two Parts
Repeat this process for every joint, that is, for the knee, elbow, wrist, or neck. The decisive area is always between the upper and the lower part. That is where you will later have to design the actual joint. Keeping the group organized really pays off here: if every layer and every path is sensibly named, you keep an overview even with many joints.

Step 12: Comparing the Result with the Helper Layer
Finally, hide the helper layer. The image then looks the same as before, and yet you have a clear structure in the background. The paths and layers show you exactly where you need to use light and shadow in the next step to bring out the joints better.

Summary – Sketching Joints in Photoshop: Templates for Robot Composings
With a rough sketch, you determine where the joints should be located. Using helper layers, Pen tool paths, and selections, you then create an upper and a lower part for each joint as separate layers. These templates remain permanently saved as paths and form the basis for further editing of light and shadow.
FAQ
Does the sketch really have to be exact?No, the sketch mainly serves as orientation. What matters is that you think beforehand about where the joints are located and how they run.
Why should I use paths instead of simple selections?Paths can be edited precisely afterwards and remain saved in the Paths panel. You can load them again at any time, even after you have saved the file.
What happens if I don't hide the helper layer at the end?The helper layer covers the result and disrupts the overall effect of the image. Therefore, you should deactivate or delete it before finishing.
What is the white color fill with a clipping mask for?It makes the cut-out joint visible and helps you better assess the shape during editing. You can reduce the opacity afterwards.


