
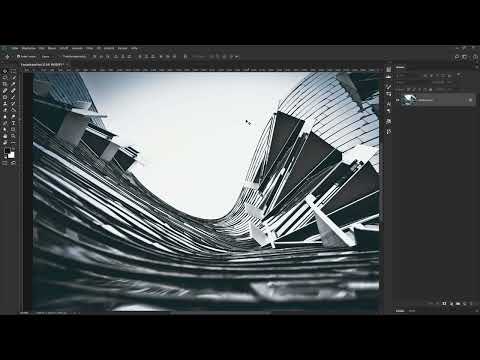
A slanted-looking house wall is one of the details in many photo composites that give a motif dynamism. This is exactly what you work on in this tutorial: You warp an originally straight façade, isolate it from the background, and save it so that you can effortlessly use it in your composite later.
The video is only loaded from YouTube when you play it – data (including your IP address) is then transmitted to YouTube/Google. More in the privacy policy
You will learn how to create a canvas of the right size, make a clean selection with the lasso, create a smart object, and bring curves into the image using the Warp tool. The most important part, however, is the path made with the Pen tool. With it, you create the cutout mask, which you load as a selection at the end and convert into a layer mask.
Key Takeaways
Key Takeaways
- A smart object allows you to make distortions that you can correct at any time.
- A Levels adjustment as a helper layer makes weak edges visible without changing the final result.
- By holding down the Alt key, you detach a handle from its counterpart and thus create a hard corner instead of a soft curve.
- A saved path can be loaded as a selection and inverted as a mask via Alt-click.
Step-by-Step Guide
Step 1: Create the Canvas for the Composite
First, create a new document via File and New. For the composite, choose a width of 3936 pixels and a height of 5906 pixels. These dimensions serve as the canvas in which you will later place all the image elements of the scene. Therefore, set the size right at the beginning so that you can scale the façade appropriately.

Step 2: Select the Lower Edge of the Façade with the Lasso
Now open the sample façade and switch to the Lasso tool. In the image you can see a straight line where the façade ends. Start at the starting point, hold down the mouse button, and move the cursor along outside the image until you pick up again on the opposite side at the height of this line. Release the mouse button there. In this way, your selection covers exactly the lower area of the façade.

Step 3: Mask the Selection and Convert It into a Smart Object
Click the layer mask icon at the bottom of the Layers panel. Name the mask, for example "Fassade", so that you can find it quickly later. Then right-click the layer and select "Convert to Smart Object". The smart object stores the layer not as a pixel surface but in its original form. As a result, transformations remain lossless and editable later.

Step 4: Place the Façade in the Canvas and Enlarge It Proportionally
Drag and drop the smart object onto your canvas. Then activate the transformation with Ctrl and T. Next, hold down the Shift key and the Alt key and drag a corner handle. The Shift key ensures proportional scaling, and the Alt key enlarges from the center. Be sure to confirm the transformation with the Enter key as soon as the size is right.

Step 5: Curve the Façade Using the Warp Tool
Now select Edit, Transform, and there Warp. A grid then appears over the layer. Drag individual anchor points or grid areas in the desired direction to bend the wall up, down, or to the side. You can also grab points in the middle of the grid. If you don't like a change, simply undo it with Ctrl and Z. Feel free to experiment until the curvature looks believable. However, don't overdo it, so that the façade doesn't look artificial.

Step 6: Use the Original Photo as a Basis
In practice, there is often a photo that already shows the desired curvature. In that case, you don't have to warp anything anymore. Open this original photo and work with the building as it actually exists in reality. This generally looks more convincing than any subsequent distortion. The further steps for isolating work exactly the same with this template.

Step 7: Make the edges visible with a Levels adjustment as an auxiliary layer
The facade does not always stand out clearly from the background. The outline can blur, especially at edges and transitions. Therefore, create a Levels adjustment layer above the background layer. Drag the sliders far to the left so that the image is heavily darkened. Now the edges stand out clearly. This layer serves exclusively as a visual aid for the path. It must not be visible in the finished image later.

Step 8: Create the path with the Pen tool
Select the Pen tool and start at the top edge of the facade. Click at the desired spot, hold down the mouse button, and drag slightly in one direction. This creates an anchor point with two small handles that determine the direction of the curve. While holding the Ctrl key (the Command key on a Mac), you can move an anchor point you have already placed as soon as the cursor turns into a white arrow. To change a curve, hold down the same key and drag the handle. A blue line appears, with which you precisely adjust the shape.

Step 9: Turn edges into hard corners with the Alt key
Not every transition on the facade should be smooth. At places where the wall forms a true edge, set an anchor point and hold down the Alt key while you click on the handle. This detaches it from the opposite handle. Both handles can now be dragged independently of each other, and the line becomes straight or kinked. While holding the Ctrl key, you can also correct the position of the anchor point if needed. In this way, work your way step by step along the entire outline of the facade. The auxiliary layer from Step 7 shows you exactly where the path must run.

Step 10: Close the path around the entire outline
Continue along the facade until you have arrived back at the starting point. If necessary, move individual anchor points up or down until the course fits cleanly along the edges. When the path is completely closed, you will see the complete outline of the facade as a blue line. This path now forms the basis for your cutout.

Step 11: Load the path as a selection
Switch to the Paths panel, which you can find under Window and Paths. There you will see the path you created. Select the background layer before you continue working. Then click the icon with the dashed circle at the bottom of the Paths panel. This converts the path into a pixel selection. You can recognize this by a dashed line running around the facade.

Step 12: Invert the selection as a mask
With the active selection, clicking the icon for a new layer mask would initially show you only the background, because the facade would be hidden. However, since you want to keep the facade, hold down the Alt key and click the mask icon. The mask is inverted in the process. The background disappears, and only the area inside the path remains visible. Finally, name the layer "Fassade" so that it can be clearly identified in your project.

Step 13: Hide the auxiliary layer and save the file
Hide the Levels adjustment, since it serves only for orientation and would otherwise make the image look unnaturally dark. Then save the file via File and Save As, for example as "fassade.psd". The PSD format retains layers, masks, and smart objects. This way, you can later insert the facade into your composing without any problems and adjust it afterwards if needed.

Summary – Facade for Composing: Transforming and Cutting Out in Photoshop
In this tutorial, you created a canvas in the appropriate format and prepared a facade with the Lasso. You then placed it as a smart object, enlarged it proportionally, and brought it into the right shape using the Warp tool or an original photo. With a Levels adjustment as an auxiliary layer, you made the edges visible and created a path with the Pen tool on that basis. You loaded the path as a selection, inverted it as a mask with an Alt-click, and saved the file as a PSD. The facade is now ready for use in your composing.
FAQ
Why should I save the facade as a Smart Object?A Smart Object retains the original information of the layer, so you can undo or adjust transformations at any time.
What is the purpose of the Levels adjustment in this tutorial?The Levels adjustment is only a helper layer that emphasizes dark edges more strongly so you can place the path more precisely. In the finished image, it is hidden.
How do I create a hard edge instead of a smooth curve?Hold down the Alt key while clicking the handle to detach it from the opposite handle, and then drag it independently.
What happens if I load the path as a selection and then create a normal mask?Then you will only see the background, because the facade is hidden. By holding down the Alt key while clicking the mask icon, you invert the mask so that only the facade remains visible.
Why is the canvas set to 3936 x 5906 pixels?This size serves as a fixed basis for the composite, so that the facade and all other image elements can be scaled to fit each other.
Can I also use the facade without warping it?Yes, if you use an original photo with an already curved facade, you don't have to warp anything anymore and can start cutting it out right away.


