
The storm dancer is a strong subject, but her photo is still set against a busy background with a floor and distracting lines. This tutorial shows you how to cleanly cut her out, refine her hair, and prepare the result so that it fits seamlessly into your composition later. The focus is on Quick Mask mode, a method that delivers particularly good results with human figures with fine contours.
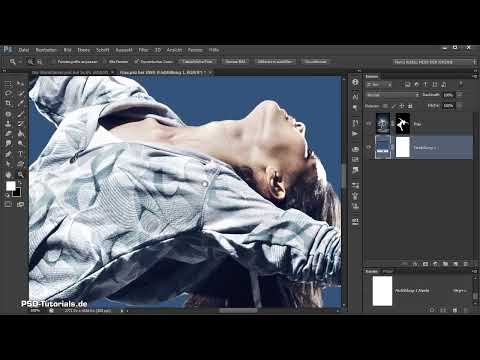
The video is only loaded from YouTube when you play it – data (including your IP address) is then transmitted to YouTube/Google. More in the privacy policy
Key Takeaways
- Quick Mask mode lets you mark areas directly with the brush and fill tool, without having to create a layer mask right away.
- A soft brush ensures a natural transition to the background, especially with blur and motion.
- The fill tool completely closes off the figure, so that only the background remains selected, which you then invert.
- Hair can be made more realistic with the "Refine Mask" option, the Clone Stamp, and the Smudge tool.
Step-by-Step Guide
Step 1: Open the Source Image
Open the photo of the storm dancer via "Open File". Unlike the photo of the man, the photographer here presumably also worked with a gray background, which was however replaced in the composite by a not very successful background and floor. Take your time to look at the image before you begin the cutout.

Step 2: Identify Distracting Image Elements
Zoom in on the contour. You will see that the background in places extends into the jeans and that a line merges into the clothing. Such transitions make the cutout difficult. Channels hardly help here, since the contrast between figure and background is too low. That is why Quick Mask mode is better suited.

Step 3: Activate Quick Mask Mode
Quick Mask mode is an inconspicuous icon in the toolbar. One click on it only changes the display at the top of the image, where it then says "Quick Mask" instead of "RGB". With another click you return to the normal working mode. The mode itself has nothing to do with the later layer mask, but merely serves to colorize areas.

Step 4: Paint the Woman Red
Select the brush and set the foreground color to black. In Quick Mask mode, the painted areas appear red. At 100% opacity, you use it to mark the areas that should not be visible later. Your goal is to fill the woman completely with red. Afterwards, you invert the selection so that only the figure remains.

Step 5: Set Brush Size and Hardness
Reduce the brush size for the contours and set the hardness not to maximum, but somewhat softer. The contour of the storm dancer is not hard, and a soft brush prevents edges that look artificial later. Increase or decrease the brush size at any time via the keyboard so that you can work precisely in tight areas.

Step 6: Trace the Contours
Run the brush along the outer contour of the woman. Switch between foreground and background color with the X key when you need to correct or uncover areas again. You can certainly work a bit sloppily here, since the fine work follows later. What matters is that the outlines are marked in red without gaps. With the hair, it can be rougher, since it will be edited separately in a later step.

Step 7: Account for Soft Transitions and Motion Blur
A soft brush with lower opacity creates semi-transparent areas. This is especially helpful with subjects with motion blur, such as a photographed bird or ball that is partly sharp and partly blurred. You can cut out such areas semi-transparently in this way. The red color shows you at all times which parts are already marked.

Step 8: Fill the Interior
The outline is now closed, so you can also fill the inner area of the figure with red. To do this, select the Fill tool. If it is hidden behind the Gradient tool in your toolbar, click and hold the tool with the mouse and select the Fill tool. In the options, make sure the opacity is 100%, the mode is "Normal," and the "Contiguous" option is selected for the fill type. Then click in the inner area of the woman.

Step 9: Set the Tolerance Correctly
The tolerance determines how far the fill spreads. In this example, the value was 179, but with your images you will have to try out which value fits. If the tolerance is too high, the background will also be filled with red. If it is too low, gaps remain. Increase or decrease the value until only the figure is filled. Incidentally, a gap in the outline prevents a complete fill, so you should check all edges beforehand.

Step 10: Exit Quick Mask Mode and Invert the Selection
Click the mask icon again to exit the mode. Now the entire background is selected, but not the figure. Via "Select" and "Inverse," or with the keyboard shortcut Ctrl + Shift + I, you invert the selection. After that, the woman is selected, and you can cut her out.

Step 11: Cut Out the Woman Using a Layer Mask
Activate the background layer, click the mask icon, and the woman is cut out. Then give the layer a meaningful name, such as "Woman." For checking, you can place a blue solid color layer beneath the figure. This way you can immediately see whether remnants of the old background are still visible. This helper layer will be deleted again later.

Step 12: Duplicate the Layer and Prepare the Hair
Duplicate the cut-out layer while holding the Alt key so that you have a second layer for the hair. Hide the upper layer and edit the mask. Fill the figure with black so that only the hair remains visible. This way you can refine the hair separately, which is generally a challenge when cutting out subjects.

Step 13: Optimize the Mask with "Select and Mask"
Open the "Select and Mask" command via the mask's properties. Under Edge Detection, activate Smart Radius and set the slider to about the middle. Photoshop then searches the edge area for further contours. With the Refine Edge Brush, you can paint over individual hair areas and ask Photoshop to look more closely there. Reduce the size of the brush for fine strands.

Step 14: Edge, Feathering, and Decontaminate Colors
Adjust the edge in the dialog. Shift it slightly inward so that no background remnants remain visible. A soft edge of about 0.2 pixels and a smoothing of roughly one pixel provide a natural transition. Also activate the "Decontaminate Colors" option. It removes the color fringes that were created at the edges by the old background. Don't overdo the strength, otherwise the result looks artificial.

Step 15: Correct the Hair with the Clone Stamp
The cutout often leaves haze around the hair. Select the Clone Stamp, a small brush, and a low opacity. Hold down the Alt key and click on a spot with matching hair to set it as the source. Release the key and paint the hair where it is missing. Pay attention to the light and don't constantly repeat the same patterns, as they will otherwise stand out. You may use the original image as a guide.

Step 16: Refine Hair Tips with the Smudge Tool
The Smudge tool is suitable for individual strands of hair. Work directly in the mask and pull small white areas outward at the edges. This creates the impression of individual hairs, which look more realistic than a smooth edge. With dark hair, you may work a bit more coarsely, since details are less noticeable anyway.

Step 17: Merging the Layers
When the body and hair are finished, hide the color background. With Ctrl + Shift + Alt + E, you create a merged layer from all visible layers. Afterwards, show the background again and then drag the cut-out woman into your composite to position her there.

Summary ??? Cutting Out the Storm Dancer: Masking Mode, Hair, and Preparation for Compositing
With Masking Mode, you precisely select the storm dancer by tracing her outline, filling the interior, and then inverting the selection. Soft brushes ensure natural transitions, while the "Refine Mask" option, the Clone Stamp, and the Smudge tool make the hair look believable. After merging the layers, the figure is ready for your composite.
FAQ
Why should I use Masking Mode instead of the Quick Selection tool?Masking Mode gives you more control with fine contours, because you place every stroke yourself and can make corrections directly while working.
What do I do if the background also turns red when filling?The tolerance is set too high. Reduce the value until only the figure is filled, and check whether all contours are closed.
How do I remove background remnants around the hair?Use the "Refine Mask" option with Smart Radius, the Refine Brush, and if needed the Clone Stamp with low opacity.
Why should I edit the hair on its own layer?By duplicating, you can optimize the hair separately without altering the figure's body.
What does the "Decontaminate Colors" option do?It removes color fringes that arose at the edges of the figure from the old background.
When is a soft brush with low opacity worthwhile?For subjects with motion blur, such as photographed birds or balls, semi-transparent areas ensure a more natural transition.
Can I still adjust the cut-out after creating it?Yes, the mask remains editable. You can make further corrections at any time by selecting the mask and refining it with a brush or refinement tools.


