
Imagine your chess pieces not standing on a smooth surface, but in the middle of a stream between rocks and moss. That is exactly what you will build up step by step in this tutorial. You will work with layer masks, place a waterfall, adopt rock structures and make the pieces really stand in the water.
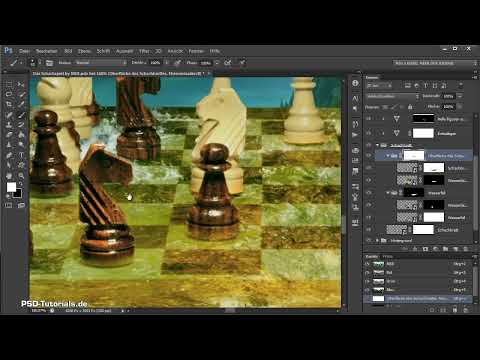
The video is only loaded from YouTube when you play it – data (including your IP address) is then transmitted to YouTube/Google. More in the privacy policy
Introduction
In this part of the composing series, Marco Kolditz refines the chessboard, which forms the foundation for all further steps in the image composition. He shows how to work a waterfall into the image using groups, masks and soft brushes, how to build up the surface of the chessboard from rock structures, and how to edit the pieces so that they stand in the water. The video is the 19th part of a 21-part series. The technique is therefore built on the previous parts, especially on the chess pieces that have already been cut out.
Key Takeaways
- Layer masks are the central tool: you paint with black and white instead of permanently deleting parts of the image.
- A waterfall can be extended convincingly by duplicating, flipping and masking.
- With the keyboard shortcut Ctrl-click on a channel, you create a selection and from it a mask, for example for the pieces.
- Soft brushes are suited for transitions, frayed brushes for natural edges on rock, moss and pieces.
- The "Soft Light" mode adds depth to the surface without destroying the colors.
Step-by-Step Guide
Create the waterfall as its own group
Start on the chessboard layer and create a new group. Name it, for example, "Waterfall", so that you keep an overview later. Place the file with the waterfall into this group. Scale it so that it is roughly the size of the chessboard, and then drag the layer into the group.


Mask the group and selectively reveal the waterfall
Create a layer mask for the group and invert it so that it is black. This makes the waterfall invisible at first. With a white brush, you now paint free the areas where the waterfall should be visible. Make sure that the edges of the chessboard do not show through. Then confirm the position with the Enter key.


Fine-tuning with opacity and soft transitions
The mask can be edited in fine detail. For smooth transitions, reduce the opacity of the brush and bring water back in certain places. Especially in the area of the trees, you help out with a smaller brush so that the transition looks more natural. You will edit the surface of the chessboard separately later.


Duplicate and flip the waterfall
Duplicate the layer with the waterfall and name the copy, for example, "Waterfall extension". Via "Edit" and "Transform" you flip it horizontally. With the arrow keys, you move the layer until you find an area that fits the image well. This trick visually extends the waterfall without you needing new material.

Refine the mask of the copy
Create a black mask again for the flipped layer by holding down the Alt key while clicking the mask icon. With a normal brush, you paint the desired parts into the image with white. Switch to a softer brush for smoother transitions. If you don't like an area, you take it back with black. Feel free to proceed in small steps and zoom in close to the spots where transitions become visible.

Designing edges with a frayed brush
A brush with frayed bristles is well suited for natural edges. Zoom in close to the transitions and use it to add accents where the water meets rocks and trees. This makes the scene look less artificial and significantly more lively.

Protecting the figures from the surface using the selection
For the surface of the chessboard, create a separate group that you name "Oberfläche des Schachbrettes" (surface of the chessboard). Create a mask for this group. Hold down the Ctrl key and click on the channel of the figures that have already been cut out. This creates a selection that you convert into a mask. Everything you now paint in this group only affects the surface and not the figures.

Transferring the waterfall texture onto the surface
Now stretch a waterfall or a texture within this group until the desired area is visible. To place the texture exactly on the chessboard, press Ctrl again and click on the outline of the chessboard. Create a mask from it and invert it. Then unlink the image and the mask by clicking on the chain icon. With the arrow keys you move the texture with millimeter precision. With Ctrl-T you can additionally transform and enlarge it.


Readjusting the mask
Areas that are affected unintentionally are corrected in the mask. Choose black as the foreground color and paint where the texture should not appear, for example over the area of the waterfall. Leave the desired areas untouched. You can repeat these corrections at any time if you don't like something.

Copying the chessboard and darkening it with Soft Light
Copy the layer of the chessboard and place the copy above the original layer. Set the blend mode of this copy to "Soft Light". In the lower area, remove the part that would otherwise look too dark by editing the mask with black color. Then compare the before and after states. The difference is often clearly visible even in a quick run-through.

Placing the figures in the water
So that the figures don't hover above the water, you work on the transition between the base of the figure and the water surface. Select the mask of the surface, take a frayed brush with a smaller tip and click several times at the edge of the figures. Pay attention to where the figure actually stands in the water. Light water areas are particularly well suited for showing splashes or light reflections. You repeat this procedure for each figure.


Incorporating rock structure
Copy a few layers with rock structure from the group of the men into the group of the surface. Move the mask until the suitable section is visible, and then confirm with the Enter key. Invert the mask if you only want to make the structure visible in certain places, and paint the areas into the image with a normal brush. If necessary, reduce the opacity to tone down areas that are too dark.


Structuring edges and breaking up borders
The rock edges initially look too straight. Create a mask on the top chessboard group and mask out individual areas at the edge with a harder brush. This creates a rougher contour. Pay attention to how the texture is already set, and work with it instead of against it. A small depression can be suggested with darker color, while you can remove moss completely in some places. However, don't overdo it. Not every edge needs editing, and the figures should remain unchanged in the process.


Final Retouching of the Rock
To finish, you remove distracting moss, refine individual rock areas further, and check the overall image. Take your time with this, because it is precisely this fine detail work that makes the difference between a rough composite and a believable scene.


Summary – Creating a Chessboard from Rock and Water in Photoshop
You have learned how to mask a waterfall in a group, extend it by duplicating and mirroring, and blend it in naturally with soft and frayed brushes. In addition, you protected the surface via a selection of the figures, transferred rock structures, and edited the figures so that they stand in the water. The chessboard is thus finished, and in the next part the figures will get their final dirt and finishing touches.
FAQ
Why should I work with masks instead of the eraser?Masks are non-destructive. You can switch back to white or black at any time and undo changes without losing the original image.
How do I create a selection from the figures?Hold down the Ctrl key and click on the channel of the isolated figures. You then create a layer mask from this selection.
What does the blending mode "Soft Light" do?It lightens light areas and darkens dark ones. This creates more contrast and depth without strongly changing the base colors.
When do I use a soft brush and when a frayed brush?Soft brushes are suitable for flowing transitions, such as between water and trees. Frayed brushes create irregular edges that look more natural on rocks, moss, and water splashes.
Do I have to edit all the figures the same way?No. Each figure needs its own consideration, because light and transitions differ depending on the position in the water. Use the bright water areas and splashes as a guide.
Why does Photoshop respond sluggishly with large files?Large files with many layers and masks use a lot of memory. It helps to have fewer visible layers while working, to hide groups you don't need, or to allocate sufficient memory in the settings.


