
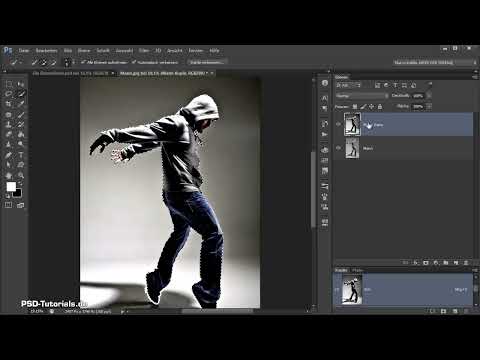
Before a subject is convincing in a composite, it has to be cleanly separated from its background. That is exactly what I'll show you in this part, using our first storm dancer as an example. You'll learn how to carefully open an original file, create a basic selection with the Quick Selection tool, refine edges with a brush, and polish the finished cutout using a layer mask. You'll also correct the hood, which shows too much of the protagonist's face.
The video is only loaded from YouTube when you play it – data (including your IP address) is then transmitted to YouTube/Google. More in the privacy policy
This tutorial is aimed at advanced users who already work with layers and masks. If you still feel unsure about these basics, it's worth taking a look at the previous parts of the series.
Key Takeaways
Work with the original file, not with a placed copy. This way you can keep using the image later without any loss of quality.
The Quick Selection tool provides a good starting point, but not a finished cutout. Especially in shadow areas and at fine transitions, you'll need to readjust.
Increase the contrast before the cutout so that edges are detected more clearly.
Work with layer masks instead of permanently deleting. That way, mistakes can be corrected at any time.
Refine the edge via "Refine Mask". With Radius, Smooth, and Feather, you control the transitions precisely.
Correct leftover spots with Levels on the mask. This is faster than the Dodge tool and delivers a similar result at comparable quality.
Edit the hood as a Smart Object. That way, quality is preserved when scaling and distorting.
Step 1: Open the Original File Instead of Placing It
Don't start by placing the image; instead, open the original file via "File > Open". This step seems inconspicuous, but it saves you a lot of trouble later. If you drag the file directly into your composing, you're working with an embedded copy that is harder to adjust afterwards. With the original file, you retain full control and can perform the cutout independently of the composing.
In the example, the image is a JPEG. The subject stands in front of a gray background, and the shadow on the floor is not ideal. However, that is no obstacle for the cutout.

Step 2: Check Channels and Assess Contrast
Before you reach for tools, it's worth taking a look at the Channels panel. In this shot, the red, green, and blue channels are very similar, so none of them lends itself to cutting out. RGB mode is the standard here and consists of the three color channels that together make up the color image.
If the channels show little difference, it's best to rely on the Quick Selection tool and a targeted increase in contrast.

Step 3: Create a Rough Selection with the Quick Selection Tool
Select the Quick Selection tool. If you hold down the mouse button on the Magic Wand icon, the submenu opens in which you'll find it. Then run the tool over the subject. Photoshop automatically detects edges, and the selection grows along with your mouse movement.
The result is not always reliable. In the shadow area at the bottom as well as between the fingers, the tool often detects contours poorly, and each time you start again, more edges get added. That's normal. You don't have to select perfectly, because the fine work follows in the next step.

Step 4: Duplicate the Layer and Save the Selection
Before you continue working, you should duplicate the background layer. The background layer is locked and cannot be moved. Double-clicking the layer opens a dialog in which you convert it into a normal layer and give it a name, for example "Man". If you drag the image onto the New Layer icon while holding down the Alt key, a copy is created. You can recognize transparency by the checkered pattern.
With Ctrl+D, you deselect the current selection again if you want to start over.
Step 5: Increase Contrast with Levels
Open Levels via Ctrl+L. In the example, you skip an adjustment layer because you won't need to change anything on this image later. Drag the sliders so that light areas become lighter and dark areas become darker.
Pay attention to the side effects. If you overdo it, dark fringes and light halos appear along the edges. For the cutout, however, this is intentional, because the contrast between the sweater and the background, between white and gray, and between the shoes and the dark gray is clearly strengthened. As a result, the Quick Selection tool detects edges more reliably. Then confirm with OK.

Step 6: Trace the edges with the brush
Now zoom in on the feet. Choose a brush with somewhat higher hardness and full opacity, and paint along the contour with white as the foreground color. This shows the Quick Selection tool exactly where the edge runs. A graphics tablet makes this work much easier, because lines can be drawn more evenly and precisely.
The shoe in the shadow is particularly difficult. Trace the contour here as well so that the contrast with the dark shadow increases. If you make a mistake in some places, that is not a problem, because these errors can be corrected later using masks.

Step 7: Add areas with the Quick Selection tool
Switch back to the Quick Selection tool and go over all areas that have not yet been captured. This time you do not have to hold the mouse button down, because the tool remembers areas that have already been processed. If you go past the edge, you can use Step Backward or hold down the Alt key to remove individual areas again.
At transitions such as between fingers or the hand, you have to start again more often. Make the brush smaller for this. The tool needs some computing time for complex areas, so let the mouse or pen rest briefly until the selection is updated.

Step 8: Convert the selection into a mask
When the selection covers all the desired areas, hide the auxiliary layer, because you no longer need it. The selection remains active. Click on the image layer and choose the layer mask icon. The subject is now cut out without any pixels having been deleted. For checking, you can create a color fill layer below the layer, for example in a shade of blue, and drag it all the way to the bottom. Click on the mask while holding the Shift key to show and hide it.

Step 9: Refine the mask
Right-click on the mask and choose "Refine Mask". There you shift the edge. If you drag the slider to the right, the mask expands; to the left, it becomes narrower. By holding the space bar, you move the image in the workspace while you observe the effect.
For the jagged edge areas, the "Smooth" value helps. In the example, a value of 3 is enough to improve the edges noticeably. Compare the result with the previous state before you confirm with OK.

Step 10: Remove remaining spots with Levels
After the mask option, blotchy, transparent areas can appear. You can remove them by calling up Levels on the mask with Ctrl+L. The mask then shows grayscale, and you drag the left slider to the beginning of the dark pixels. Light gray tones at the edge thereby become white, and the spots disappear.
The Dodge tool on the highlights would be an alternative. However, Levels delivers a result faster at the same quality. With white, you can specifically touch up smaller areas.

Step 11: Adjust the hood
If you do not like the hood, you can adjust it. First delete the copy of the man at the top, which you no longer need. Then select the image layer, not the mask, and use the Lasso tool to select only the cap. With Ctrl+J you copy the selection onto a new layer. Hide the original layer to make sure you are editing the right layer.
Name the new layer "Mütze" and convert it into a Smart Object. This way the quality is preserved when scaling, distorting, and masking. Via "Edit" and "Transform", you pull the cap downward with "Warp" until the eye is no longer visible. Confirm with Enter.

Step 12: Masking the Transitions of the Cap
Create a layer mask for the cap and, with black as the foreground color, paint out the areas that extend too far beyond the head. Hide the mask and check whether a line has appeared. If so, reduce the opacity of the brush and paint softly over the transition. Also take a close look at the area near the eye before you are satisfied.

Step 13: Merging Layers
When the man and the cap look right, deactivate the background layer. Then press Ctrl+Alt+Shift+E. This merges all visible layers onto a new layer. Name it "Man" and reactivate the background layer so you can hide it if needed. You now have a single, cleanly cut-out layer that you can use in the composing.

Summary – Cutting Out the Storm Dancer in Photoshop
You have seen how to separate the first storm dancer from his background. You open the original file, create a basic selection with the Quick Selection tool, and increase the contrast so that edges are recognized more clearly. With the brush, you correct difficult areas such as shadows and the spaces between fingers. Using layer masks and "Refine Mask," you achieve soft, realistic transitions. You adjust the hood as a Smart Object, and at the end you merge all layers. This result is the basis for the next step: cutting out the woman.
FAQ
Why shouldn't I work directly with a placed file?Because with a copy in the composing, you can adjust the cutout less well afterwards, whereas the original file leaves all options open to you.
Why do I increase the contrast before cutting out?A higher contrast makes edges more clearly visible to the Quick Selection tool, so that it works more reliably.
Does the cutout have to be perfect before I continue?No, you can correct minor inaccuracies later using masks, especially if the subject appears small in the composing.
Why do I work with masks instead of deleting pixels?Masks are non-destructive, and you can rework them at any time without losing image information.
When do I use Levels instead of the Dodge tool?Levels on the mask removes spots faster and delivers a similar result at comparable quality.
Why should the hood be edited as a Smart Object?Smart Objects retain their quality when scaled and distorted, so you can adjust the cap without losses.


