
A stationary off-road vehicle quickly looks lifeless in a composite. Only when it appears to race narrowly past the camera does dynamism emerge. In this tutorial, Marco Kolditz shows you how to give vehicles a realistic motion blur that blends believably into the scene. You will edit not only the off-road vehicle, but also the burning truck and the fire itself. The guide is aimed at users who can already work with layers, smart objects and masks.
The video is only loaded from YouTube when you play it – data (including your IP address) is then transmitted to YouTube/Google. More in the privacy policy
Key Takeaways
- Fire can be cut out with the Lasso tool, converted into a smart object and blended in darkly using the "Screen" blend mode.
- The fire must lie outside of a clipping mask so that it can appear behind the truck.
- Motion blur filters on smart objects can be changed at any time afterwards.
- A layer mask with a soft brush and low opacity brings back important details such as tires or the front of the vehicle.
- The blur must match the direction of movement. A vehicle that drives from left to right may only be smeared in that direction.
Step-by-Step Guide
Cut Out the Fire and Prepare It as a Smart Object
First, use "File Open" to open the photo with the fire. Not every fire photo is suitable, so you should choose a file whose flames you like. Select the flames with the Lasso tool and copy the selection onto its own layer with Ctrl and J. Then hide the original layer so that you can check the result. Convert the new layer into a smart object and give it a meaningful name, for example "Fire". This keeps the layer flexible for later adjustments.


Insert the Fire into the Composite
Drag the smart object into your composite. Be sure to place it below the truck group and not drag it into it. If the fire lies inside the group, it is incorporated as a clipping mask, and that would be wrong for this effect. After all, the fire is supposed to appear behind the truck. With this arrangement, you ensure that the truck partially covers the fire, while it remains visible elsewhere.

Scale, Flip and Position the Fire
Scale the fire with Ctrl and T. The speaker decides on a horizontal flip via "Transform" because the flames then fit the direction of travel better. Rotate the layer slightly until the fire between the front and rear parts of the truck looks as if it were burning at that spot. Then confirm the transformation with Enter.

Set the Blend Mode and Warp the Fire
Set the blend mode of the fire layer to "Screen". This mode only calculates the bright areas of the image, while dark areas are ignored. Since the fire sits on a black background, it therefore blends cleanly with the scene. Then adjust the shape via "Edit", "Transform" and "Warp". Pull the flames so that they point in the direction in which the truck is flying. The Warp tool is particularly well suited for this because you can move areas with little effort. Take care not to make the fire look too wild, since overly intense burning quickly looks unrealistic.


Refine the Fire with a Mask and Desaturate It
After you have confirmed the warp with Enter, you can hide unwanted areas. To do this, add a layer mask, choose a soft brush with lower opacity and paint away the spots you don't like using black as the foreground color. Then create a Hue/Saturation layer as a clipping mask, name it something like "Desaturate" and reduce the saturation slightly. This way the fire blends more harmoniously into the cool blue tint of the scene.


Applying Motion Blur to the Off-Road Vehicle
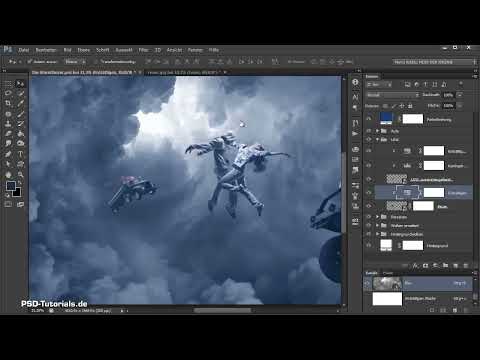
Now the actual motion comes into play. The off-road vehicle speeds past the camera from right to left, while the truck, on the other hand, drives in the opposite direction. Before you edit the car, check whether the Hue/Saturation layer is locked, and then click on the car group. Since it is a Smart Object, you can adjust the filter at any time afterwards. Choose "Filter," "Blur Filters," and "Motion Blur." The speaker sets the distance to about 70 and the angle to roughly -1 degree. Confirm the setting with OK.


Bringing Back Details on the Car
The blur is now very strong, so that the car can hardly be recognized. Therefore, add some sharpness back via the filter's mask. Use a soft brush with low opacity for this so that the transition stays natural. In particular, the tire and the front area of the nose should still be recognizable. The car rotates slightly around its own axis, so the nose may appear somewhat sharper than the rear. This creates a believable impression of speed and direction.

Setting Motion Blur on the Truck
Now select the truck layer and open the Motion Blur filter again. The speaker first sets the angle to about 9 to 10 degrees, but changes the strength to 31, because the original value looks too strong. Especially with rain and wind, the nose of the truck should remain clearly recognizable. Since the truck also rotates around its own axis, the gas tank moves faster than the front area. Therefore, the front part gets some sharpness back via the mask.


Checking the Direction of the Blur
Zoom in closer on the image and check the direction of the blur. If the motion shows both to the left and to the right, it looks unnatural. In this case, undo the effect with Undo and correct the mask. Ideally, everything on the left side of the image is smeared, while the right edge of the truck remains legible. With a few brush strokes, you can touch up individual spots.


Applying Motion Blur to the Fire
The fire gets the same treatment. Select the "Motion Blur" filter again, set the angle to about 39 or 40 degrees, and reduce the distance a little. Since both the car and the fire are moving, the combination looks believable. Finally, with black paint and low opacity on the mask, you bring some sharpness back into the flames.


Rounding Off the Overall Image with Color
One last look from a distance shows whether the scene is coherent. If necessary, you reduce the saturation of the Hue/Saturation layer a bit more. The speaker compares before and after and notes that the fire now blends better with the blue of the surroundings. With that, the vehicles are cut out, placed, and set in motion, and the effect looks realistic overall.


Summary ??? Bringing Vehicles into Motion in Photoshop with Motion Blur
In this part, you learned how to cut out a fire, insert it as a Smart Object, and integrate it into the scene with the "Screen" blend mode. Afterwards, you applied a motion blur to the off-road vehicle, truck, and fire that matches the direction of travel. With masks and a soft brush, you brought back important details so that the vehicles do not blur completely. What is crucial here is that all elements show the same direction of movement. The next step is about the birds in the tornado.
FAQ
Why shouldn't the fire be dragged into the truck group?If the fire is inside the group, it is incorporated as a clipping mask and does not appear behind the truck. Therefore, place it below the group.
What is the function of the "Screen" blend mode?This mode only blends the bright areas of an image. Dark areas such as the black background of the fire photo are ignored, so the flames blend cleanly into the scene.
Why is a Smart Object worthwhile for the motion blur?With a Smart Object, you can reopen the filter at any time afterwards and adjust the values without changing the original.
How do I tell whether the motion blur points in the right direction?Zoom in on the image and check whether the blur runs in only one direction. If it runs in both directions, you should correct the mask.
What is the layer mask for with the filter?With the mask, you can use a soft brush at low opacity to bring back sharpness in important areas, such as the tire or the front of the vehicle.
Why is the saturation of the fire reduced?An orange that is too intense quickly looks artificial in a cool, blue-toned scene. Slight desaturation creates a more harmonious overall image.


