

An arc of penne rigate often looks stiff in the picture, as if the noodles had been aligned with a ruler. With two different filters you can bring dynamics into it: the Radial Blur, a tool from the early days of Photoshop filters, and the Spin Blur in the Blur Gallery, which is comparatively new. In addition, you need Curves adjustment layers, clipping masks and a layer mask so that the individual groups work together harmoniously. The tutorial guides you step by step through the entire process.
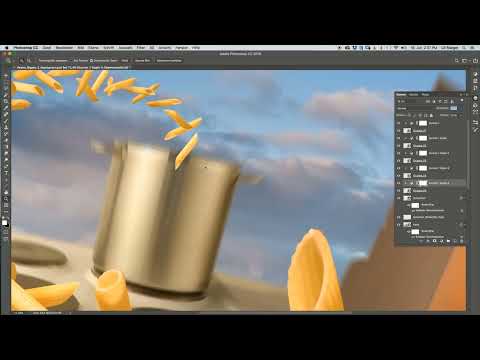
The video is only loaded from YouTube when you play it – data (including your IP address) is then transmitted to YouTube/Google. More in the privacy policy
Key Takeaways
- Check the arc for overlaps before filtering. Noodles should ideally only touch, not penetrate each other.
- Copy Curves adjustment layers onto other groups by holding down the Alt key, and limit their effect with clipping masks.
- Noodles that are further away may be slightly lighter. This image logic creates depth.
- The circular radial blur tolerates only a low strength. An angle below 10° looks the most realistic.
- The Spin Blur in the Blur Gallery is easier to control because you see the center point, angle and strength live in the preview.
Step-by-Step Guide
Step 1: Check the arc for overlaps
First, make the layers visible again and look at the finished arc. Make sure that no tips penetrate each other. Ideally they touch exactly without overlapping. Otherwise, you can hardly go wrong in this step, because the differences between the individual noodles will become visible later through the filters anyway.

Step 2: Transfer the coloring to other groups
You have already colored the first group with a Curves adjustment layer. Instead of editing each group from scratch, drag this adjustment layer onto the next group while holding down the Alt key. Photoshop creates a copy that adopts the same coloring. You repeat this process for all other groups.
Step 3: Set the clipping mask
After copying, the entire image initially looks colored, because the adjustment layer applies everywhere. You fix this with a clipping mask. Choose Layer > Create Clipping Mask or use the keyboard shortcut Alt + Ctrl + G (Mac: Option + Command + G). The curve then only affects the group below it. If the clipping mask gets lost while copying, you can restore it at any time with the same shortcut.

Step 4: Adjust the brightness of the rear groups
Parts of the arc that lie further back should appear minimally lighter, similar to the horizon in a landscape. To do this, double-click the Curves adjustment layer of the copy for group three and move the curve slightly upward. Then you transfer the corrected curve to group four while holding down the Alt key and set the clipping mask again. If the group now looks too bright, you take the curve back a small step.

Step 5: Transfer the correction to group five
You also copy the last curve to group five with Alt and set the clipping mask. The groups are arranged on top of each other so that they overlap cleanly. Make sure the order is correct, because group five is at the very bottom in this arrangement. A problem shows up with this group: one noodle flies past the pot. You will fix this in the next step.

Step 6: The layer mask for the pot rim
Create a layer mask for group five. Choose a very soft brush and set the foreground color to black. Paint with 100% opacity over the pasta where it visually sticks out past the pot. The edges should remain slightly blurred, because that makes it look as if the noodles are actually landing in the pot.
Step 7: Prepare the Radial Blur for group one
The first group is already a Smart Object, so you do not need to convert it separately. Open Filter > Blur > Radial Blur. The dialog offers two methods, Spin and Zoom. The spin variant creates a rotational movement and looks more fitting in this case, as the preview will show later.

Step 8: Reduce the strength of the circular blur
Select the circular method in the dialog. With this variant, the pivot point is at a fixed location, and the pasta appears to rotate around this point. With the default strength, however, the result looks unnatural. Reduce the value significantly, because the circular blur tolerates much less strength than the radial one. In the example, a value of 3 works well. If you don't like the result, undo the filter and try out the Blur Gallery.

Step 9: Apply the circular blur in the Blur Gallery
Open Filter > Blur Gallery and select the circular blur there. It is more advanced and can be controlled much more precisely. Enlarge the pasta group in the preview area so that it is fully visible. Then use the center point to determine around which point the movement should revolve. The preview shows you the effect live while you change the values.

Step 10: Fine-tune angle and strength
The angle determines how far the disc rotates. The initial value of 22° is far too strong for this pasta. It's better to go below 10° and approach it carefully. At around 6 to 8°, the movement looks much more realistic than with the radial variant. If necessary, additionally reduce the strength. Confirm the filter once the result is convincing.

Step 11: Match the remaining groups
For the overall pasta, the circular blur is recommended. You can instead edit individual groups with the radial blur if you prefer it. What's important is that in the end all five groups are blurred. Only then does the entire arc appear uniformly in motion.
Summary – Blurring pasta in Photoshop: Movement in the penne arc
With the steps described, you bring movement into your penne arc. You have learned to distribute colorations in a targeted way with Alt copies and clipping masks, to adjust brightness for more depth, and to correct the pot's edge with a layer mask. Afterwards, you got to know the two blur filters. The radial blur in circular method requires low strengths, while the circular blur of the Blur Gallery with its live preview offers more control. Try out both variants and decide based on your image which combination achieves the best effect.
FAQ
Why should I copy the curve while holding the Alt key instead of creating it anew?With the Alt key, you carry over the setting completely, so that all groups are colored uniformly and you save yourself the work of recreating it.
What happens if I lose the clipping mask when copying?You create it again with Alt + Ctrl + G (Mac: Option + Command + G), and then the curve affects only the group beneath it again.
Why is the angle so important with the circular blur?With large angles, the pasta quickly looks unnaturally twisted, while small values below 10° create believable movement.
When should I use the radial blur?It is suitable for individual groups that can tolerate a stronger, star-shaped blur, while the overall pasta usually benefits from the circular variant.

