

A dark horizon can quickly make a photo look threatening, as if a storm were about to roll in. If the clouds above actually look friendly, the mood doesn't fit together. With a simple layer in Soft Light mode, the lower sky can be selectively brightened without you needing to be able to draw.
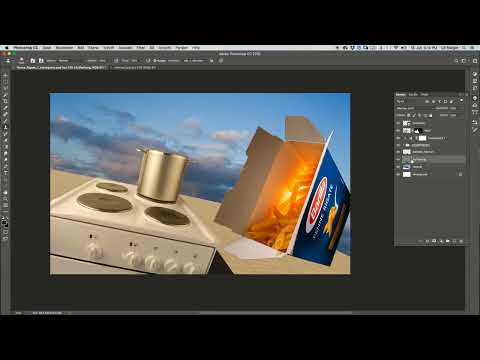
The video is only loaded from YouTube when you play it – data (including your IP address) is then transmitted to YouTube/Google. More in the privacy policy
Key Takeaways
A layer in Soft Light mode, filled with 50% gray, brightens the image only where you paint. With a white brush at 50% opacity, you work your way step by step toward the desired brightness. The horizon then looks wider and calmer.
Why the Horizon Should Be Brightened
First, take a close look at your image. The lower area of the sky is often noticeably darker than the upper area, and that is exactly what creates the impression of an approaching storm. If there are also friendly fair-weather clouds in the picture, the subject and the mood contradict each other. Brightening the horizon brings the scene back into harmony and lets the eye wander into the distance.
Don't worry, you don't need any talent for drawing for this technique. You simply paint with a brush over areas that should become brighter. The rest is taken care of by the layer's blending mode.
Step 1: Identify the Problem Area
Before you get started, look at the image critically. Is the horizon noticeably darker than the rest of the sky? Does the subject feel oppressive? Then this area is exactly your starting point. If needed, also compare with a bright version of the image to see how much openness you can gain.

Step 2: Create a New Layer
Click the new layer icon in the Layers panel or go to the Layer menu, then New and Layer. A dialog window opens. Here you can immediately give the layer a descriptive name, such as "Brighten Horizon". This helps you keep track later when you are working with several layers.

Step 3: Set Soft Light Mode and Neutral Color
In the same dialog window, set the mode to Soft Light. The decisive part, however, is the checkmark for the option to fill the layer with the neutral color for Soft Light mode. Be sure to activate this checkmark, because only then do you get a layer that initially has no effect whatsoever on the image.

Many users don't know why this step is so important. Soft Light mode works with brightness values. Neutral gray at 50% brightness does not change the underlying image at all. Only when you paint on it with brighter white or darker black does the blending take effect. That is why the gray is the foundation of the entire technique.
Then confirm with OK. The new layer now sits directly above the sky, and you are ready to go.
Step 4: Reset Colors to Black and White
To make sure you work with the right white, press the D key. Photoshop then sets the foreground color to black and the background color to white. With the X key you swap both colors, in case you need the order the other way around.

The background color white is important here because it is absolutely pure. Only with this pure white do you achieve the desired brightening without color casts creeping in.
Step 5: Set Up the Brush
Now select the Brush tool, not the Clone Stamp tool. Set the brush size to approximately 900 pixels. With such a large brush, you can work on the horizon quickly without having to make many individual strokes. Make sure the layer with the gray is selected before you start painting.
Step 6: Carefully Brighten the Horizon
Reduce the brush opacity to about 50%. Then sweep once along the dark horizon. You will immediately see how the sky becomes brighter at this spot. The brightening builds up in a controlled way, and you retain control over the result at all times.
A repetition is usually necessary, because 50% is usually not enough yet. Therefore, go over the same spot several times until the area reaches the desired brightness. You don't have to get it perfect right away. With every stroke you get closer to the result, and you can stop at any time.

Step 7: Compare before and after
Hide the layer and show it again from time to time to check the difference. The comparison shows you whether the horizon now conveys spaciousness and no longer looks threatening. Pay particular attention to making sure that the transition to the rest of the sky looks natural and that no visible edges appear.
If the horizon has become too bright, simply reduce the opacity of the layer or paint over it with black. This way you correct exaggerations without having to edit the image again.
Step 8: Evaluate the result
At the end, you look at the overall image. The shot looks opened up toward the back, the clouds match the mood, and the thunderstorm has disappeared. With a single layer, you have noticeably improved the image, and that is exactly the appeal of this technique.
Summary – Brightening the horizon in Photoshop with a gray layer
A horizon that is too dark quickly makes a photo look like an approaching storm. With a new layer in Soft Light mode, filled with neutral gray, you create a foundation that initially does not change the image. With white paint and a large brush at 50% opacity, you brighten the lower sky step by step. The shot gains spaciousness, and the mood fits the subject again.
FAQ
Do I need to be able to draw to use this technique?No, you only have to move a large brush over the horizon. The technique is based on the layer's blending method and not on drawing skills.
Why does the layer have to be filled with a neutral color?In Soft Light mode, neutral gray has no effect on the image underneath. Only when you paint with white or black is the brightness changed.
Why do I use a brush tool and not a stamp?With the brush, you apply the color softly and in a controlled way. A stamp would work on the layer differently and is not suitable for this brightening.
Which opacity should I choose?An opacity of about 50% is a good starting value. You can repeat this step several times until the horizon reaches the desired brightness.
What do I do if the horizon becomes too bright?Reduce the opacity of the layer or paint over it with black to weaken the brightening.
Why are the D and X keys important?With D, you set the foreground color to black and the background color to white. With X, you swap both colors. This way you work reliably with pure white.

