

A work surface that sits crooked in the room gives away any photo composite immediately. The eye often detects deviations in the lines even before it notices details. This is exactly where this tutorial comes in. You will learn how to use the Vanishing Point filter to fit a surface into a photo so that its distortion matches the actual perspective of the scene.
The video is only loaded from YouTube when you play it – data (including your IP address) is then transmitted to YouTube/Google. More in the privacy policy
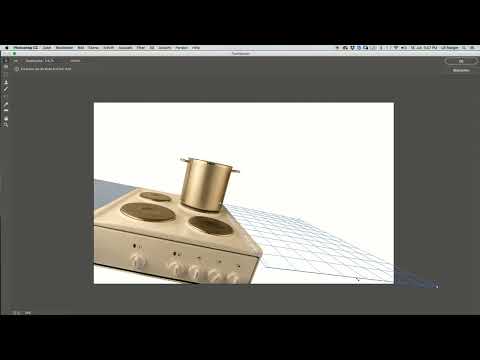
The example is a kitchen scene in which a left work surface is already in place. The right side is to be added. For this, you do not use the simple transformation from the first page, but the Vanishing Point filter. It calculates the distortion from the lines of the surroundings and thus delivers a physically correct result. The method works with all surfaces that have straight edges, such as tables, floors, walls, or tiles.
Key takeaways
- Give layers meaningful names from the start, for example "Work surface right". This way you keep track even with many layers.
- Copy the surface to be inserted to the clipboard before opening the Vanishing Point filter.
- Place the four vanishing points exactly on the lines of the surroundings. The more precisely the lines match, the more realistic the surface looks.
- Pasting is done in the filter with the key combination Ctrl+V (Windows) or Command+V (Mac), since the filter has no paste button.
- The distortion may stretch a structure such as wood slightly. What matters is that the lines are right.
- A color balance acting as a clipping mask on a group adjusts the surface in color without changing the overall image.
Step 1: Name the layers and create the new layer
Before you get started, check your Layers panel. The left work surface already exists as a layer, but may still have a default name. Rename it to "Work surface left". That sounds like a minor thing, but it saves you a lot of time later. Nobody can identify a layer called "Layer 17 copy 5" once the file contains fifty layers.
For the right side, you create a new, empty layer and immediately name it "Work surface right". It stays empty for now. The perspective-corrected surface will end up here later.

Step 2: Copy the work surface to the clipboard
The right work surface does not yet exist in your file. You need a template that you fetch from a separate file. Open the file with the work surface, for example via "Open Recent". Then choose the "Select All" command in the "Select" menu so that the entire image is selected. After that, go to "Edit" and choose "Copy". The surface is now in the clipboard, and you can close the file without losing the copy.

Step 3: Open the Vanishing Point filter and adjust the view
Switch back to the kitchen scene and make sure the "Work surface right" layer is selected. Then open the "Vanishing Point" filter. The image appears in its own window. If it is too large, reduce the view with Command+Minus (Mac) or Ctrl+Minus (Windows). This way you keep the edges in view without having to scroll with every movement.

Step 4: Place the first vanishing point on the lines
Now the actual core of the method begins. The first vanishing point must lie exactly where the longitudinal edges of the surroundings meet. To do this, zoom in close to the intersection. Do not place the point at the edge of the image, but about halfway between the edge and the intersection, so that you have enough room for correction.
It is important that the line you draw from the point runs through the edges of the kitchen. Make sure it stays as straight as possible. A vanishing point is only correct if all parallel edges meet in it. If the line is off, the surface will look warped later.

Step 5: Understand the grid and place the second vanishing point
The grid size in the options bar only changes the display of the grid, not the function. Set it so that the grid helps you with orientation. Based on the lines, you can already see the perspective of the surface.
Then draw a second line that doesn't run through the corner, but about two to three centimeters above it. This creates a surface with the correct depth. The third vanishing point is created at the spot where the lines of the corner meet. With this point, the foundation for a trapezoid is in place. A single point is not enough for this, since Photoshop would otherwise only create a rectangular surface without depth.
Step 6: Drag the vanishing point area beyond the edge of the image
Now you extend the grid forward, that is, toward the viewer. Drag it far enough that it extends beyond the edge of the image. Make sure that no point moves too far up or down. Photoshop indicates when a point is poorly placed, for example when the line becomes invalid. In this case, you move the point until the message disappears and the grid looks clean again.
The last point should ideally lie on a straight line that leads from the starting point through the center point. A perfect match is rare in practice, but the closer you get, the more convincing the result will be.

Step 7: Paste the countertop with Ctrl+V
With the grid, the perspective is set, and now you insert the surface. Since the filter has no paste button, you use the keyboard shortcut Ctrl+V (Windows) or Command+V (Mac). The surface appears in the top left of the image. Then drag it with the mouse toward the grid. As soon as it lies within it, it is roughly placed correctly.

Step 8: Scale the surface and stretch it lengthwise
The pasted surface does not yet have the right size. You use the Transform tool via the corner points or midpoints of the selection. In this case, it is enough to stretch the surface lengthwise upward and downward. It looks slightly stretched as a result. That doesn't matter, because the texture will be softened later and the stretching will no longer be noticeable. What matters is that the surface sits correctly in perspective and the edges lie exactly on the lines.
Step 9: Check the position and confirm
Now check the position of the surface. It should lie beneath the stovetop, that is, at the right spot on the countertop. Also compare the left and right sides. Both surfaces must appear at a common height and at the same depth. If everything is correct, confirm with OK. The surface is then transferred to the "Countertop right" layer.
Step 10: Combine the layers into a group
The gray surface still looks unattractive. To make it harmonize with the kitchen, you first edit it in a group. To do this, hold down the Shift key and select the left and right countertops at the same time. Via the small menu in the Layers panel, open the command "New Group from Layers". Name the group, for example "Countertops". This keeps the file organized and allows you to edit both surfaces together.

Step 11: Create a Color Balance as a clipping mask
Finally, you give the surface a wooden character. You'll find the adjustments in the "Adjustments" window. If it is not visible, open it via the "Window" menu. Choose "Color Balance" there and increase the amounts of red and especially yellow. The result should already be reminiscent of wood.
When you go back to the Layers panel, you'll see a small angled arrow next to the adjustment layer. It indicates that Photoshop has automatically created a clipping mask. The Color Balance thus affects only the group of countertops and not the entire image. That is exactly what you wanted to achieve, because the kitchen remains unchanged.

Summary ??? Vanishing Point Filter in Photoshop: Inserting a countertop in perspective
You have learned how to fit a countertop into a scene in a physically correct way using the Vanishing Point filter. What is crucial are the precisely placed vanishing points, which are oriented along the lines of the surroundings. You paste the surface from the clipboard in the filter with Ctrl+V or Command+V and then adjust it. With a group and a Color Balance as a clipping mask, you get a coherent wood look that affects only the countertops. With cleanly named layers, the file remains comprehensible at all times.
FAQ
Do I have to open the Vanishing Point filter anew for each surface?Yes, for each surface with a different perspective you create new vanishing points in the filter, since the lines run differently.
Why should I name layers right when I create them?Descriptive names like "Countertop right" prevent mix-ups when a file contains many layers.
What happens if Photoshop reports that a vanishing point is invalid?The point is in a position that does not result in a valid perspective. Move it until the message disappears and the grid looks clean again.
Can I change the grid size later?Yes, the grid size can be adjusted at any time in the options bar. It only affects the display of the grid and not the result.
Why does the pasted surface look slightly distorted after stretching?That is normal with this method. Since the texture is softened later, the stretching is hardly noticeable.
Why is a clipping mask created with the Color Balance?Photoshop assumes that an adjustment is meant to apply to a group. The small arrow indicates the clipping mask, so that only the group is affected.

