

Imagine the noodles floating sharp and dynamic in the middle of the pot, while the background gently tips into blur. You will achieve exactly this effect in this tutorial. We deliberately avoid the simple blur filter that smudges the entire image evenly. Instead, you work with two filters that give the background direction, speed, and structure.
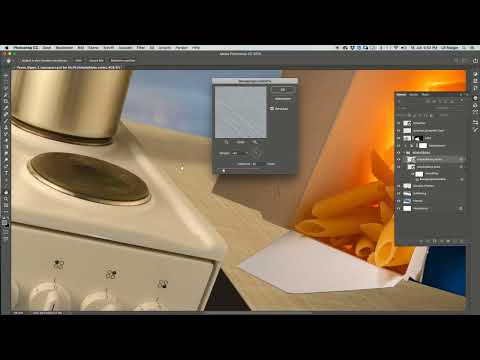
The video is only loaded from YouTube when you play it – data (including your IP address) is then transmitted to YouTube/Google. More in the privacy policy
You will learn how to blur artboards with motion blur in the direction of the vanishing point, how to align the radial blur to a center point, and how to sharpen individual areas again with layer masks. You apply all filters as smart filters so that you can come back at any time and readjust.
Key Takeaways
- Apply blur filters as smart filters so that you can change settings later.
- Motion blur is suitable for surfaces whose direction you determine via angle and distance. Each artboard can get its own direction.
- The radial blur creates motion from the center point outward. The position of this center determines which areas stay sharp.
- With a layer mask and a black brush at 10 to 20% opacity, you selectively restore sharpness at distinctive spots.
- Image logic is not mandatory. What matters is that the result achieves the desired effect.
Step-by-Step Guide
Step 1: Prepare the left artboard as a smart filter
First, select the layer of the left artboard. Before you apply a filter, convert the layer into a smart object or convert it directly for smart filters. The advantage is that the filter is preserved as an editable layer and you can reopen its values later. In addition, the filter's layer mask is available to you, which you will need in the following steps.

Step 2: Find the motion blur and set the direction
In the Filter menu, open the blur filters and select Motion Blur there. Then zoom in close to a corner of the artboard so that you can clearly see the smearing in the preview. You set the direction of the effect via the angle. The starting value is about -69°. Turn the angle so that it roughly corresponds to the vanishing direction of the surface. This makes the movement look believable, as if the surface were moving past the image.

Step 3: Fine-tune distance and angle
The distance determines how strong the smearing is. Drag the value down or up until the surface gets a structured finish that becomes blurry toward the back. Note that the filter always remembers the most recently used value. If the result looks strange because of this, deliberately reset the values. In this example, an angle of -11° with a distance of about 30 pixels fits very well. Then confirm the setting with OK.
Step 4: Give the right artboard its own direction
The artboard on the right receives a different direction of movement. This creates tension in the image. Had you converted both surfaces together into one smart object, they would have received the same direction. So convert this layer into a smart object as well and then apply the motion blur again. This time, choose a different angle that fits the position of the surface.

Step 5: Experiment with angle and distance
This filter offers only a few controls, so there is little you can do wrong. Play with angle and distance until you like the result. A value of about 90 pixels and -40° can be a good starting point. The edge of the artboard then no longer looks harshly cut off, but gains speed. It creates the impression that the surface is in motion. Confirm the values once you are satisfied.

Step 6: Apply the radial blur
Next, convert the layer with the pot background into a smart filter so that this filter also remains editable. Then open the radial blur via the blur filters. Set the amount to 12. Note that this filter does not display a preview. The calculation can take some time depending on your computer. The Draft quality delivers quick results, while Good or Best are more accurate.

Step 7: Set the center of the blur
The radial blur smears outward from the center. Imagine the square matrix of the filter over your rectangular image and move the center point to the spot where the heart of the image lies. To do this, simply drag the center point to the desired position with the mouse. If you are unsure, you can use the preview, provided it is available. Afterwards, check whether the areas around the center point remain sharp and the edges show the typical motion trails.

Step 8: Check the result and bring back sharpness with the layer mask
Now it may be that the smearing seems too strong to you in some places, for example in the edge areas or on details that should remain legible. To fix this, click on the filter's layer mask, take a black brush and set the opacity to 10 to 20%. Carefully paint over the places where the filter should be switched off again. This lets the original image edge show through slightly. This doesn't always seem logical for the image, but it often looks very coherent.

Step 9: Apply a radial blur to the box
The box in the image should also be blurred. Since it is already a smart object, you open the radial blur again with a strength of 12. Move the center so that the pasta in the foreground is smeared as little as possible, while the side flaps clearly get motion. A position somewhat lower in the image can be helpful here.

Step 10: Bring back structure and brand name with the mask
If the box looks too heavily smeared overall, work with the layer mask again. Take a black brush and carefully paint over the areas where you want structure back. If the brand name or the small graphic on the box should be easily legible, paint specifically over these spots. This way you keep the most important information sharp, while the rest still shows motion.

Step 11: Evaluate the result
At the end, look at the overall image once more in peace. The smearing on the box does not necessarily follow the laws of physics, because a moving box would have to be completely blurred, including the lettering. However, the image deliberately plays with surrealism and artistic freedom. What matters is whether the noodles are in focus and the background looks dynamic. If you manage that, the image has gained considerably.

Summary – Photoshop blur: using motion blur and radial blur purposefully
In this tutorial, you learned how to blur the background of a photo with two different filters without losing the actual star of the image. The work surfaces each receive their own direction through the motion blur. The radial blur provides dynamics around a center point that you set deliberately. With smart filters and layer masks, you keep control over the effect at all times and can sharpen individual areas again.
FAQ
Why should I apply blur filters as smart filters?Smart filters remain as an editable layer. You can reopen and adjust the values at any time, and the filter's layer mask allows you to limit the effect in a targeted way.
Why do both work surfaces have a different direction?A different direction looks more lively and creates tension in the image. Had you blurred both surfaces together, both would have been aligned the same way.
Why does the radial blur not show a preview?This filter is very old and was developed without a preview. You therefore have to apply the settings and then judge the result.
What do I do if the motion blur looks strange?The filter remembers the last value. Deliberately reset the angle and distance until the result matches your vision.
Does the result have to be physically correct?No. The image may take artistic liberties. What matters is that the desired effect is achieved and the viewer's eye is drawn to the noodles.

