
A storm without rain often looks lifeless in an image composition. You only feel the cold and the wetness when drops are visible on fabric, skin, and bodywork. This is exactly where this tutorial comes in. You will learn how to paint rain splashes with a simple brush onto an off-road vehicle and onto the skin of your characters, organize them in their own layer structure, and refine them with motion blur so that they look believable.
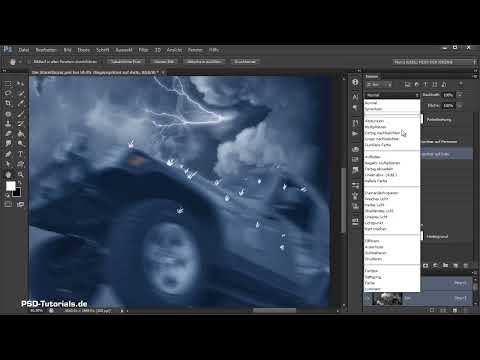
The video is only loaded from YouTube when you play it – data (including your IP address) is then transmitted to YouTube/Google. More in the privacy policy
The tutorial comes from Part 17 of the compositing series "Die Sturmtänzer" by Marco Kolditz. It assumes that you are generally familiar with layers, Smart Objects, and filters in Photoshop.
Key Takeaways
Rain splashes are painted on two separate layers, one for people and one for the car, because the sharpness needs to differ. The splashes on the vehicle are in the foreground and look blurred, while the splashes on the people stay sharper.
A hard brush with a small size is enough. On the car you work with about 6 to 8 pixels, on the skin with 2 to 4 pixels. Small, irregular strokes look more natural than large, even dabs.
The layer mode "Screen" and a reduced opacity prevent the splashes from looking artificially white. It makes sense to set the opacity before converting to a Smart Object, otherwise the values are carried over.
Motion blur gives the drops direction and speed. The angle should match the falling direction of the rain, and the distance determines the strength of the effect.
Restraint is important. Too many splashes quickly look exaggerated. A few well-placed drops create more impact than a dense veil.
Step-by-Step Guide
Create a group for the rain splashes
Before you make the first brushstroke, you should bring some order to your layers. To do so, click the folder icon at the bottom of the Layers panel and give the new group a clear name, for example "Regenspritzer". This keeps all the helper layers together and makes them easy to hide or adjust later.

Create two layers for different sharpness
Within this group, you now create two layers. Name one "Regenspritzer auf Personen" and the other "Regenspritzer auf Auto". The separation is not an end in itself: the splashes on the vehicle will later be rendered more blurred because they are in the foreground of the image and not in focus. The figures, on the other hand, should remain more clearly recognizable.
Add splashes to the car
Start with the layer for the car. Choose a brush with a hard edge and a size of about 6 pixels. Use white as the foreground color. Think briefly about which direction the rain is coming from. If the drops fall diagonally from above, they land on the hood and the side surfaces in a typical pattern. Then place individual strokes and dots in that direction. If it seems too fine to you, you can increase the size to about 8 pixels.

Don't worry if the splashes still look unnatural at first. That changes as soon as the blur is applied. Especially with composings, the effect often only shows in the overall image.

Convert the layer to a Smart Object and set the mode
So that you can edit the splashes at any time, you convert the layer into a Smart Object. Before that, however, you should do two things. First set the opacity to 100 percent and briefly set the mode to "Normal". Only then do you convert the layer. Afterwards you set the layer mode to "Screen" and reduce the opacity to about 75 percent.
The reason for this order: if you reduced the opacity before the conversion, the reduced value would be carried over into the Smart Object. Double-clicking the Smart Object would then show a doubly reduced opacity. With the order described, everything remains clean and easy to follow.


Applying Motion Blur
Now the blur effect comes into play, which makes the splashes look realistic. Open the Blur Filters section via the Filter menu and select Motion Blur there. Set the angle to about 50 so that the splashes point in the desired direction of fall. The distance in the video is about 13 pixels. This value is a good starting point, but it must match your image size.

Then check the result in your image. If the drops look stretched too long, reduce the distance. If the effect is too weak, increase it slightly.

Fine-tuning the Opacity of the Car Splashes
After the filter, the splashes often still look too dominant. Reduce the opacity of the Smart Object a little until the drops look more suggested than intrusive. This way you can easily judge whether the sharpness gradient fits the rest of the image.

Creating a Layer for the People
Now switch to the layer "Regenspritzer auf Personen" (rain splashes on people). For the skin, a much smaller brush is sufficient, about 4 pixels. Try out the size and reduce it to 2 pixels if necessary if the strokes look too coarse. The splashes should be placed on the hands, in the face, and on the upper body. Make sure they follow the contours of the bodies and don't look stuck on.


Place the drops carefully. A few splashes on the hand and some on the shoulder or the sweater already create a believable impression. On fabrics like a sweater, splashes are often less visible, so a few dots are enough here.


Inserting the People Splashes Subtly
The same applies to the people: less is more. Too many splashes quickly make the scene look artificial. You only want to convey the impression that it has already started to rain. Then set the opacity of this layer to about 90 percent and briefly hide the image to check the overall result.


Making Corrections to the Overall Image
At the end, look at the image from a bit of a distance. Often you will then notice splashes that are placed too conspicuously. Simply remove them by working with the eraser or a mask. You can also still improve the position of individual drops on the car. Sometimes it is enough to move a splash slightly so that it looks like a fountain of water hitting the bodywork.


Summary – Creating Realistic Rain Splashes in Photoshop
You have now learned how to create rain splashes on two separate layers, paint with a hard brush, and insert them into your composite using Smart Objects, layer mode, and motion blur. The key lies in the gradation: the splashes on the car look blurrier and lighter than those on the people, and both groups are used subtly. If you follow these principles, the rain looks believable and supports the mood of your storm. The next part of the series is about how to create the rain itself.
FAQ
Which brush do I need for the rain splashes?You need a brush with a hard edge. On the car, a size of about 6 to 8 pixels is suitable; on the skin, 2 to 4 pixels are enough.
Why are the splashes on the car and on the people painted on different layers?The splashes on the car are in the foreground and may be displayed blurrier. The people remain sharper, so both areas need their own layer with different processing.
Why should the opacity be at 100 percent before converting to a Smart Object?If the opacity is reduced beforehand, this value is carried over into the Smart Object. On double-clicking, a doubly reduced opacity would then appear.
Which layer mode is suitable for rain splashes?The tutorial uses the "Screen" mode ("Negativ multiplizieren"). Together with a reduced opacity of about 75 percent, the white splashes look subtle and embedded.
Which settings are used for the motion blur?In the video, an angle of about 50 and a distance of about 13 pixels are used. These values are starting values and should be adapted to your image size and the desired direction of fall.
How many rain splashes should I place?Place only a few, targeted splashes. Overuse quickly looks artificial. Check the result regularly from a bit of a distance.
Can I still change the splashes later?Yes, since the layer is a Smart Object, you can edit filters and settings at any time afterwards. Individual splashes can also be removed or moved.


