
The off-road vehicle appears right at the front of the composite, and that is exactly why it needs to be cleanly isolated. The background is busy, the wheel at the bottom is partially missing, and the lens has left strong chromatic aberrations. In this tutorial, you will tackle all of these problems step by step: from opening the file, through masking, to correcting the color fringes and the tire.
The video is only loaded from YouTube when you play it – data (including your IP address) is then transmitted to YouTube/Google. More in the privacy policy
Key Takeaways
- With gradual transitions, the Quick Selection tool often fails. Quick Mask mode with a hard brush gives you more control.
- A pen tool is only suitable for clear, round, or angular shapes. For organic contours, you are better off working with the brush.
- Chromatic aberrations can be removed in a targeted way with an empty layer in Color mode, which affects only the car via a clipping mask.
- A solid color layer with a desaturated blue tone provides a uniform color base for the later composite.
- A damaged wheel can be reconstructed with a copy, transformation, and mask without altering the rest of the car.
Open the off-road vehicle and prepare the view
First, open the off-road vehicle file via the File menu and the Open command. Select the image file and confirm with a double-click. Then you should maximize the document in view mode so that you can see as much of the subject as possible. You can use the hand icon in the toolbar for this. The task is therefore clear: the vehicle must be separated from the busy background, and the damaged wheel at the bottom needs to be reconstructed so that it looks round again.

Check channels and choose a suitable isolation method
Before you get started, it is worth taking a look at the Channels panel. However, red, green, and blue provide hardly any additional contrast in this image, so you won't find a usable selection there. The Quick Selection tool is also only of limited help here. It works well in some places but poorly in others, because the transitions between the vehicle and the background are gradual and Photoshop barely detects a clear contour. On top of that, there are the strong color fringes in magenta and green, which any automatic edge detection would pick up as well.
For this reason, you rely on Quick Mask mode and work manually with the brush.

Activate Quick Mask mode and set up the brush
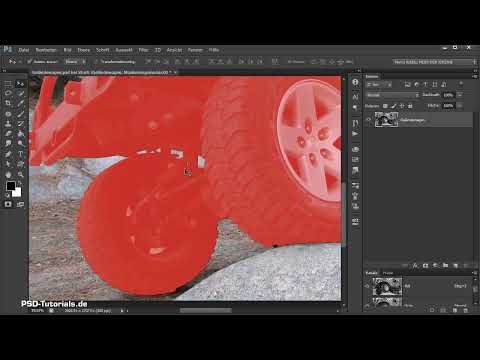
Close the Channels panel and choose a brush with medium hardness. It should be relatively hard, but not too hard, so that the edges stay clean. Then switch to Quick Mask mode by clicking the corresponding icon in the toolbar. With full opacity, you now paint over the areas that are supposed to disappear later. At the end, you simply invert the selection. This approach is a bit unusual because you first mark the background, but it gives you full control over every brushstroke.

Trace the contours with the brush
Now trace along the contours of the car. You can switch between foreground and background color with the X key. This way, a mistake can be quickly erased without changing tools. Make sure you work close to the edge without painting into the vehicle. For areas such as the lamp or smaller car parts, you have to look closely at which areas belong to the vehicle and which to the background.
The pen tool is not the best choice for this task. It works for clear, round, or angular shapes, such as technical devices, but with organic transitions it quickly becomes imprecise. For small closed areas, the Paint Bucket is excellent, and you can use it to fill the interior areas of the contours.

Fill interior areas and complete the mask
Once all the contours are closed, fill the interior areas of the vehicle with the Fill tool. This works just like with the Storm Dancer. Make sure that no gaps remain, as they would later stand out in the image as holes. If you have painted beyond the target, that's not a problem, because mistakes can be corrected afterward.

Invert the selection and create a mask
Now click the Quick Mask Mode icon to exit it. You now see the selected background. Invert the selection via the Select menu and the Inverse command, or use the keyboard shortcut Ctrl + Shift + I. The vehicle is now selected. Activate the SUV layer and click the layer mask icon at the bottom of the Layers panel. The car is now cut out.

Set up an auxiliary layer with a solid color
So that you can better evaluate the cutout, you create a solid color layer as an auxiliary layer. Choose, for example, a strong shade of blue and drag the layer below the SUV layer. It serves only as a check and will be deleted again later. You also don't need to name it, since it will disappear anyway.

Identify and analyze chromatic aberrations
Now the color fringes show up more clearly. Especially in the area of the headlights and along the edges, you can see magenta and green haze. Such defects occur with many lenses and can be fixed with a targeted color correction. You don't need any complicated technique for this, just a new layer and a few brush strokes.

Create an empty layer for the color correction
Create a new, empty layer above the SUV layer. To do this, click the corresponding icon at the bottom of the Layers panel and name the layer, for example, "ca korrigieren". You can additionally call the layer "Farbe" so that you keep track of it later.

Pick up color with the eyedropper and paint over
Hold down the Alt key and click with the eyedropper on a color near the defect, for example on the area of the headlight. Then paint with the brush over the edge area where the color fringe is located. The defect disappears immediately. Proceed in the same way with the green. You can also pick up the color again with the eyedropper if the area changes. Your goal is to neutralize the haze without changing the shape of the car.
Set the layer to Color mode
So that the correction changes only the color and not the brightness, you set the layer to the Color blend mode. Now the chromatic aberrations have disappeared, but unfortunately the correction also affects the background. You will solve this problem in the next step.

Apply a clipping mask
Hold down the Alt key and click between the correction layer and the SUV layer. This converts the layer into a clipping mask. It now affects only the vehicle, while the background remains untouched. Compare the before and after states to make sure that only the car was corrected.
Choose a bluish, desaturated hue
An additional advantage arises if you choose a bluer and less saturated hue. In the later composite, the entire image will look bluish anyway, so this hue can already be prepared in the source images. Paint once across the affected areas with this tone. The color haze then disappears directly from the image. However, you should preserve the turn signals, as they are a nice eye-catcher. So don't paint over them excessively.

Refine the mask and check the result
If the color change is too strong for you, you can bring it back via the mask of the correction layer. To do this, paint into the mask with black or white foreground color, depending on whether you want to hide or reveal something. Then compare the result with the original. A brownish tone that disappears in the process can be restored via the mask.

Copy the tire and use the lasso
The wheel at the bottom is incomplete, so you have to reconstruct it. To do this, you first apply the layer mask of the SUV. Right-click the mask and choose the Apply command. The car is then visible without a mask. Now use the Lasso tool to select an area of the tire that is still complete and copy it to a new layer with Ctrl + J. Name the layer, for example, "Reifen korrigieren". You can then delete the old layer.

Transform the tire as a Smart Object
Convert the tire layer into a Smart Object before you distort it. This keeps the layer flexible in case you want to adjust the transformation later. Press Ctrl + T to enter the transformation. Enlarge the tire until it fits, and adjust the shape using the Warp command. You can also rotate or stretch the layer slightly until the circle looks round again. Then confirm the transformation with the Enter key.

Mask the tire and sharpen the layer
Create a mask for the tire and hold down the Alt key while doing so, so that the layer initially disappears completely. Then, using white as the foreground color, paint back into the image the areas that should be visible. With a Levels adjustment, you can then brighten the tire slightly and adjust the contrast. Compare the result with the before-and-after state, because sometimes the correction looks better without adjustment. In the example, the Levels adjustment was deleted again later because the result was more coherent without it.

Merge layers and show the background again
So that you can continue using the vehicle as a single unit, you merge the relevant layers. To do this, hide the background layer and press Ctrl + Shift + Alt + E. This creates a merged layer containing the entire SUV. Then you show the background again and activate the color correction layer. Now the car looks bluish overall and fits harmoniously with the overall image. If necessary, you can add a little green in certain areas with the brush.

Outlook on the next steps
The SUV is now cut out, color-corrected, and fitted with a reconstructed tire. One detail still remains, however: The trees visible in the windows will be removed in the next part. Your vehicle is then ready to be placed into your actual composite.

Summary ??? Cutting out an SUV in Photoshop: Step by step to a clean mask
You have learned how to precisely cut out an SUV with a busy background and flowing transitions using Quick Mask mode. Afterwards, you specifically removed the chromatic aberrations with a color layer in Color mode and a clipping mask. Finally, you reconstructed the damaged wheel and prepared the vehicle for the composite. With these techniques, you can also apply such corrections to your own photos.
FAQ
Why doesn't the Quick Selection tool work well with this image?The transitions between the car and the background are flowing. Photoshop therefore cannot detect a clear contour, which is why the automatic selection remains imprecise in many places.
Why do you work with Quick Mask mode instead of the Pen tool?The Pen tool is mainly suited for clear, round, or angular shapes. For organic contours, the brush in Quick Mask mode is significantly more precise and gives you more control.
How do you recognize which areas you should mask?In Quick Mask mode, you first paint the areas that should disappear. Then you invert the selection so that the vehicle remains selected.
Why is the color correction layer created as a clipping mask?The clipping mask ensures that the color correction only affects the vehicle and leaves the background untouched.
What does Color mode do for the adjustment layer?Color mode only changes the hue and saturation. The brightness is therefore preserved, so that details of the car are not lost.
Why should you use a bluish, desaturated tone?In the later composite, the entire image looks bluish anyway. A desaturated blue tone removes the color casts without making the vehicle look unnatural.
Why do you convert the tire layer into a Smart Object?A Smart Object retains the original data and allows you to adjust the transformation at any time later without losing quality.
How do you proceed with the tire correction?You copy an intact part of the tire onto a new layer, transform it until it fits, and then mask it so that only the desired areas remain visible.
Why do you merge the layers?Merging with Ctrl + Shift + Alt + E creates a single layer containing the entire SUV. This is easier to place and reuse in the composite.
What happens to the trees in the windows?The trees will be removed in the next part of the tutorial. This part only covers cutting out, color correction, and preparing the vehicle.


