
Composing in Photoshop: retouching & photomontage

- Photoshop composing at a high-end level
- Merge images and image components into one another
- Comprehensible step-by-step instructions
- Create four breathtaking composings
- Get to know numerous tips, procedures and Photoshop tools
- Switch from beginner to professional now
Take up the weapons of Photoshop now and conquer a real treasure trove of experience. With this training you will learn the art of breaking standards!
64 Videos, 715 minutes
The Oracle of the Sea
Photoshop Composing - The Oracle of the Sea - Part 01: Introduction, Image Composition, Objectives
In this introductory video training I will present my finished painting "The Oracle of the Sea" and its composition. We will also define our goal for this training and create a blank canvas on which we will then start working on the composition.
Before working on a new composition, distances to the edge of the visible work surface should be created. In this video training, I'll show you how to do this step in a simple way. We will also develop the background of the compositing, consisting of the stormy sea and the cloudy sky.
Working file: Water style
This is part 1 of 12.
Trainer: Marco Kolditz, MEER DER IDEEN®, www.meer-der-ideen.de
Composing: Idea, concept & image editing by Marco Kolditz
Photoshop Composing - The Oracle of the Sea - Part 02: Cropping and placing the boat
In this video training, we free a small boat from its background and place it on the stormy sea. The focus here is on an efficient working method that is explicitly tailored to the objective of the compositing.
You can download the water style work file in the first part of the series.
This is part 2 of 12.
Trainer: Marco Kolditz, MEER DER IDEEN®, www.meer-der-ideen.de
Composing: Idea, concept & image editing by Marco Kolditz
Photoshop composing - The oracle of the sea - Part 03: Cut out the lamp
In order not to leave the little man in the boat completely in the dark, in this video training we want to crop a lantern from its background and further optimize the cropping.
You can download the water style working file in the first part of the series.
This is part 3 of 12.
Trainer: Marco Kolditz, MEER DER IDEEN® www.meer-der-ideen.de Composing: Idea, concept & image editing by Marco Kolditz
Photoshop composing - The oracle of the sea - Part 04: Cut out the lamp and make it glow
We now place the now cleanly cropped lantern on the boat and adjust it to the lighting conditions of the rest of the picture.
A lantern is there to shine - that's why we will make it shine in this video training, creating an interesting contrast to the otherwise cool, bluish look of the picture.
You can download the water style working file from the first part of the series.
This is part 4 of 12.
Trainer: Marco Kolditz, MEER DER IDEEN®, www.meer-der-ideen.de Composing: Idea, concept & image editing by Marco Kolditz
Photoshop Composing - The Oracle of the Sea - Part 05: Preparing and placing the mask
Using two model photos, we will now prepare the mysterious mask for composing. We combine two photos to reconstruct a cropped forehead and a concealed chin. Finally, the face is cropped and placed on the composing.
You can download the working water style file in the first part of the series.
This is part 5 of 12.
Trainer: Marco Kolditz, MEER DER IDEEN®, www.meer-der-ideen.de Composing: Idea, concept & image editing by Marco Kolditz
Photoshop composing - The oracle of the sea - Part 06: Creating path masks and optimizing contours
To make the face inserted into the composing more mask-like, we create a path mask and break up its smooth contour to achieve a more realistic result.
You can download the water style working file in the first part of the series.
This is part 6 of 12.
Trainer: Marco Kolditz, MEER DER IDEEN®, www.meer-der-ideen.de Composing: Idea, concept & image editing by Marco Kolditz
Photoshop composing - The oracle of the sea - Part 07: Adding depth to the mask
A real mask naturally has a certain depth. In this video training, we will now draw this depth into the image and adjust it in terms of color as well as light and shadow.
You can download the water style file in the first part of the series.
This is part 7 of 12.
Trainer: Marco Kolditz, MEER DER IDEEN®, www.meer-der-ideen.de Composing: Idea, concept & image editing by Marco Kolditz
Photoshop Composing - The Oracle of the Sea - Part 08: Cropping and placing a waterfall
Seawater should flow out of the mysterious mask - in the form of an impressive waterfall. We will now crop this waterfall, place it in the compositing, optimize its colour effect and adjust its perspective and shape.
You can download the water style file in the first part of the series.
This is part 8 of 12.
Trainer: Marco Kolditz, MEER DER IDEEN®, www.meer-der-ideen.de Composing: Idea, concept & image editing by Marco Kolditz
Photoshop composing - The oracle of the sea - Part 09: Optimizing waterfalls and adjusting the sea surface
In this video training we create the second waterfall and optimize both waterfalls using a Photoshop texture brush, with which we also realistically adjust the sea surface.
You can download the water style working file in the first part of the series.
This is part 9 of 12.
Trainer: Marco Kolditz, MEER DER IDEEN®, www.meer-der-ideen.de Composing: Idea, concept & image editing by Marco Kolditz
Photoshop composing - The oracle of the sea - Part 10: Optimize mask and paint water drops
In this video tutorial, we remove small hairs from the still very human-looking mask and paint very realistic water droplets on the skin in a very intuitive, exciting and fun way using a graphic style I created.
You can download the working file water style in the first part of the series.
This is part 10 of 12.
Trainer: Marco Kolditz, MEER DER IDEEN®, www.meer-der-ideen.de Composing: Idea, concept & image editing by Marco Kolditz
Photoshop composing - The oracle of the sea - Part 11: Image look and highlights + shadows
In this video tutorial, we move towards the desired color look of the compositing. To do this, we adjust the color of the mask by giving it a cool blue look and also adapting the colors of the small boat to the surroundings.
In this video, we now paint highlights and shadows into the image. We pay particular attention to the mask, her eyes and the shimmer of light on her skin, which is created by the boat's shining lantern.
You can download the water style work file in the first part of the series.
This is part 11 of 12.
Trainer: Marco Kolditz, MEER DER IDEEN®, www.meer-der-ideen.de Composing: Idea, concept & image editing by Marco Kolditz
Photoshop composing - The oracle of the sea - Part 12: The final step
The final step: We create the final blue look of the entire image and in this way unite all placed objects with each other so that they form a harmonious whole. We also darken the edges of the compositing to create a frame that guides the eye and provides contrast.
You can download the water style work file in the first part of the series.
This is part 12 of 12.
Trainer: Marco Kolditz, MEER DER IDEEN®, www.meer-der-ideen.de Composing: Idea, concept & image editing by Marco Kolditz
Photoshop Composing - The Oracle of the Sea - Part 01: Introduction, Image Composition, Objectives
12 min OpenPhotoshop Composing - The Oracle of the Sea - Part 02: Cropping and placing the boat
13 min OpenPhotoshop composing - The oracle of the sea - Part 04: Cut out the lamp and make it glow
12 min OpenPhotoshop Composing - The Oracle of the Sea - Part 05: Preparing and placing the mask
13 min OpenPhotoshop composing - The oracle of the sea - Part 06: Creating path masks and optimizing contours
9 min OpenPhotoshop Composing - The Oracle of the Sea - Part 08: Cropping and placing a waterfall
14 min OpenPhotoshop composing - The oracle of the sea - Part 09: Optimizing waterfalls and adjusting the sea surface
8 min OpenPhotoshop composing - The oracle of the sea - Part 10: Optimize mask and paint water drops
11 min OpenPhotoshop composing - The oracle of the sea - Part 11: Image look and highlights + shadows
16 min OpenThe chess game
Photoshop composing - The chess game - Part 01: Introduction, preparation and placement of the first image
In this introductory video training, Marco Kolditz presents his finished composition "The Chess Game" and its image composition. The aim of this video training is also defined and a blank canvas is created on which the first image for the background is already placed.
This is part 1 of 21.
Trainer: Marco Kolditz, MEER DER IDEEN®, www.meer-der-ideen.de. Composing: Idea, concept & image editing by Marco Kolditz
Photoshop composing - The chess game - Part 02: Crop and prepare the right person
In this video training, the right-hand man of the compositing by Marco Kolditz is cropped using the channel calculations and prepared for placement on the compositing.
This is part 2 of 21.
Trainer: Marco Kolditz, MEER DER IDEEN®, www.meer-der-ideen.de. Composing: Idea, concept & image editing by Marco Kolditz
Photoshop Composing - The Chess Game - Part 03: Cut out the left person and place both men
Now the person on the left of the composition is also cropped, prepared and placed on the composition together with the previously cropped person on the right.
This is part 3 of 21.
Trainer: Marco Kolditz, MEER DER IDEEN®, www.meer-der-ideen.de. Composing: Idea, concept & image editing by Marco Kolditz
Photoshop composing - The chess game - Part 04: Cut out and prepare rocks
Using channel calculations in combination with brushes, Marco Kolditz exposes the rocks for the background of the compositing in this video training and optimizes them for placement.
This is part 4 of 21.
Trainer: Marco Kolditz, MEER DER IDEEN®, www.meer-der-ideen.de. Composing: Idea, concept & image editing by Marco Kolditz
Photoshop Composing - The Chess Game - Part 05: Placing rocks, masking and defining the color mood of the image
The previously cropped rocks are now placed in the composing and further adjusted using masking. The general color look of the compositing is also defined.
This is part 5 of 21.
Trainer: Marco Kolditz, MEER DER IDEEN®, www.meer-der-ideen.de. Composing: Idea, concept & image editing by Marco Kolditz
Photoshop composing - The chess game - Part 06: Preparing foreground elements
In this video training, Marco Kolditz shows you how he crops and optimizes the foreground elements for composing so that they later create more depth in the image.
This is part 6 of 21.
Trainer: Marco Kolditz, MEER DER IDEEN®, www.meer-der-ideen.de. Composing: Idea, concept & image editing by Marco Kolditz
Photoshop Composing - The Chess Game - Part 07: Placing Foreground Elements and Creating Lens Blur
The three foreground elements are now placed in the composing and blurred using the lens blur filter. In this way, a more realistic depth effect is achieved.
This is part 7 of 21.
Trainer: Marco Kolditz, MEER DER IDEEN®, www.meer-der-ideen.de. Composing: Idea, concept & image processing by Marco Kolditz
Photoshop composing - The chess game - Part 08: Adding more background elements and creating skies
In this video training, Marco Kolditz places a rock bridge in the background and creates a cloudy blue sky.
This is part 8 of 21.
Trainer: Marco Kolditz, MEER DER IDEEN®, www.meer-der-ideen.de. Composing: Idea, concept & image processing by Marco Kolditz
Photoshop Composing - The Chess Game - Part 09: Cropping, correcting and preparing the chessboard
The chessboard photographed on a desk in relatively poor lighting is now cropped, color corrected and prepared for compositing.
This is part 9 of 21.
Trainer: Marco Kolditz, MEER DER IDEEN®, www.meer-der-ideen.de. Composing: Idea, concept & image editing by Marco Kolditz
Photoshop composing - The chess game - Part 10: Selecting pieces and further color corrections on the chessboard
The chessboard is now placed on the composing and its colors are adjusted further. The pieces on the chessboard are also selected for later editing.
This is part 10 of 21.
Trainer: Marco Kolditz, MEER DER IDEEN®, www.meer-der-ideen.de. Composing: Idea, concept & image editing by Marco Kolditz
Photoshop composing - The chess game - Part 11: Crop, place and shade the machine
In this video training, Marco Kolditz shows you how he crops the machine for the belly of the left giant, places it on the composition and shades it realistically.
This is part 11 of 21.
Trainer: Marco Kolditz, MEER DER IDEEN®, www.meer-der-ideen.de. Composing: Idea, concept & image editing by Marco Kolditz
Photoshop composing - The chess game - Part 12: Preparing and placing the mechanical ear
Now the left giant is given a mechanical ear - in this video training, this is cut out, placed and integrated more realistically using shadows.
This is part 12 of 21.
Trainer: Marco Kolditz, MEER DER IDEEN®, www.meer-der-ideen.de. Composing: Idea, concept & image editing by Marco Kolditz
Photoshop Composing - The Chess Game - Part 13: Creating, placing and adjusting the colors of a smoke cloud
The giant on the left in the picture should really be smoking from the head - accordingly, a cloud of smoke is cropped, placed and realistically adjusted in color in this video training.
This is part 13 of 21.
Trainer: Marco Kolditz, MEER DER IDEEN®, www.meer-der-ideen.de. Composing: Idea, concept & image editing by Marco Kolditz
Photoshop composing - The chess game - Part 14: Placing the shoulder cogwheel and integrating it realistically
In this video training, Marco Kolditz places a cogwheel on the shoulder of the left giant and creates a realistic hole in the shoulder using light and shadow.
This is part 14 of 21.
Trainer: Marco Kolditz, MEER DER IDEEN®, www.meer-der-ideen.de. Composing: Idea, concept & image editing by Marco Kolditz
Photoshop composing - The chess game - Part 15: Placing the machine at the elbow and refining machine parts with shadows
Now another machine part is cut out and placed at the elbow of the left giant. In addition, a more three-dimensional effect of all machine parts is achieved by adding shadows.
This is part 15 of 21.
Trainer: Marco Kolditz, MEER DER IDEEN®, www.meer-der-ideen.de. Composing: Idea, concept & image editing by Marco Kolditz
Photoshop composing - The chess game - Part 16: Applying texture to the surface of the skin and planting additional trees
Now Marco Kolditz places a texture on the skin of the giant on the left, adding more structure. Other small trees are also placed in the composing.
This is part 16 of 21.
Trainer: Marco Kolditz, MEER DER IDEEN®, www.meer-der-ideen.de. Composing: Idea, concept & image editing by Marco Kolditz
Photoshop Composing - The Chess Game - Part 17: Placing and Adjusting Textures on Right Giants I
Now Marco Kolditz takes care of the giant on the right in the picture and gradually transforms it into a giant made of rock and moss. In this video, the first texture is placed and adjusted.
This is part 17 of 21.
Trainer: Marco Kolditz, MEER DER IDEEN®, www.meer-der-ideen.de. Composing: Idea, concept & image editing by Marco Kolditz
Photoshop Composing - The Chess Game - Part 18: Placing and Adjusting Textures on Right Giants II
Now Marco Kolditz adds "belly moss" to the right giant and refines the rock structures with an additional impressive texture.
This is part 18 of 21.
Trainer: Marco Kolditz, MEER DER IDEEN®, www.meer-der-ideen.de. Composing: Idea, concept & image editing by Marco Kolditz
Photoshop composing - The chess game - Part 19: Creating a chessboard from rock and water
In this video, Marco Kolditz refines his checkerboard in composing by adding waterfalls and stone structures.
This is part 19 of 21.
Trainer: Marco Kolditz, MEER DER IDEEN®, www.meer-der-ideen.de. Composing: Idea, concept & image editing by Marco Kolditz
Photoshop composing - The chess game - Part 20: Editing chess pieces with moss and dirt
For a more realistic representation of the chess pieces on the chessboard, Marco Kolditz now adds moss and dirt textures to them and adjusts them realistically using masks and adjustment layers.
This is part 20 of 21.
Trainer: Marco Kolditz, MEER DER IDEEN®, www.meer-der-ideen.de. Composing: Idea, concept & image editing by Marco Kolditz
Photoshop composing - The chess game - Part 21: The final steps
In the last video, Marco Kolditz refines his composing with additional layers that add the finishing touches to the image.
This is part 21 of 21.
Trainer: Marco Kolditz, MEER DER IDEEN®, www.meer-der-ideen.de. Composing: Idea, concept & image editing by Marco Kolditz
Photoshop composing - The chess game - Part 01: Introduction, preparation and placement of the first image
9 min OpenPhotoshop composing - The chess game - Part 02: Crop and prepare the right person
24 min OpenPhotoshop Composing - The Chess Game - Part 03: Cut out the left person and place both men
4 min OpenPhotoshop Composing - The Chess Game - Part 05: Placing rocks, masking and defining the color mood of the image
9 min OpenPhotoshop Composing - The Chess Game - Part 07: Placing Foreground Elements and Creating Lens Blur
8 min OpenPhotoshop composing - The chess game - Part 08: Adding more background elements and creating skies
14 min OpenPhotoshop Composing - The Chess Game - Part 09: Cropping, correcting and preparing the chessboard
13 min OpenPhotoshop composing - The chess game - Part 10: Selecting pieces and further color corrections on the chessboard
7 min OpenPhotoshop composing - The chess game - Part 11: Crop, place and shade the machine
13 min OpenPhotoshop composing - The chess game - Part 12: Preparing and placing the mechanical ear
9 min OpenPhotoshop Composing - The Chess Game - Part 13: Creating, placing and adjusting the colors of a smoke cloud
8 min OpenPhotoshop composing - The chess game - Part 14: Placing the shoulder cogwheel and integrating it realistically
9 min OpenPhotoshop composing - The chess game - Part 15: Placing the machine at the elbow and refining machine parts with shadows
10 min OpenPhotoshop composing - The chess game - Part 16: Applying texture to the surface of the skin and planting additional trees
10 min OpenPhotoshop Composing - The Chess Game - Part 17: Placing and Adjusting Textures on Right Giants I
13 min OpenPhotoshop Composing - The Chess Game - Part 18: Placing and Adjusting Textures on Right Giants II
13 min OpenPhotoshop composing - The chess game - Part 19: Creating a chessboard from rock and water
16 min OpenPhotoshop composing - The chess game - Part 20: Editing chess pieces with moss and dirt
7 min OpenThe Storm Dancers
Photoshop composing - The Stormdancers - Part 01: Introduction, preparation and placement of the first image
In this introductory video training I present my finished composing "The Stormdancers" and its composition. We also define our goal for this video training and create a blank canvas on which we place our first image for the background.
This video training is part 1 of 19.
Trainer: Marco Kolditz, MEER DER IDEEN®, www.meer-der-ideen.de Composing: Idea, Concept & Image Editing by Marco Kolditz
Photoshop composing - The Stormdancers - Part 02: Color mood of the image and shadow correction
We are already defining the color look of the resulting compositing and correcting the shadow areas of the already placed cloud image.
This video training is part 2 of 19.
Trainer: Marco Kolditz, MEER DER IDEEN®, www.meer-der-ideen.de Composing: Idea, concept & image editing by Marco Kolditz
Photoshop composing - The Storm Dancers - Part 03: Placing and adjusting more clouds
To make the picture even more stormy and dramatic, we place more clouds and adjust them so that they blend together harmoniously.
This video training is part 3 of 19.
Trainer: Marco Kolditz, MEER DER IDEEN®, www.meer-der-ideen.de Composing: Idea, concept & image editing by Marco Kolditz
Photoshop composing - The Stormdancers - Part 04: Cropping the Stormdancer and preparing it for composing
We release our first storm dancer for compositing and prepare it for its use in the picture. We also correct the hood and pull it slightly over the protagonist's face.
This video training is part 4 of 19.
Trainer: Marco Kolditz, MEER DER IDEEN®, www.meer-der-ideen.de Composing: Idea, concept & image editing by Marco Kolditz
Photoshop composing - The Stormdancers - Part 05: Cropping the Stormdancer and preparing her for composing
Now let's take care of the Storm Dancer, freeing her from her unruly background and optimizing her hair for use in compositing at the same time.
This video training is part 5 of 19.
Trainer: Marco Kolditz, MEER DER IDEEN®, www.meer-der-ideen.de Composing: Idea, concept & image editing by Marco Kolditz
Photoshop composing - The Stormdancers - Part 06: Placing the people in the composing
Now we place our storm dancers in the compositing and create the impression that the two protagonists are actually dancing together. We'll also make some adjustments to the highlights and shadows so that the storm dancers fit better into the picture.
This video training is part 6 of 19.
Trainer: Marco Kolditz, MEER DER IDEEN®, www.meer-der-ideen.de Composing: Idea, concept & image editing by Marco Kolditz
Photoshop composing - The Stormdancers - Part 07: Setting Stormdancers in motion
To enhance the impression of a couple dancing at dizzying heights, we will now edit the couple with a blur effect.
This video training is part 7 of 19.
Trainer: Marco Kolditz, MEER DER IDEEN®, www.meer-der-ideen.de Composing: Idea, concept & image editing by Marco Kolditz
Photoshop composing - The storm dancers - Part 08: Cut out and prepare off-road vehicles
In this video training we free up the off-road vehicle for compositing, correct the front tire and take care of the massive chromatic aberrations in the image.
This video training is part 8 of 19.
Trainer: Marco Kolditz, MEER DER IDEEN®, www.meer-der-ideen.de Composing: Idea, concept & image editing by Marco Kolditz
Photoshop composing - The Stormdancers - Part 09: Optimizing the windows of an off-road vehicle
In this video training, we replace the reflecting trees in the windows of the off-road vehicle with clouds and adjust them in lights, shadows and color.
This video training is part 9 of 19.
Trainer: Marco Kolditz, MEER DER IDEEN®, www.meer-der-ideen.de Composing: Idea, concept & image editing by Marco Kolditz
Photoshop composing - The Stormdancers - Part 10: Cut out the front part of the truck
We expose the front part of the truck and optimize the cropping for use in compositing.
This video training is part 10 of 19.
Trainer: Marco Kolditz, MEER DER IDEEN®, www.meer-der-ideen.de Composing: Idea, concept & image editing by Marco Kolditz
Photoshop composing - The Stormdancers - Part 11: Cut out the truck's gas tank
Now we also take care of the truck's large gas tank, expose it cleanly and reconstruct parts of the gas tank for use in compositing.
This video training is part 11 of 19.
Trainer: Marco Kolditz, MEER DER IDEEN®, www.meer-der-ideen.de Composing: Idea, concept & image editing by Marco Kolditz
Photoshop composing - The Stormdancers - Part 12: Combining trucks and placing vehicles
Now we combine the front and rear parts of the truck together to give the impression that the truck is floating in the air, and we place the off-road vehicle and the truck on the compositing.
This video training is part 12 of 19.
Trainer: Marco Kolditz, MEER DER IDEEN®, www.meer-der-ideen.de Composing: Idea, concept & image editing by Marco Kolditz
Photoshop composing - The Stormdancers - Part 13: Optimizing vehicles with motion blur
To ensure that the off-road vehicle flies right past our nose, we will process it and the truck with a realistic blur effect.
This video training is part 13 of 19.
Trainer: Marco Kolditz, MEER DER IDEEN®, www.meer-der-ideen.de Composing: Idea, concept & image editing by Marco Kolditz
Photoshop Composing - The Storm Dancers - Part 14: Cropping birds, placing them on the composition and adjusting them
We release three birds for our composing, place them in front of our cloud background, deform them and also adjust them realistically with a blur effect.
This video training is part 14 of 19.
Trainer: Marco Kolditz, MEER DER IDEEN®, www.meer-der-ideen.de Composing: Idea, concept & image editing by Marco Kolditz
Photoshop Composing - The Storm Dancers - Part 15: Placing and optimizing lightning in clouds
What would a storm be without lightning? We place three lightning bolts in our composing, deform them and adjust them realistically.
This video training is part 15 of 19.
Trainer: Marco Kolditz, MEER DER IDEEN®, www.meer-der-ideen.de Composing: Idea, concept & image editing by Marco Kolditz
Photoshop composing - The storm dancers - Part 16: Brighten clouds
To ensure that the clouds near the lightning are also realistically brightened, we optimize them in this video training and make some clouds really glow.
This video training is part 16 of 19.
Trainer: Marco Kolditz, MEER DER IDEEN®, www.meer-der-ideen.de Composing: Idea, concept & image editing by Marco Kolditz
Photoshop composing - The Stormdancers - Part 17: Creating rain splashes
Raindrops patter on the off-road vehicle and on the skin of our storm dancers - in this video training I show you how to paint these rain splashes realistically into the picture and add a blur effect.
This video training is part 17 of 19.
Trainer: Marco Kolditz, MEER DER IDEEN®, www.meer-der-ideen.de Composing: Idea, concept & image editing by Marco Kolditz
Photoshop composing - The Stormdancers - Part 18: Creating rain
In this exciting video training, I show you how I work to create rain for compositing in a realistic way - in three layers.
This video training is part 18 of 19.
Trainer: Marco Kolditz, MEER DER IDEEN®, www.meer-der-ideen.de Composing: Idea, concept & image editing by Marco Kolditz
Photoshop composing - The Stormdancers - Part 19: Final steps
In the final video training, I will show you a way to give the image even more contrast, further optimize highlights and shadows, create a lighting effect and finally optimize the image with a noise effect.
This video training is part 19 of 19.
Trainer: Marco Kolditz, MEER DER IDEEN®, www.meer-der-ideen.de Composing: Idea, concept & image editing by Marco Kolditz
Photoshop composing - The Stormdancers - Part 01: Introduction, preparation and placement of the first image
9 min OpenPhotoshop composing - The Stormdancers - Part 02: Color mood of the image and shadow correction
10 min OpenPhotoshop composing - The Storm Dancers - Part 03: Placing and adjusting more clouds
17 min OpenPhotoshop composing - The Stormdancers - Part 04: Cropping the Stormdancer and preparing it for composing
20 min OpenPhotoshop composing - The Stormdancers - Part 05: Cropping the Stormdancer and preparing her for composing
15 min OpenPhotoshop composing - The Stormdancers - Part 06: Placing the people in the composing
6 min OpenPhotoshop composing - The Stormdancers - Part 07: Setting Stormdancers in motion
8 min OpenPhotoshop composing - The storm dancers - Part 08: Cut out and prepare off-road vehicles
16 min OpenPhotoshop composing - The Stormdancers - Part 09: Optimizing the windows of an off-road vehicle
11 min OpenPhotoshop composing - The Stormdancers - Part 10: Cut out the front part of the truck
10 min OpenPhotoshop composing - The Stormdancers - Part 12: Combining trucks and placing vehicles
6 min OpenPhotoshop composing - The Stormdancers - Part 13: Optimizing vehicles with motion blur
10 min OpenPhotoshop Composing - The Storm Dancers - Part 14: Cropping birds, placing them on the composition and adjusting them
13 min OpenPhotoshop Composing - The Storm Dancers - Part 15: Placing and optimizing lightning in clouds
16 min OpenFire and ice
Photoshop composing - Fire and ice - Part 01: Introduction, preparation and placement of the first image
In this introductory video training, I present my finished painting "Fire and Ice" and its composition. We also define our goal for this video training and create a blank canvas on which we place our original painting.
Photoshop composing - Fire and ice - Part 02: Creating contours in preparation for the fire
To prepare the fire, we will create rough contours and fine structures in this video training and place them on separate layers. We will use these to "wipe" the fire into the image in the next chapter.
Photoshop composing - Fire and ice - Part 03: Wiping fire into the image
In this video tutorial, we use the previously created contour layers to create the first fire in the image by "wiping" it into the image using the swipe finger technique.
Photoshop composing - Fire and ice - Part 04: Darkening the background and preparing the colors
To prepare for the colorful and bright fire, we darken the background of the image in this video training and make some important color adjustments.
Photoshop composing - Fire and ice - Part 05: Making the fire glow
Now it's time to make the fire in the picture glow and shine. In this video tutorial, we color our previously created fire layer accordingly and then add exciting highlights to the fire.
Photoshop composing - Fire and ice - Part 06: Sparks and frost
Where there is blazing fire, there are usually glowing sparks - in this video training we paint them into the picture, give them highlights and let the fiery woman on her side facing the frosty man "shiver" a little.
Photoshop composing - Fire and ice - Part 07: Placing real fire in the image
With the help of photos of real fire, we will enhance the fiery look even further in this video training, then adjust the individual flames in the color look and integrate them harmoniously into the overall picture.
Photoshop composing - Fire and ice - Part 08: Where there's fire, there's smoke
Where there's fire, there's smoke. And in this video training course, we will realistically place this smoke in the image with the help of real photos using transformation tools and layer modes.
Photoshop composing - Fire and ice - Part 09: The icy look of the man
Now we turn our attention to the man in the picture and give him a truly icy look with special color looks. We also decorate his sweater with frosty ice floes.
Photoshop composing - Fire and ice - Part 10: Further optimization of the frosty look
In this video training session, we will further edit the face and hand of the frosty man using a photo of a real ice cube and make minor corrections to the image.
Photoshop composing - Fire and ice - Part 11 - The icy fog and color adjustments
In this video tutorial, I'll show you how to add an icy mist to the picture and how to adjust the color of the area between the icy man and the fiery woman.
Photoshop composing - Fire and ice - Part 12: The final steps
In the last video tutorial, I'll show you how to use the high-pass filter to optimally sharpen the image and finally how to harmonize image components by deliberately adding noise.
Photoshop composing - Fire and ice - Part 01: Introduction, preparation and placement of the first image
7 min OpenPhotoshop composing - Fire and ice - Part 02: Creating contours in preparation for the fire
16 min OpenPhotoshop composing - Fire and ice - Part 04: Darkening the background and preparing the colors
9 min OpenPhotoshop composing - Fire and ice - Part 10: Further optimization of the frosty look
12 min OpenPhotoshop composing - Fire and ice - Part 11 - The icy fog and color adjustments
7 min OpenExamples of use
-
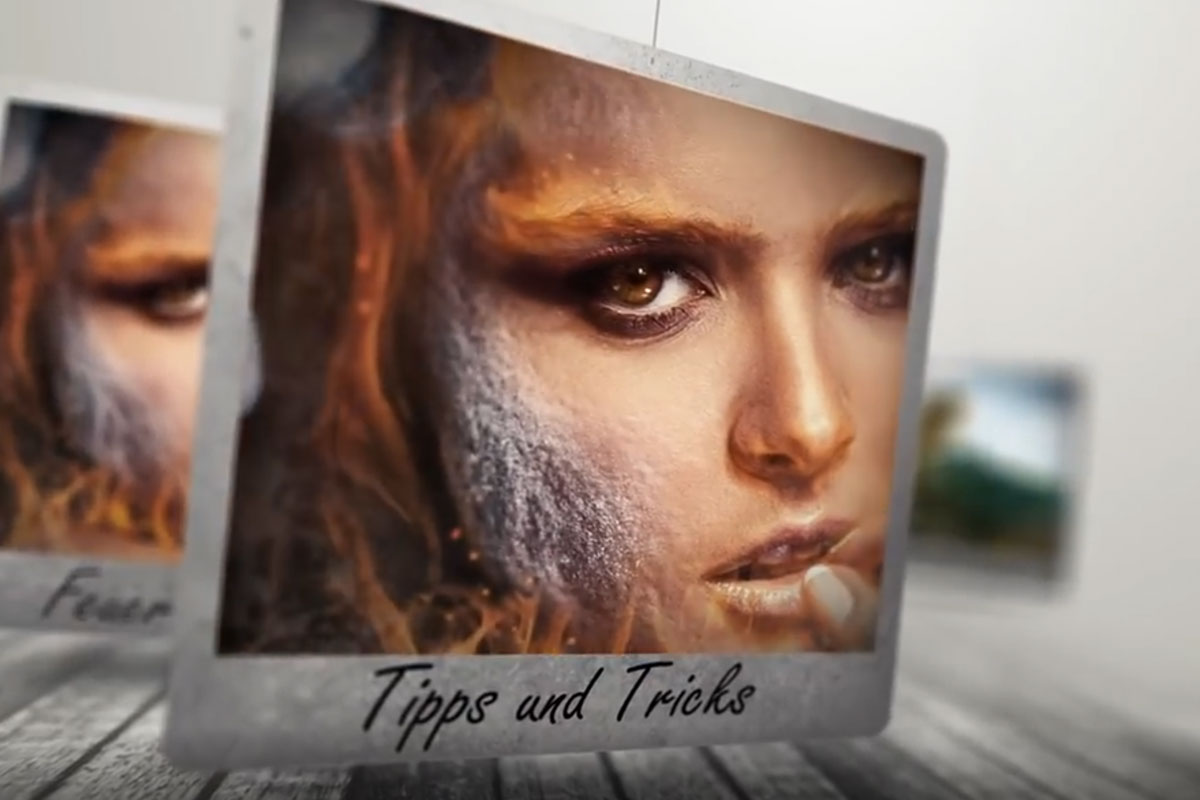 Composing in Photoshop: retouching & photomontage
 -
 Composing in Photoshop: retouching & photomontage using the example of the oracle of the sea
 -
 Composing in Photoshop: retouching & photomontage using the example of fire and ice
 -
 Learn new Photoshop techniques as you create the Stormdancer compositing
 -
 An oversized chess set? The right material for a creative photomontage in Photoshop!
You might also like

Photo editing & image composition

More style, more power, more templates!

Full power, more inspirations, maximum WOW effect!

Save time with artificial intelligence
Comment now „Composing in Photoshop: retouching & photomontage“